简介(Elasticsearch)
Elasticsearch是开源分布式搜索引擎,它的特点有:分布式,零配置,自动发现,索引自动分片,索引副本机制,restful 风格接口,多数据源,自动搜索负载等!
官方网站: https://www.elastic.co
官方参考文档:https://www.elastic.co/guide/en/elasticsearch/reference/6.6/setup-configuration-memory.html
下载地址: https://mirrors.tuna.tsinghua.edu.cn/elasticstack/6.x/yum/6.6.0/
环境
| 主机IP | 主机名 |
|---|---|
| 192.168.1.20 | locathost |
| 192.168.1.19 | httpd |
服务搭建(elasticsearch)
1.下载并安装elasticsearch包
[root@localhost ~]# yum -y install   https://mirrors.tuna.tsinghua.edu.cn/elasticstack/6.x/yum/6.6.0/elasticsearch-6.6.0.rpm
已加载插件:fastestmirror, langpacks
elasticsearch-6.6.0.rpm              | 109 MB     00:14
......
2.创建数据目录,并修改权限
[root@localhost ~]# mkdir -p /data/elasticsearch
[root@localhost ~]# chown -R elasticsearch.elasticsearch /data/elasticsearch/
3.修改服务配置文件
[root@localhost ~]# vim /etc/elasticsearch/elasticsearch.yml
更改:
node.name: node-1				#群集中本机节点名
path.data: /data/elasticsearch		#数据目录
path.logs: /var/log/elasticsearch	#日志目录
bootstrap.memory_lock: true	#锁定内存,需要和/etc/elasticsearch/jvm.options关联
network.host: 192.168.1.20,127.0.0.1  #监听的ip地址
http.port: 9200	 #端口号
如果是节点服务器的话,请把以下俩项也配置:
discovery.zen.ping.unicast.hosts: ["主服务器的IP", "本机的IP"]
discovery.zen.minimum_master_nodes: 2
4.分配锁定内存
[root@localhost ~]# vim /etc/elasticsearch/jvm.options
查找并修改
-Xms1g		#分配最小内存
-Xmx1g		#分配最大内存,官方推荐为物理内存的一半,但最大为32G
5.重启服务
[root@localhost ~]# systemctl  restart elasticsearch.service
[root@localhost ~]# systemctl status  elasticsearch.service
● elasticsearch.service - Elasticsearch
   Loaded: loaded (/usr/lib/systemd/system/elasticsearch.service; disabled; vendor preset: disabled)
   Active: active (running) since 四 2020-07-30 14:55:27 CST; 17s ago
     Docs: http://www.elastic.co
 Main PID: 57470 (java)
   CGroup: /system.slice/elasticsearch.service

7月 30 14:55:27 localhost.localdomain systemd[1]: Starte...
7月 30 14:55:27 localhost.localdomain systemd[1]: Starti...
Hint: Some lines were ellipsized, use -l to show in full.
修改锁定内存后,有时候可能无法重启,解决方法如下:
[root@localhost ~]# systemctl edit elasticsearch.service
添加:
[Service]
LimitMEMLOCK=infinity
最后按F2保存退出
[root@localhost ~]# systemctl daemon-reload
[root@localhost ~]# systemctl restart elasticsearch.service
6.检查

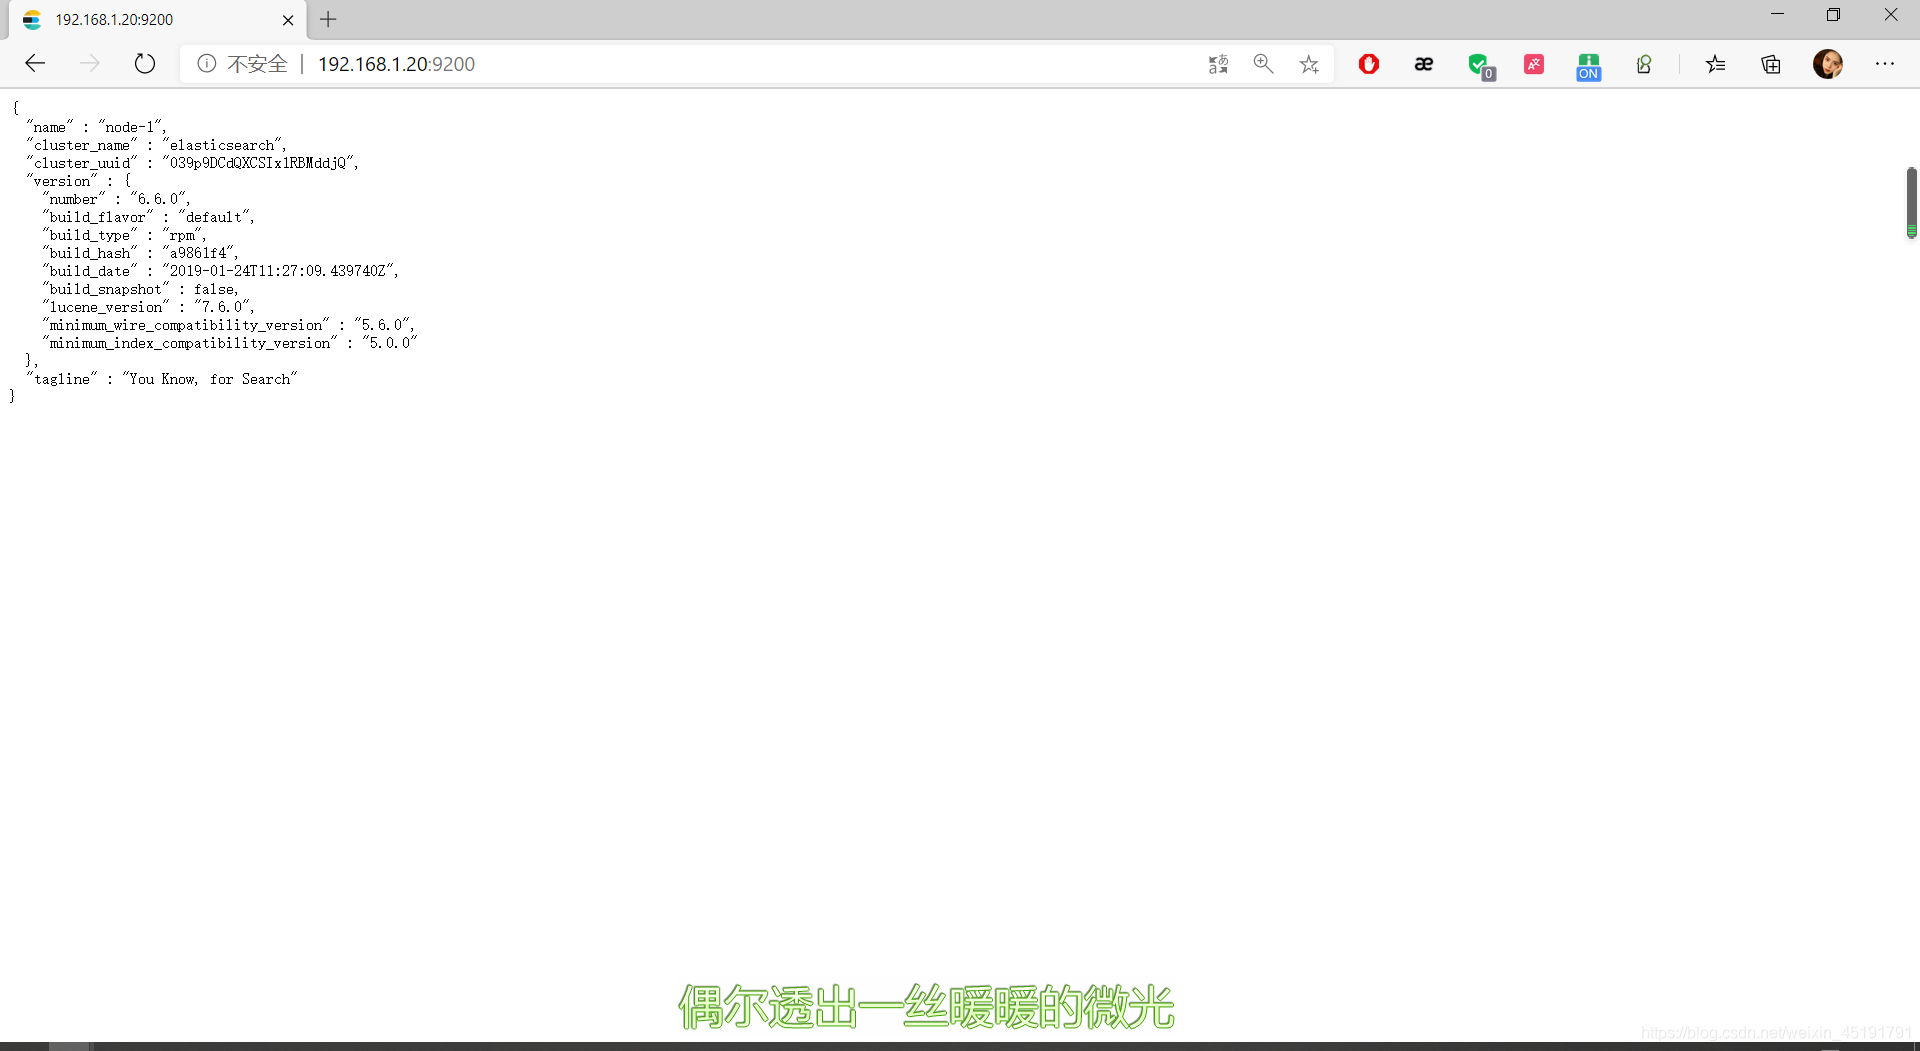
(1)查看单主机
http://192.168.1.20:9200/
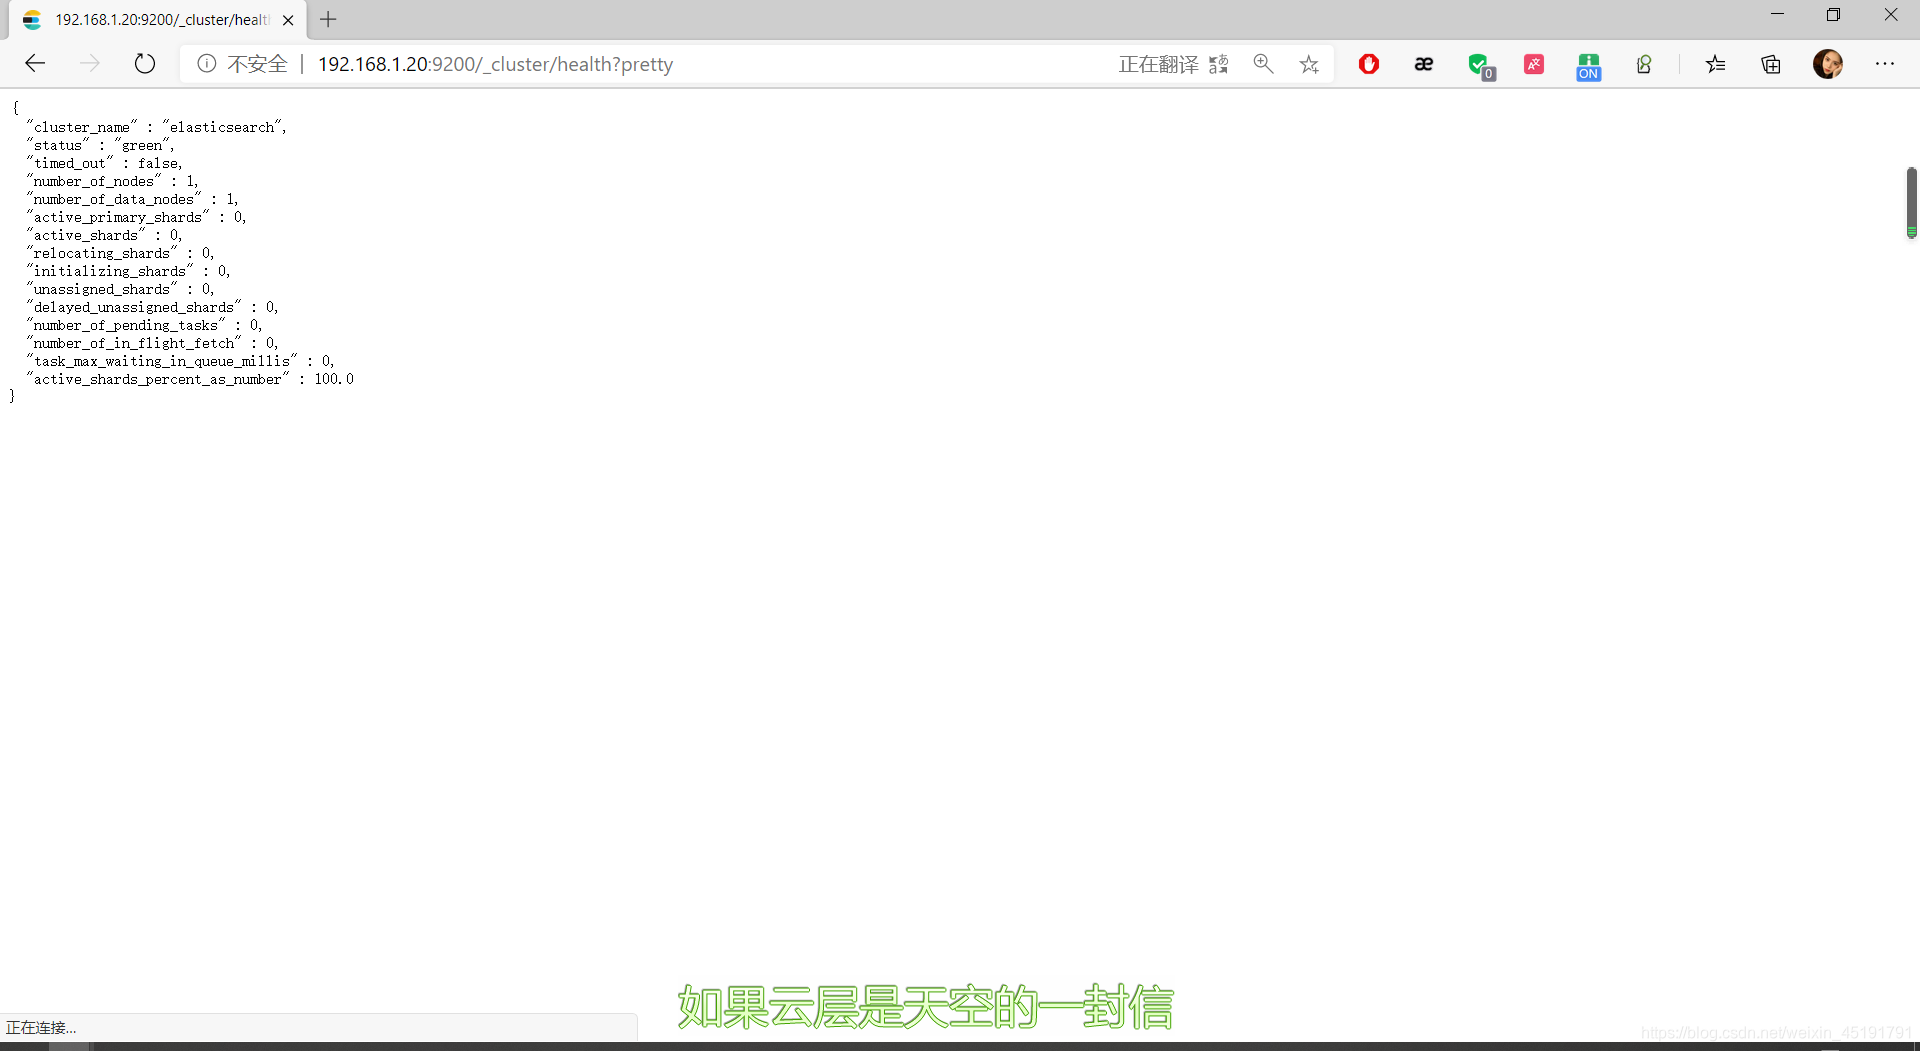
(2)查看群集健康状态
http://192.168.1.20:9200/_cluster/health?pretty
(3)查看整个群集状态信息
http://192.168.1.20:9200/_cluster/state?pretty

常见群集管理监控命令
(1)创建索引
选项说明:
- XPUT 创建
- XDELETE 删除
[root@node-1 ~]# curl -XPUT '192.168.1.20:9200/vipinfo/users/1?pretty&pretty' -H 'Content-Type: application/json' -d '{"name": "guofucheng","age": "45","job": "mingxing"}'
{
  "_index" : "vipinfo",
  "_type" : "users",
  "_id" : "1",
  "_version" : 1,
  "result" : "created",
  "_shards" : {
    "total" : 2,
    "successful" : 1,
    "failed" : 0
  },
  "_seq_no" : 0,
  "_primary_term" : 1
}
(2)查看索引信息
[root@node-1 ~]# curl -XGET '192.168.1.20:9200/_cat/indices?pretty'
green open index1  Nl2se1FqQAW_UIeK7M4yGQ 3 2 0 0    2kb  690b
green open vipinfo mzPDLS0ZSm-862uJ-JWEvg 5 1 1 0 10.9kb 5.4kb
(3)查看群集健康状态
[root@node-1 ~]# curl -XGET '192.168.1.20:9200/_cluster/health?pretty'
{
  "cluster_name" : "elasticsearch",
  "status" : "green",
  "timed_out" : false,
  "number_of_nodes" : 3,
  "number_of_data_nodes" : 3,
  "active_primary_shards" : 0,
  "active_shards" : 0,
  "relocating_shards" : 0,
  "initializing_shards" : 0,
  "unassigned_shards" : 0,
  "delayed_unassigned_shards" : 0,
  "number_of_pending_tasks" : 0,
  "number_of_in_flight_fetch" : 0,
  "task_max_waiting_in_queue_millis" : 0,
  "active_shards_percent_as_number" : 100.0
}
(4)统计群集节点
[root@node-1 ~]# curl -XGET '192.168.1.20:9200/_cat/nodes?human&pretty'
192.168.1.20 13 96 1 0.00 0.05 0.13 mdi * node-1
192.168.1.19 21 96 0 0.00 0.01 0.12 mdi - node-2
192.168.1.11 19 96 1 0.00 0.04 0.05 mdi - node-3
(5)查看群集所有节点详细信息
[root@node-1 ~]# curl -XGET '192.168.1.20:9200/_nodes/_all/info/jvm.process?human&pretty'
{
  "_nodes" : {
    "total" : 3,
    "successful" : 3,
    "failed" : 0
  },
  "cluster_name" : "elasticsearch",
  "nodes" : {
    "8crfmI3QSB6p9e9GL7rBNA" : {
      "name" : "node-3",
      "transport_address" : "192.168.1.11:9300",
      "host" : "192.168.1.11",
      "ip" : "192.168.1.11",
      "version" : "6.6.0",
      "build_flavor" : "default",
      "build_type" : "rpm",
      "build_hash" : "a9861f4",
      "roles" : [
        "master",
        "data",
        "ingest"
      ],
      "attributes" : {
        "ml.machine_memory" : "1907970048",
        "ml.max_open_jobs" : "20",
        "xpack.installed" : "true",
        "ml.enabled" : "true"
      }
    },
    "aqvOxpEnQ7Koe9Q62Q9o9w" : {
      "name" : "node-1",
      "transport_address" : "192.168.1.20:9300",
      "host" : "192.168.1.20",
      "ip" : "192.168.1.20",
      "version" : "6.6.0",
      "build_flavor" : "default",
      "build_type" : "rpm",
      "build_hash" : "a9861f4",
      "roles" : [
        "master",
        "data",
        "ingest"
      ],
      "attributes" : {
        "ml.machine_memory" : "1912107008",
        "xpack.installed" : "true",
        "ml.max_open_jobs" : "20",
        "ml.enabled" : "true"
      }
    },
    "pkZM81gYS2up4J3fpQkjVQ" : {
      "name" : "node-2",
      "transport_address" : "192.168.1.19:9300",
      "host" : "192.168.1.19",
      "ip" : "192.168.1.19",
      "version" : "6.6.0",
      "build_flavor" : "default",
      "build_type" : "rpm",
      "build_hash" : "a9861f4",
      "roles" : [
        "master",
        "data",
        "ingest"
      ],
      "attributes" : {
        "ml.machine_memory" : "1907970048",
        "ml.max_open_jobs" : "20",
        "xpack.installed" : "true",
        "ml.enabled" : "true"
      }
    }
  }
安装插件(elasticsearch-head)
elasticsearch-head插件提供 一个索引树预览和创建索引树工具,还可以 运行一些 命令 ,如定义 命令的别名和删除 索引。
elasticsearch群集:
状态颜色:
| 颜色 | 解释 |
|---|---|
| 灰色 | 未连接 |
| 绿色 | 数据完整态 |
| 黄色 | 副本不完整 |
| 红色 | 数据分片不完整 |
| 紫色 | 数据分片复制过程 |
群集主机角色:
- 主节点master:负责管理调度
- 工作节点: 负责处理数据
- 默认情况,所有节点都是工作节点,即主节点也处理数据
1.安装node环境
官网: https://nodejs.org/en/download/
(1)下载node包
[root@localhost ~]# wget https://nodejs.org/dist/v8.11.3/node-v8.11.3-linux-x64.tar.xz
--2020-07-30 15:14:23--  https://nodejs.org/dist/v8.11.3/node-v8.11.3-linux-x64.tar.xz
正在解析主机 nodejs.org (nodejs.org)... 104.20.22.46, 104.20.23.46, 2606:4700:10::6814:162e, ...
正在连接 nodejs.org (nodejs.org)|104.20.22.46|:443... 已连接。
已发出 HTTP 请求,正在等待回应... 200 OK
长度:11351132 (11M) [application/x-xz]
正在保存至: “node-v8.11.3-linux-x64.tar.xz”

100%[==================>] 11,351,132  37.7KB/s 用时 84s
2020-07-30 15:15:54 (133 KB/s) - 已保存 “node-v8.11.3-linux-x64.tar.xz” [11351132/11351132])
[root@localhost ~]# tar -xvf node-v8.11.3-linux-x64.tar.xz
(2)进入解压后的目录 bin 目录下,执行 ls 会看到两个文件 node,npm. 然后执行./node -v ,如果显示出 版本号说明我们下载的程序包是没有问题的。
[root@localhost ~]# cd node-v8.11.3-linux-x64/bin/
[root@localhost bin]# ls
node  npm  npx
[root@localhost bin]# ./node -v
v8.11.3
(3)配置环境变量
[root@localhost ~]# vim /etc/profile
添加:
export PATH=/usr/local/node/node-v8.11.3-linux-x64/bin:$PATH
[root@localhost ~]# source  /etc/profile    //立即生效变量
2.安装grunt
PS: 运行head需要借助grunt命令!
在Node安装目录执行以下命令即可安装grunt工具
[root@localhost bin]# npm install -g grunt-cli
npm WARN deprecated [email protected]: https://github.com/lydell/resolve-url#deprecated
npm WARN deprecated [email protected]: Please see https://github.com/lydell/urix#deprecated
/usr/bin/grunt -> /usr/lib/node_modules/grunt-cli/bin/grunt
/usr/lib
└─┬ [email protected]
  ├── [email protected]
  ├── [email protected]
  ├─┬ [email protected]
  │ ├── [email protected]
......
3.安装head插件
插件github地址 :https://github.com/mobz/elasticsearch-head
(1)下载包
[root@localhost ~]# git clone https://github.com/mobz/elasticsearch-head
正克隆到 'elasticsearch-head'...
remote: Enumerating objects: 10, done.
remote: Counting objects: 100% (10/10), done.
remote: Compressing objects: 100% (10/10), done.
remote: Total 4347 (delta 0), reused 3 (delta 0), pack-reused 4337
接收对象中: 100% (4347/4347), 2.49 MiB | 24.00 KiB/s, done.
处理 delta 中: 100% (2417/2417), done.
[root@localhost ~]# cd elasticsearch-head/
[root@localhost elasticsearch-head]# npm install
......
此段时间过长 请耐心等待!
(2) 修改Elasticsearch主配置文件
[root@localhost elasticsearch-head]# vim /etc/elasticsearch/elasticsearch.yml
http.cors.enabled: true
#开启跨域访问支持
http.cors.allow-origin: "*"
#跨域访问允许的域名地址
(3)重启服务
[root@localhost elasticsearch-head]# systemctl restart elasticsearch.service
[root@localhost elasticsearch-head]# npm  run  start &   // 前台启动,一旦关闭终端。,服务器自动关闭 ,所有此刻选择后台开启
[1] 9436
[root@localhost elasticsearch-head]# [..................] - : info using node@v6
> [email protected] start /root/elasticsearch-head
> grunt server

>> Local Npm module "grunt-contrib-jasmine" not found. Is it installed?

Running "connect:server" (connect) task
Waiting forever...
Started connect web server on http://localhost:9100

[root@localhost elasticsearch-head]# netstat -lnupt | grep  9100
tcp        0      0 0.0.0.0:9100            0.0.0.0:*               LISTEN      9449/grunt
[root@localhost elasticsearch-head]# netstat -lnupt | grep  9200
tcp6       0      0 192.168.1.20:9200       :::*                    LISTEN      9232/java
tcp6       0      0 127.0.0.1:9200          :::*                    LISTEN      9232/java
(4)检查
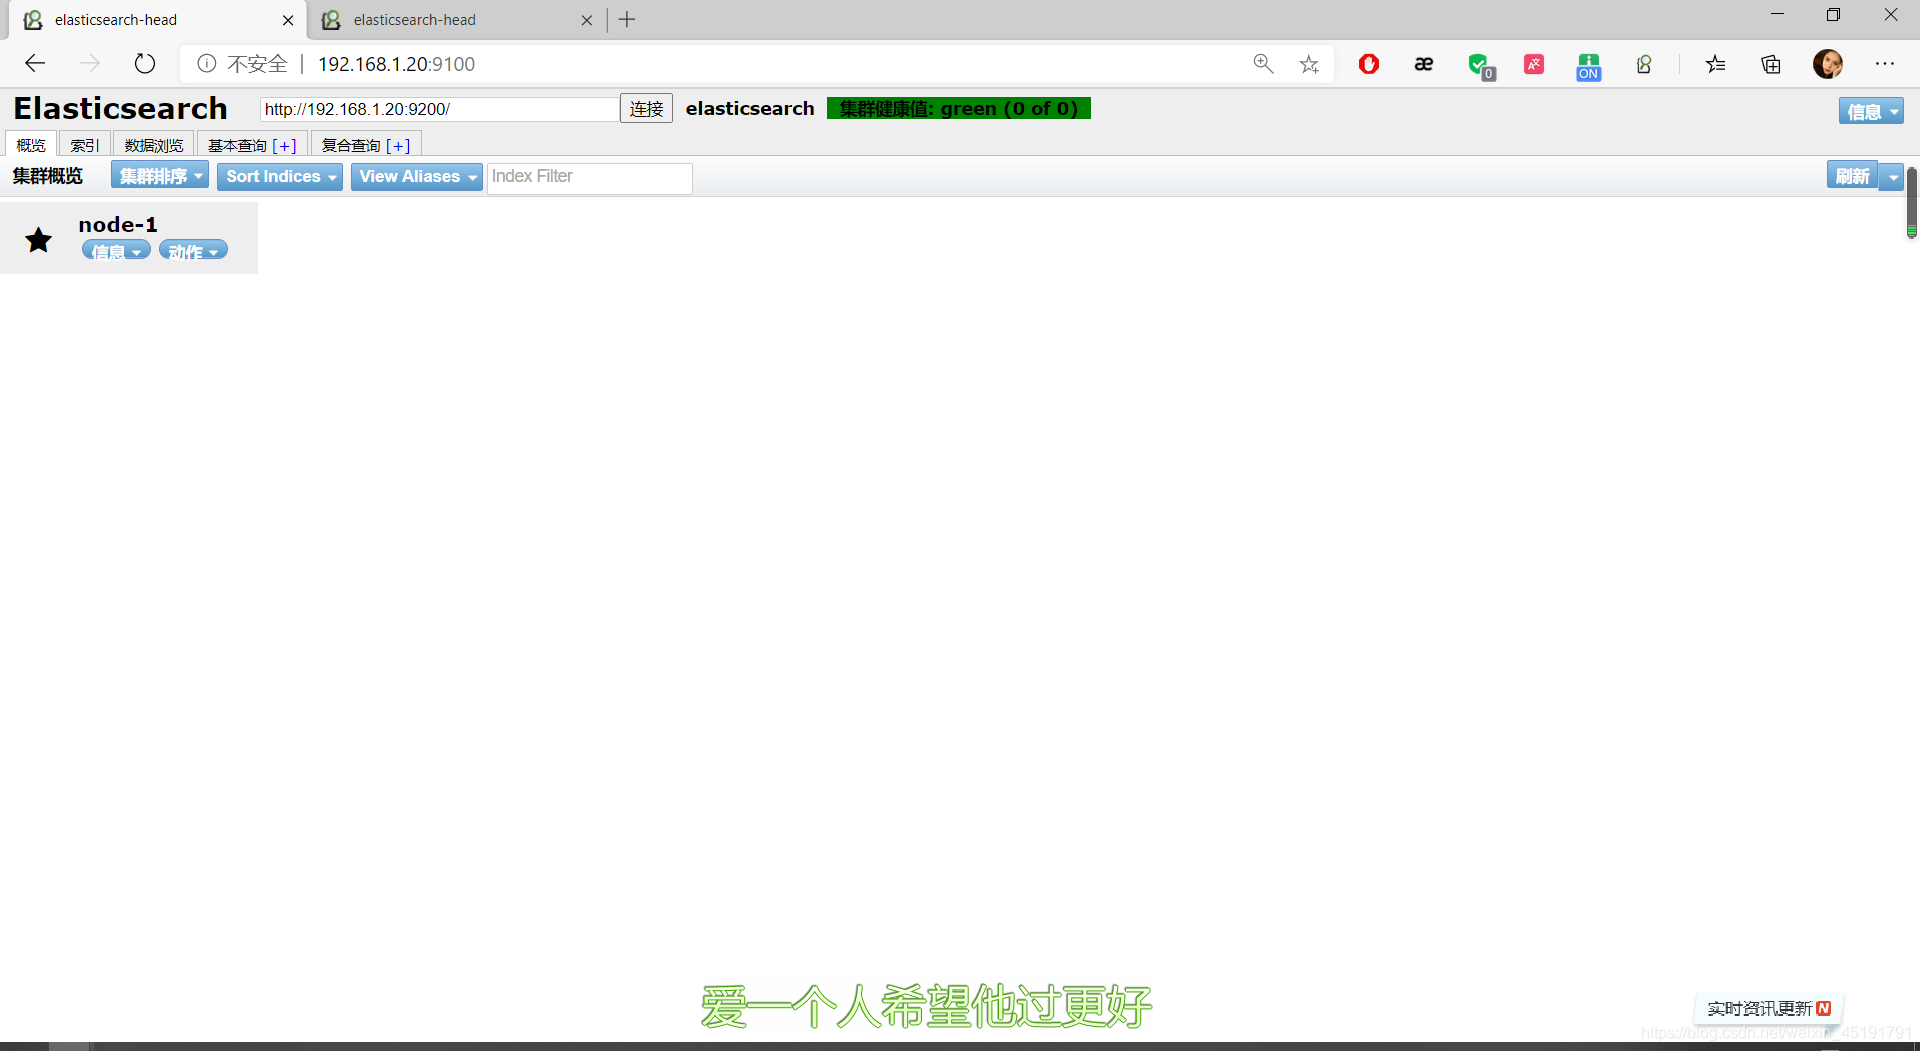
4.验证
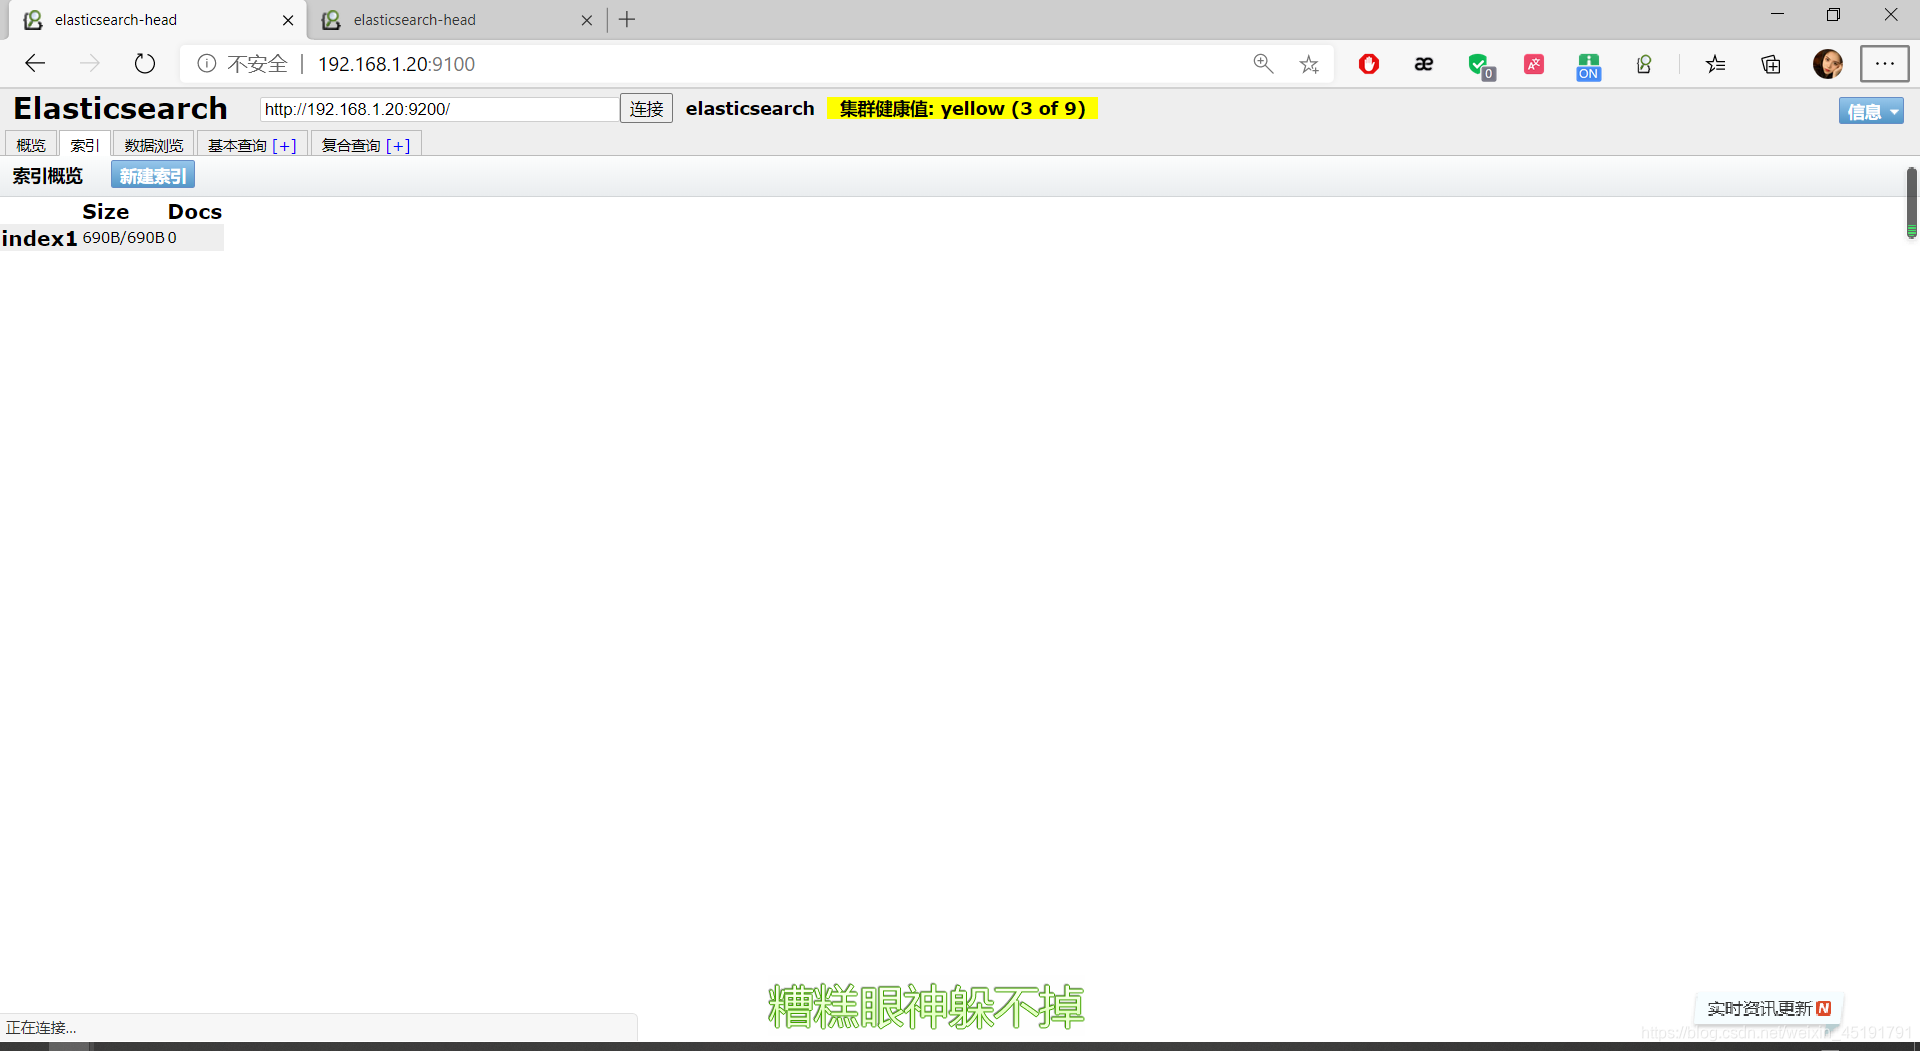
(1)插入一条索引
[root@localhost ~]# curl -X PUT 192.168.1.20:9200/index1  -H 'Content-Type: application/json' -d '{
>     "settings" : {
>         "index" : {
>             "number_of_shards" : 3,
>             "number_of_replicas" : 2
>         }
>     }
> }'
{"acknowledged":true,"shards_acknowledged":true,"index":"index1"}
(2)浏览器查看
安装插件(kibana)
(1)下载kibana包。
[root@localhost ~]# yum -y install https://mirrors.tuna.tsinghua.edu.cn/elasticstack/6.x/yum/6.6.0/kibana-6.6.0-x86_64.rpm
已加载插件:fastestmirror, langpacks
kibana-6.6.0-x86_64.rpm                                  | 177 MB     00:07
正在检查 /var/tmp/yum-root-1aqueq/kibana-6.6.0-x86_64.rpm: kibana-6.6.0-1.x86_64
/var/tmp/yum-root-1aqueq/kibana-6.6.0-x86_64.rpm 将被安装
正在解决依赖关系
--> 正在检查事务
---> 软件包 kibana.x86_64.0.6.6.0-1 将被 安装
--> 解决依赖关系完成
......
(2)修改kibana的配置文件
[root@localhost ~]# vim /etc/kibana/kibana.yml
[root@localhost ~]# grep -v '#' /etc/kibana/kibana.yml | grep -v '^$'
server.port: 5601
#Kibana打开的端口
server.host: "0.0.0.0"
#Kibana侦听的地址
elasticsearch.url: "http://192.168.1.20:9200"
#和Elasticsearch建立连接
kibana.index: ".kibana"
#在Elasticsearch中添加。Kibana索引
[root@localhost ~]# systemctl start kibana.service //开启服务
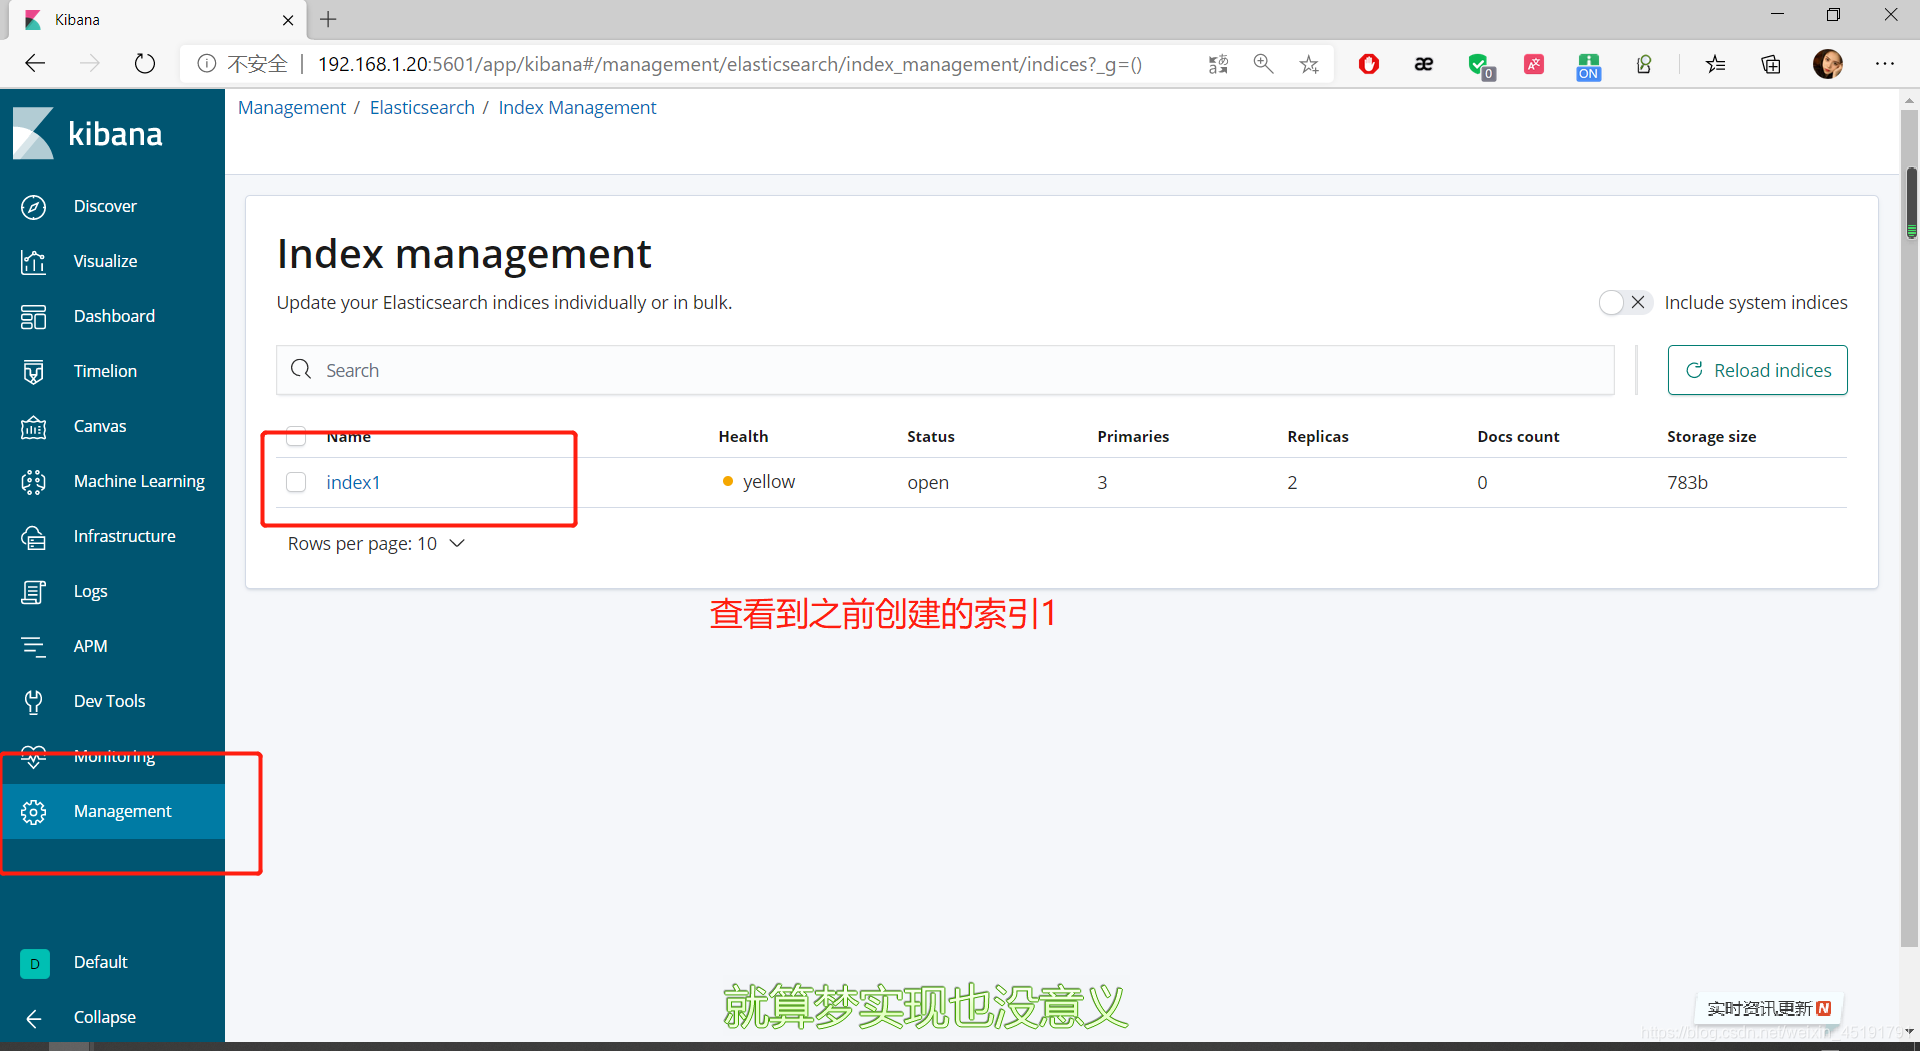
(3)验证
安装插件(logstash)
(1)下载logstash包。
[root@localhost ~]# yum -y install https://mirrors.tuna.tsinghua.edu.cn/elasticstack/6.x/yum/6.6.0/logstash-6.6.0.rpm
已加载插件:fastestmirror, langpacks
logstash-6.6.0.rpm                                       | 163 MB     00:23
正在检查 /var/tmp/yum-root-1aqueq/logstash-6.6.0.rpm: 1:logstash-6.6.0-1.noarch
/var/tmp/yum-root-1aqueq/logstash-6.6.0.rpm 将被安装
正在解决依赖关系
--> 正在检查事务
---> 软件包 logstash.noarch.1.6.6.0-1 将被 安装
--> 解决依赖关系完成
......
[root@localhost ~]# systemctl daemon-reload
[root@localhost ~]# systemctl start  logstash.service
[root@localhost ~]# systemctl enable  logstash.service
Created symlink from /etc/systemd/system/multi-user.target.wants/logstash.service to /etc/systemd/system/logstash.service.
(2)安装httpd服务
[root@localhost ~]# yum -y install httpd
已加载插件:fastestmirror, langpacks
Loading mirror speeds from cached hostfile
 * base: mirrors.bfsu.edu.cn
 * extras: mirrors.bfsu.edu.cn
 * updates: mirrors.njupt.edu.cn
......
[root@localhost ~]# systemctl start httpd
[root@localhost ~]# systemctl enable  httpd
Created symlink from /etc/systemd/system/multi-user.target.wants/httpd.service to /usr/lib/systemd/system/httpd.service.
(3)编写logstash配置文件
[root@efk html]# cd /etc/logstash/conf.d/
[root@efk conf.d]# touch apache_log.conf
[root@efk conf.d]# vim apache_log.conf
input{
	file{
		path => "/etc/httpd/logs/access_log" #收集APache访问日志
		type => "access" #类型指定为acces
		start_position => "beginning" #从开始处收集
}
	file{
		path => "/etc/httpd/logs/error_log" #收集Apache错误日志
		type => "error"  #类型指定为error
		start_position => "beginning"  #从开始处收集
}
}

output{
	if[type] == "access"{  # 如果类型为access,即Apace访问日志输出到elasticsearch
		elasticsearch{
			hosts => ["192.168.1.19:9200"]  #elasticsearch监听地址及端口
			index => "apache_access-%{+YYYY.MM.dd}" #指定索引格式
}
}
	if[type] == "error"{ # 如果类型为error,即Apace访问日志输出到elasticsearch
		elasticsearch{
			hosts => ["192.168.1.19:9200"] #elasticsearch监听地址及端口
             index => "apache_access-%{+YYYY.MM.dd}" #指定索引格式
}
}
}
[root@efk conf]# /usr/share/logstash/bin/logstash -f /etc/logstash/conf.d/apache_log.conf

WARNING: Could not find logstash.yml which is typically located in $LS_HOME/config or /etc/logstash. You can specify the path using --path.settings. Continuing using the defaults
Could not find log4j2 configuration at path /usr/share/logstash/config/log4j2.properties. Using default config which logs errors to the console
[INFO ] 2020-08-03 17:50:10.596 [main] writabledirectory - Creating directory {:setting=>"path.queue", :path=>"/usr/share/logstash/data/queue"}
[INFO ] 2020-08-03 17:50:10.605 [main] writabledirectory - Creating directory {:setting=>"path.dead_letter_queue", :path=>"/usr/share/logstash/data/dead_letter_queue"}
.......
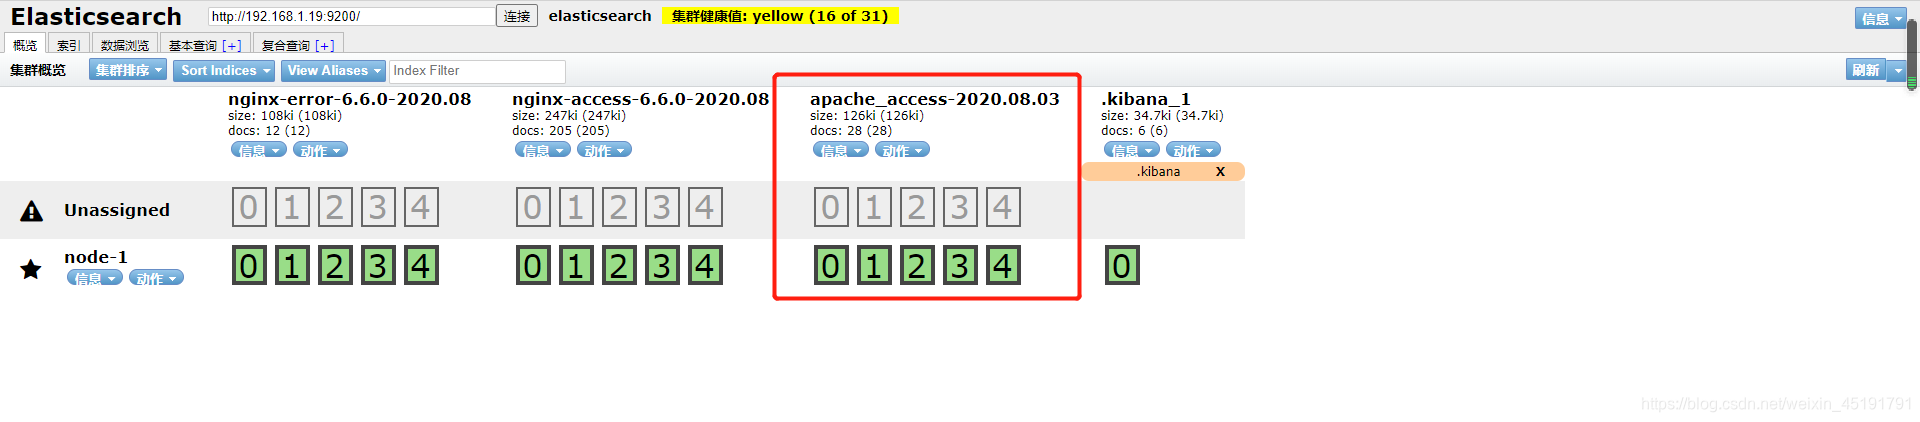
(4)在es页面查看索引
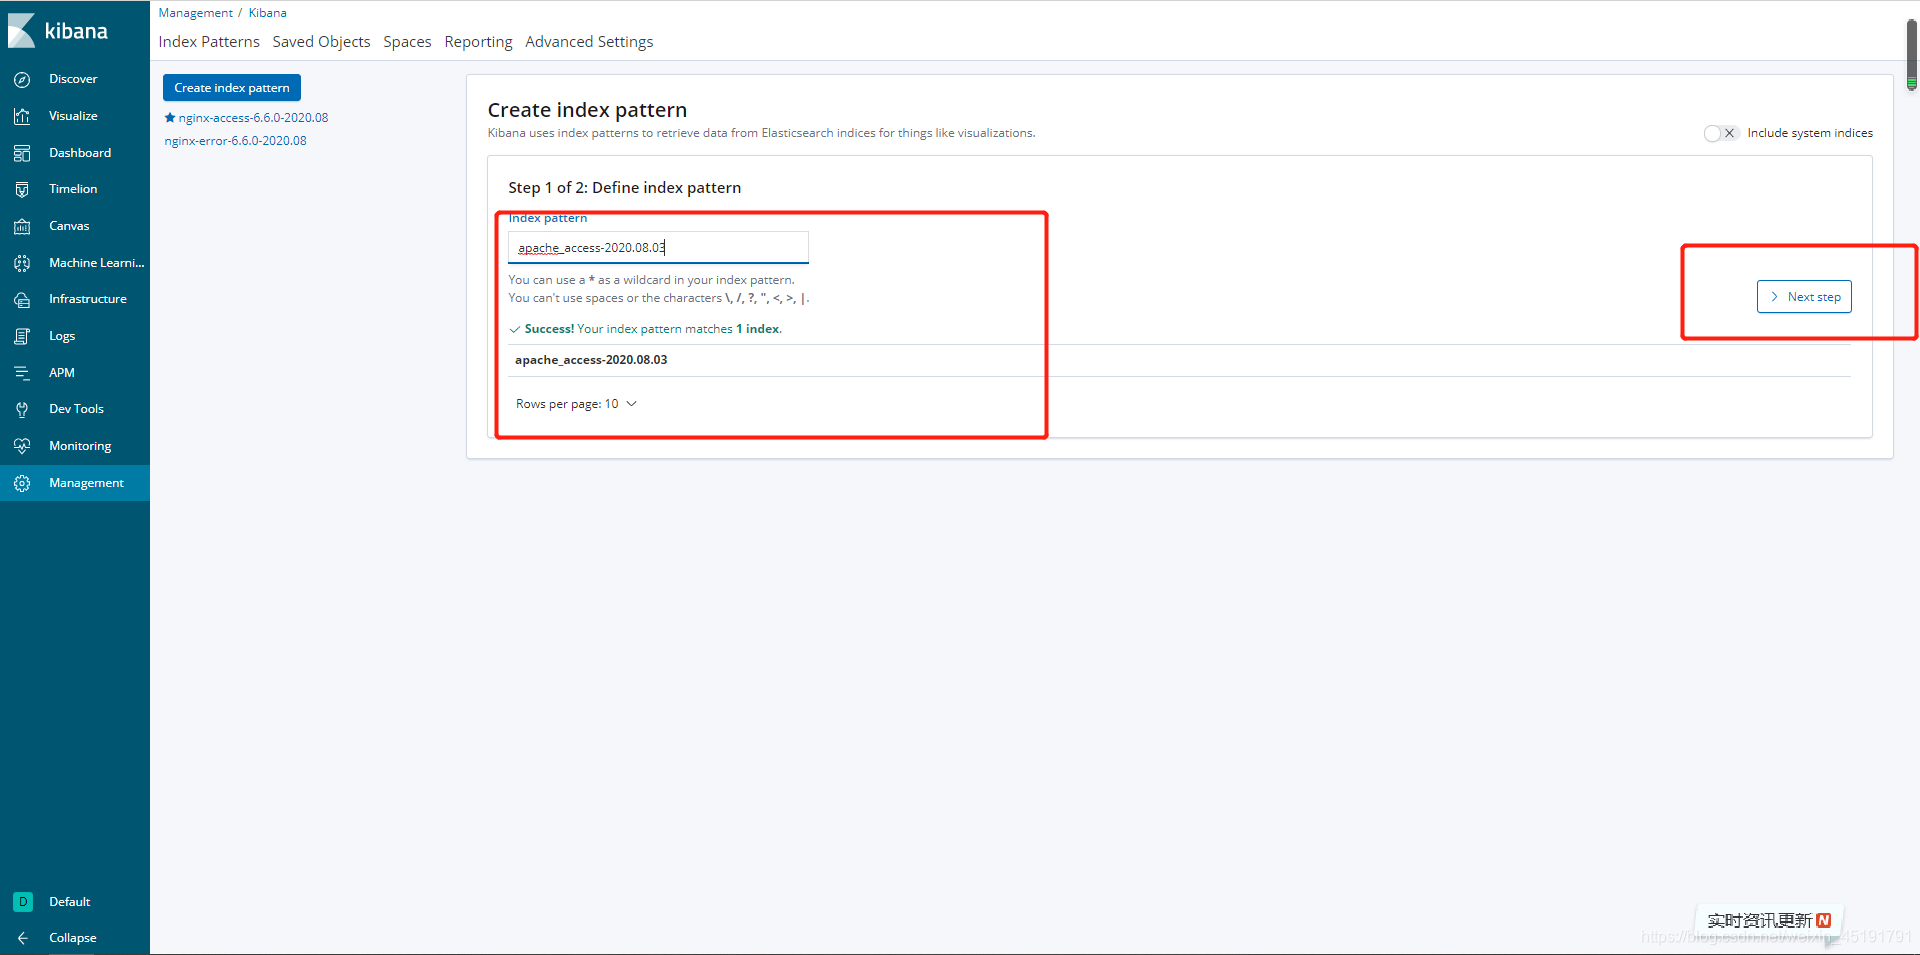
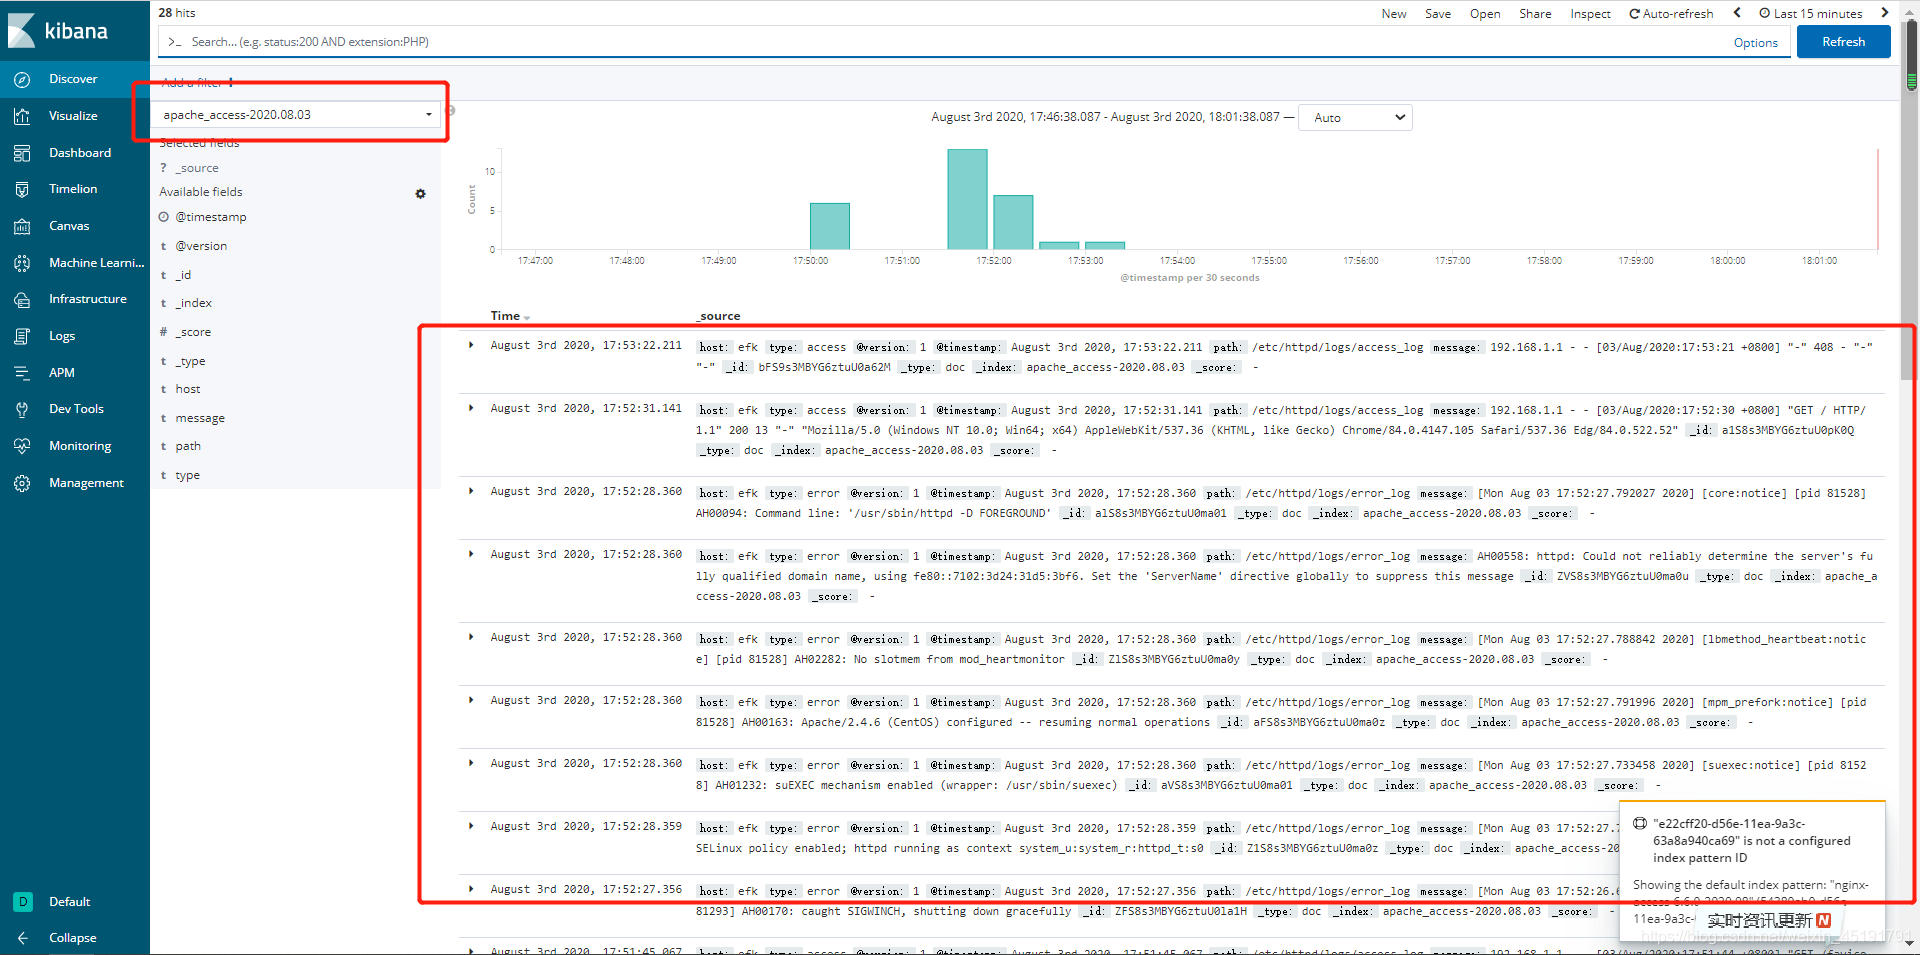
(5)在kinbana页面创建apache索引