一、理论概述
1、理解UI
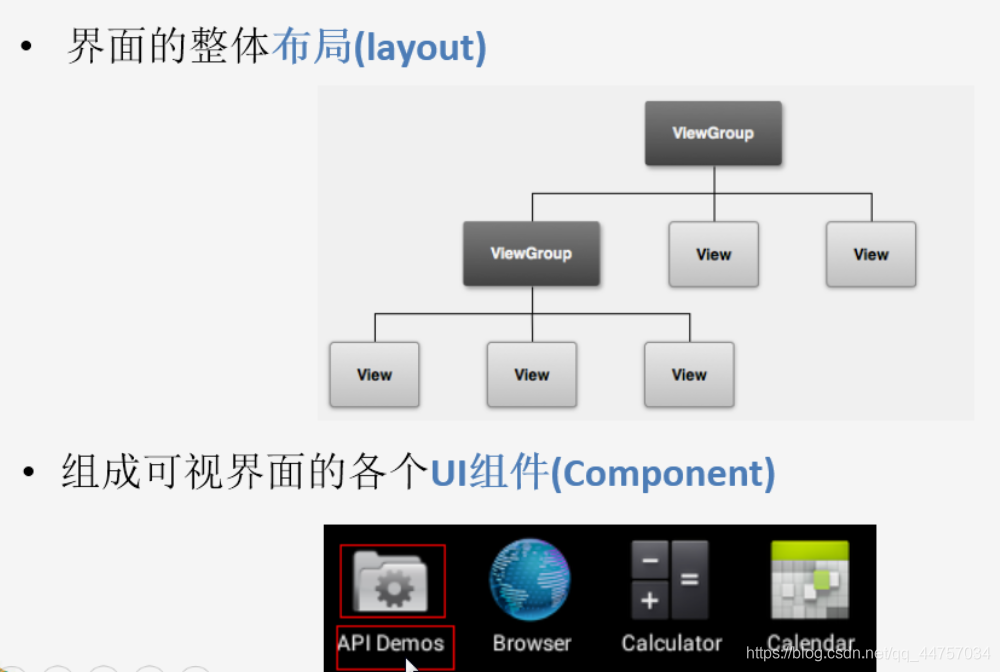
(1)UI的定义
全称user interface,意为:用户界面。
UI由view和ViewGroup组成
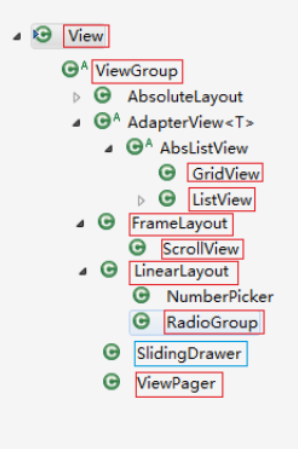
View类是所有视图(包括ViewGroup)的根基类
View在屏幕上占据一片矩形区域,并会在上面进行内容绘制. ViewGroup包含一些View或ViewGroup,用于控制子View的布局
(2)View的API结构(常用的一般视图)

(3)View的API结构(常用的布局)

(4)UI的组成
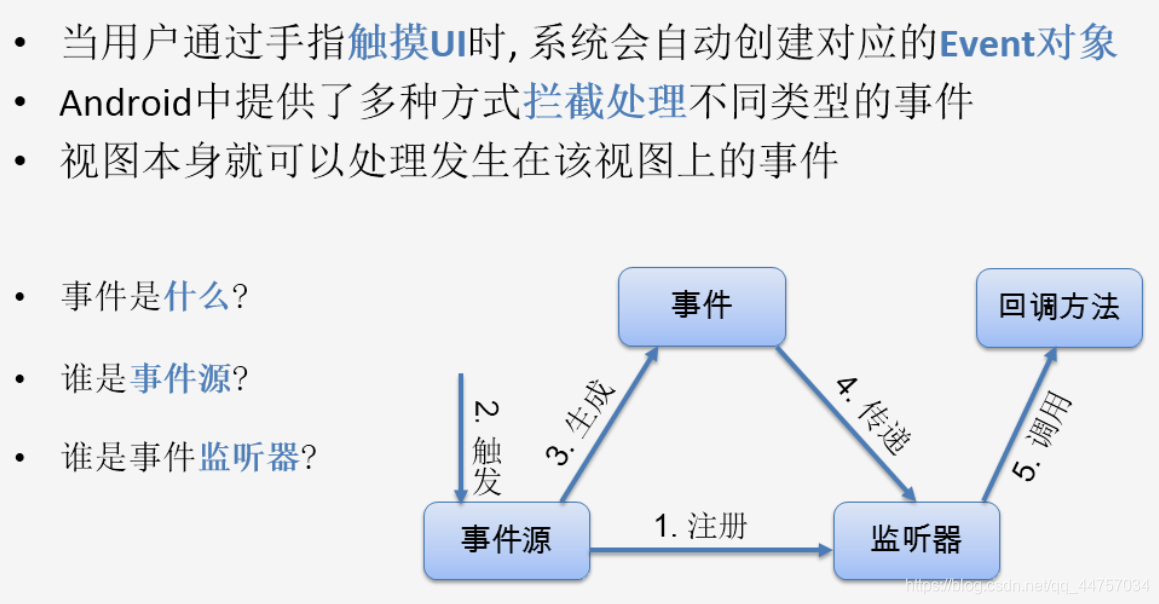
2、UI事件
(1)UI事件的概念
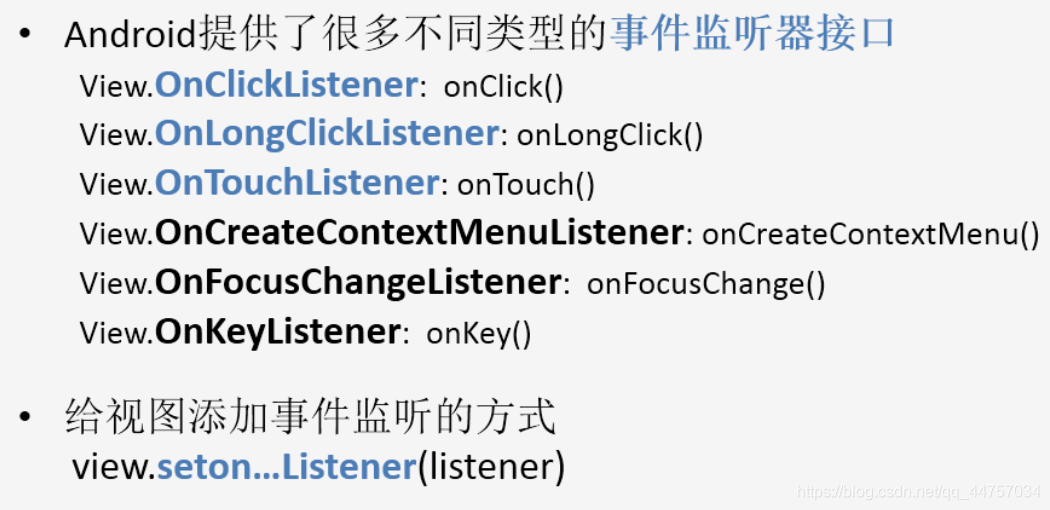
(2)使用UI事件
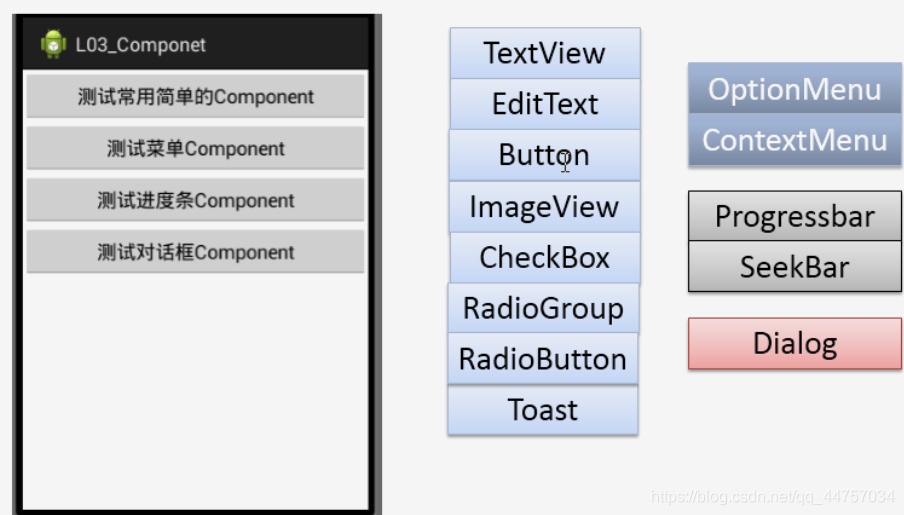
3、测试用例
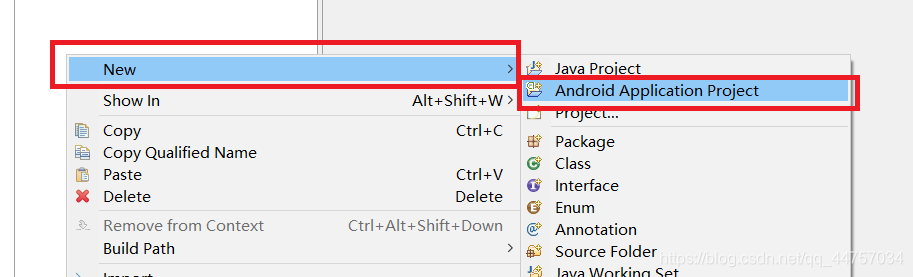
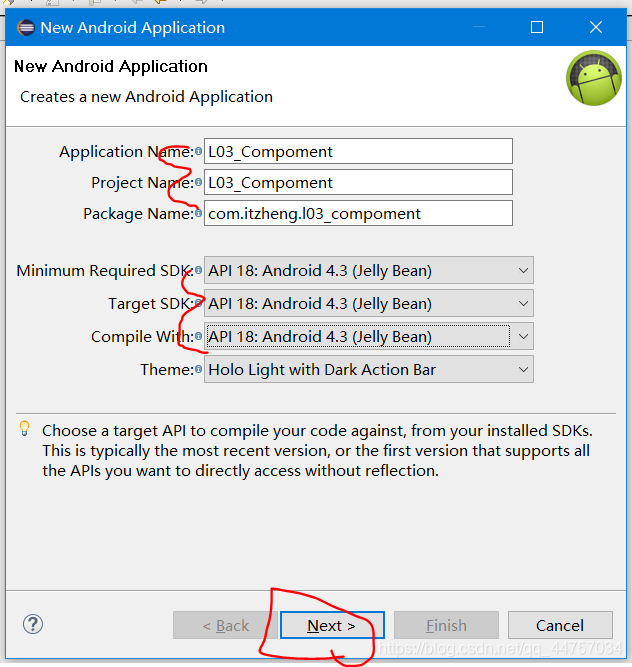
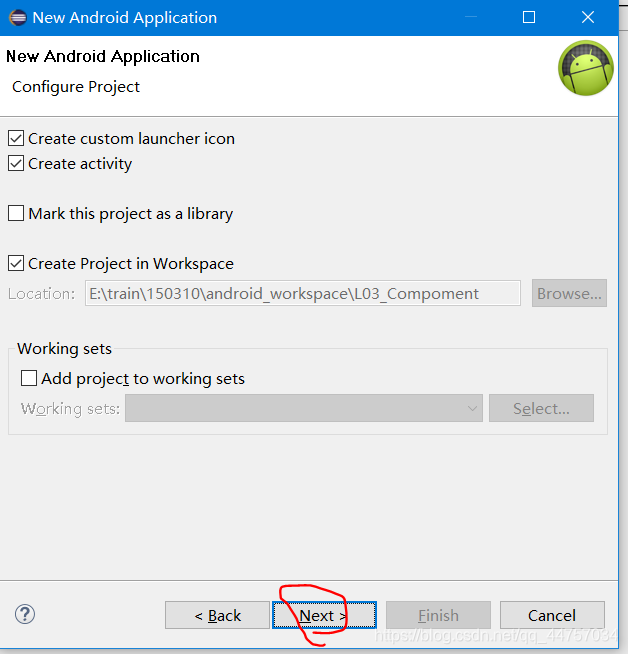
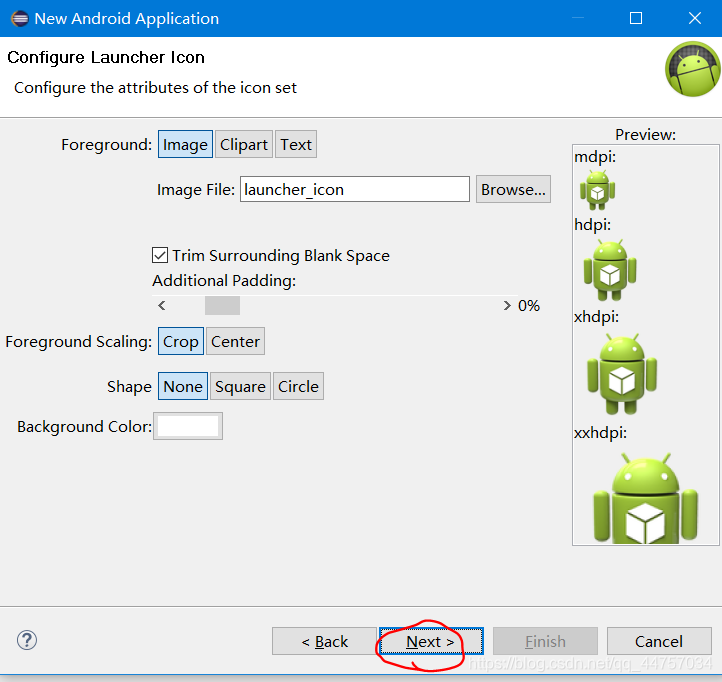
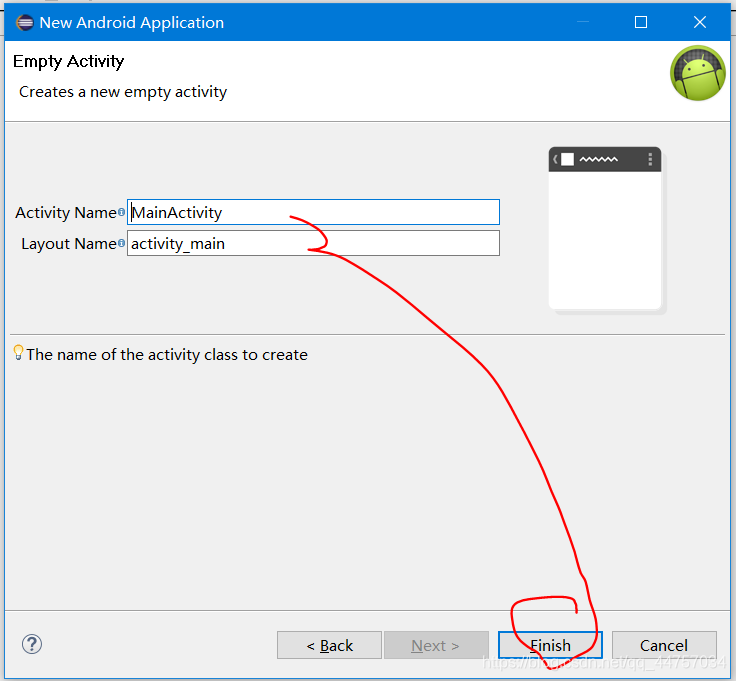
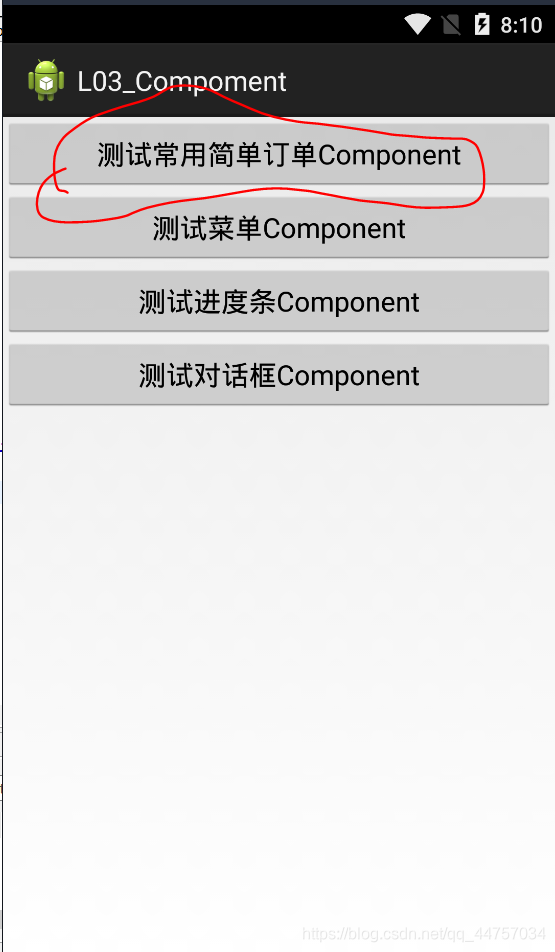
(1)创建工程

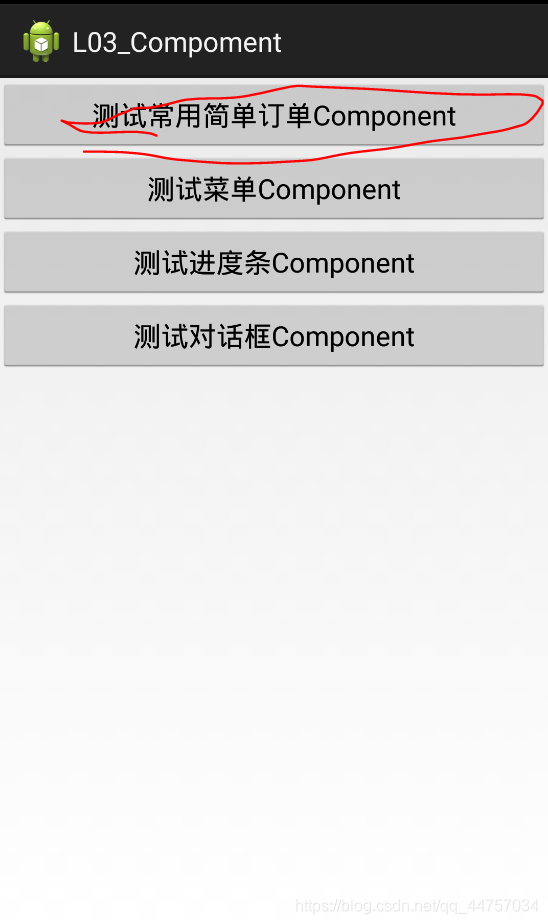
(2)创建线程布局以及对应的按钮(activity_main.xml当中)
<LinearLayout xmlns:android="http://schemas.android.com/apk/res/android"
    android:layout_width="fill_parent"
    android:layout_height="fill_parent"
    android:orientation="vertical" >
    <Button
        android:id="@+id/btn_main_test1"
        android:layout_width="match_parent"
        android:layout_height="wrap_content"
        android:text="测试常用简单订单Component" />
    <Button
        android:id="@+id/btn_main_test2"
        android:layout_width="match_parent"
        android:layout_height="wrap_content"
        android:text="测试菜单Component" />
    <Button
        android:id="@+id/btn_main_test3"
        android:layout_width="match_parent"
        android:layout_height="wrap_content"
        android:text="测试进度条Component" />
    <Button
        android:id="@+id/btn_main_test4"
        android:layout_width="match_parent"
        android:layout_height="wrap_content"
        android:text="测试对话框Component" />
</LinearLayout>
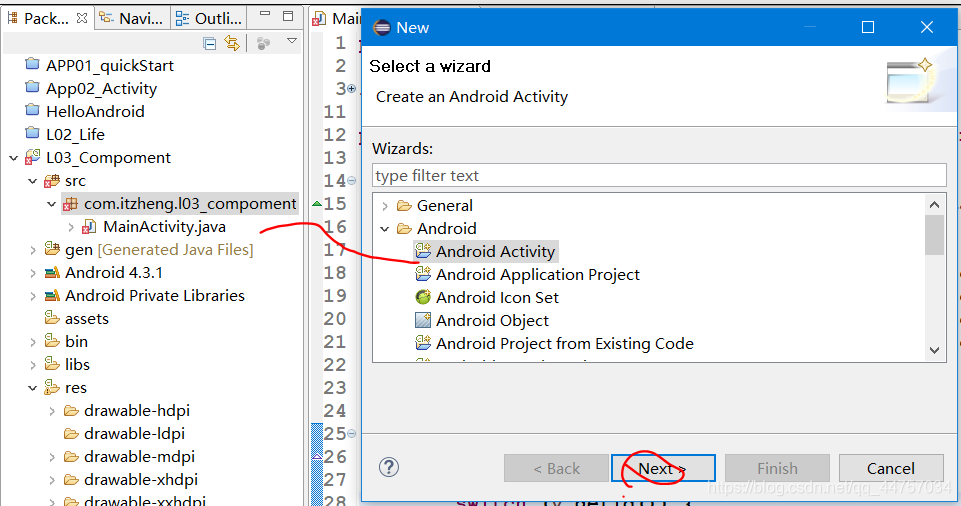
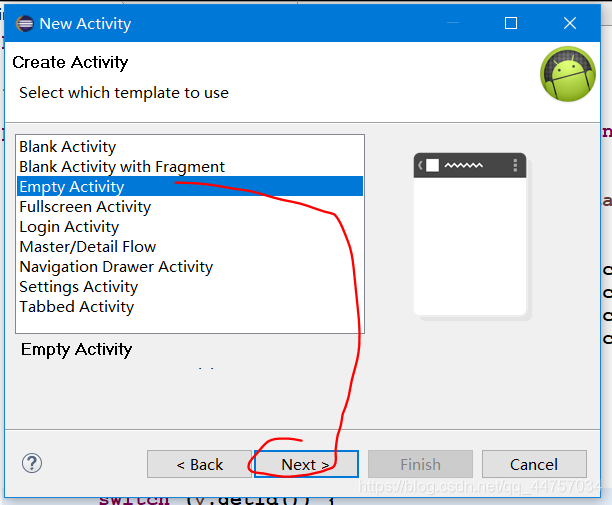
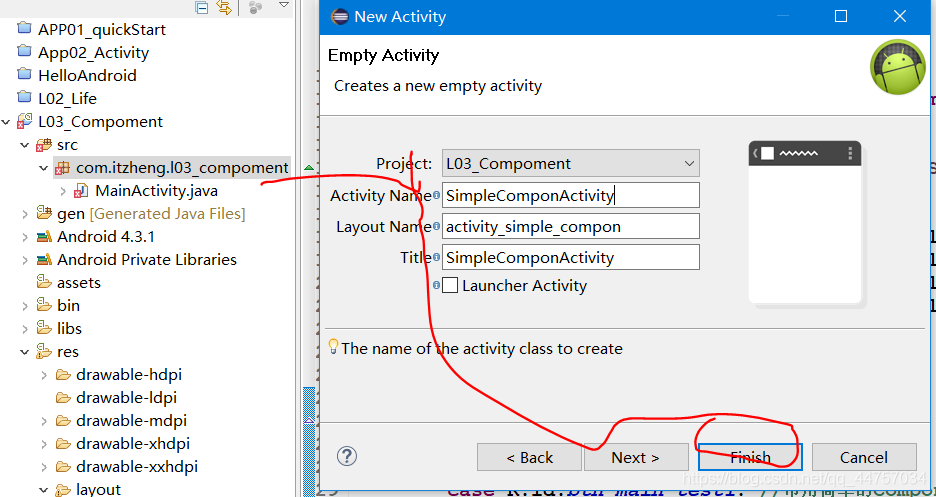
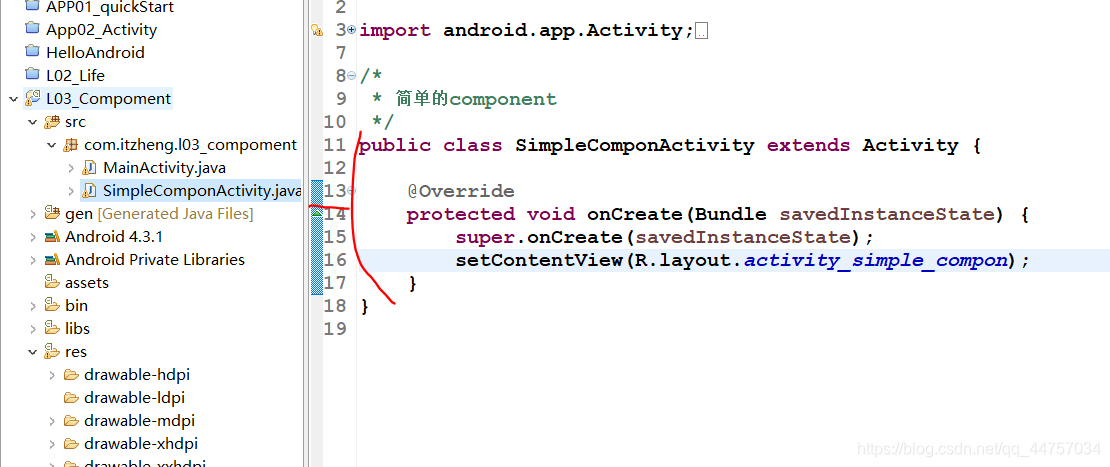
(3)创建其他的视图Activity
(4)在对应按钮上创建监听事件(打开另外一个界面)
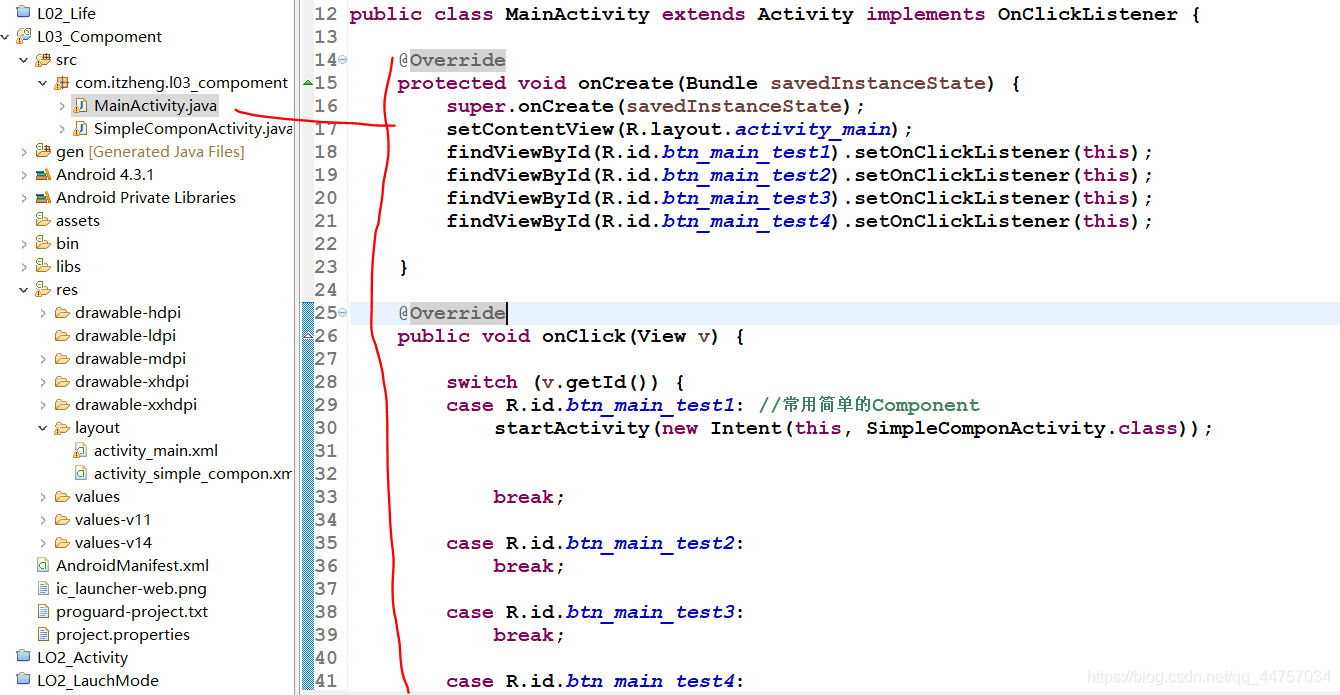
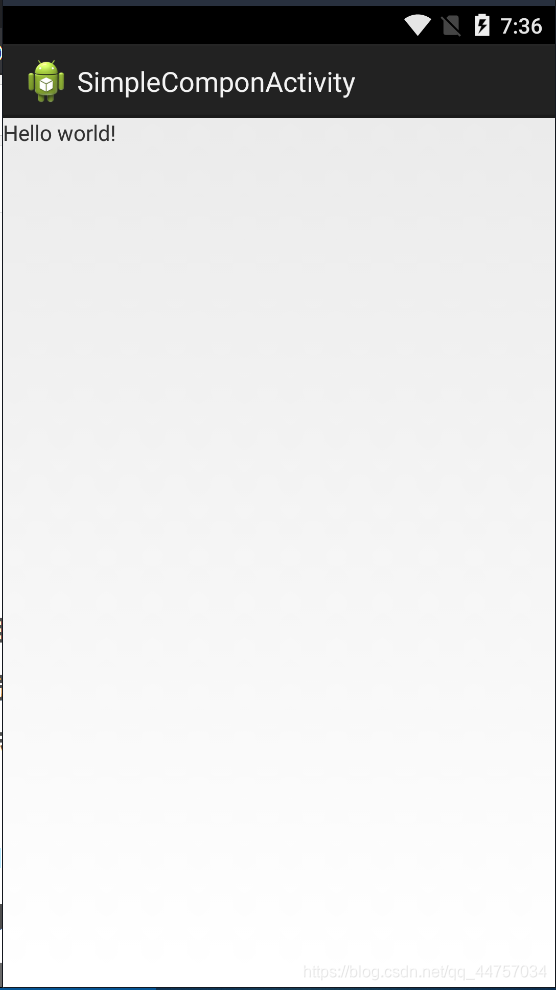
(5)测试
二、UI开发
1、常用的UI组件 常用的简单的Component
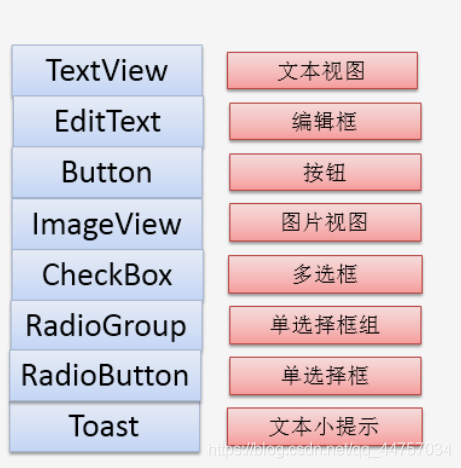
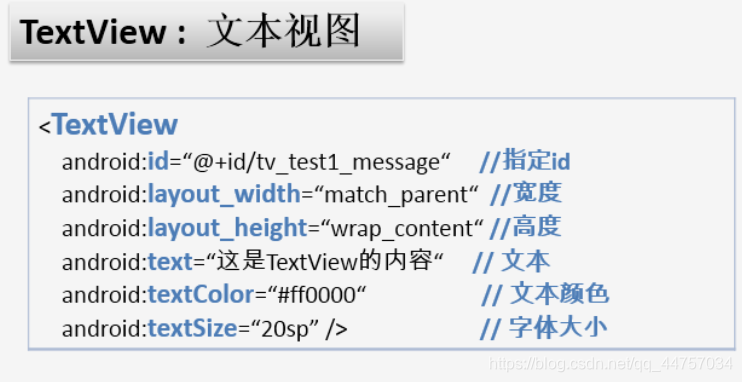
(1)TextView
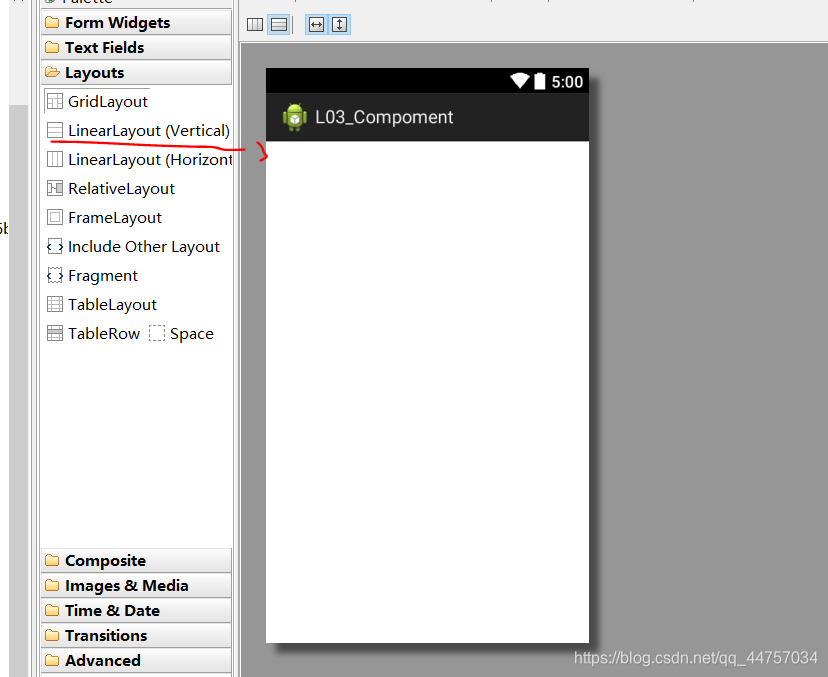
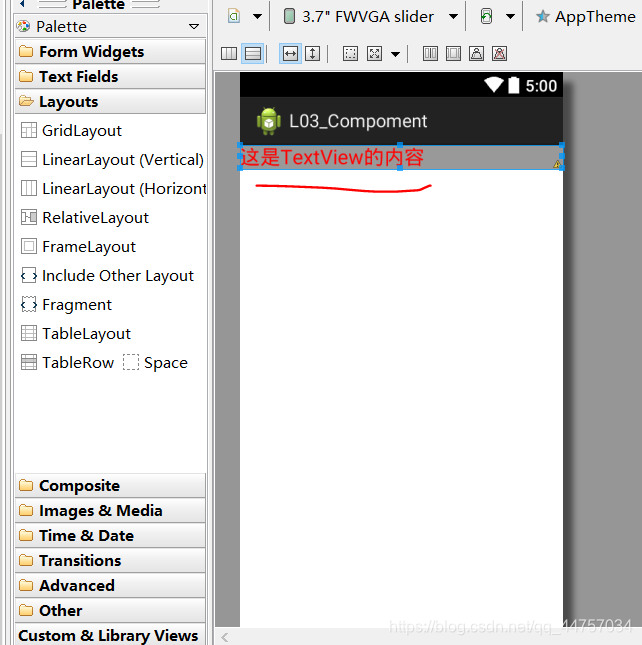
a、修改activity_simple_compon.xml
拖拽即可
编写页面
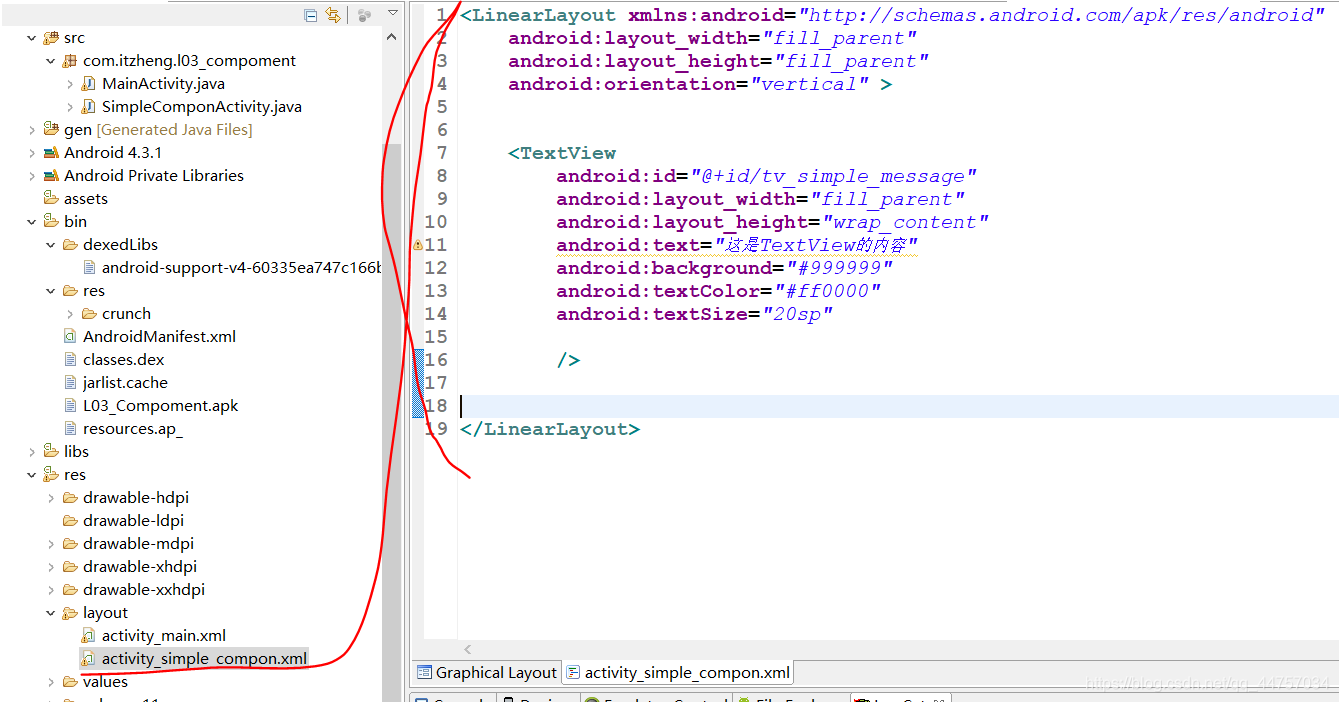
<LinearLayout xmlns:android="http://schemas.android.com/apk/res/android"
    android:layout_width="fill_parent"
    android:layout_height="fill_parent"
    android:orientation="vertical" >
    <TextView
        android:id="@+id/tv_simple_message"
        android:layout_width="fill_parent"
   		android:layout_height="wrap_content"
   		android:text="这是TextView的内容"
   		android:background="#999999"
   		android:textColor="#ff0000"
   		android:textSize="20sp"

        />
</LinearLayout>
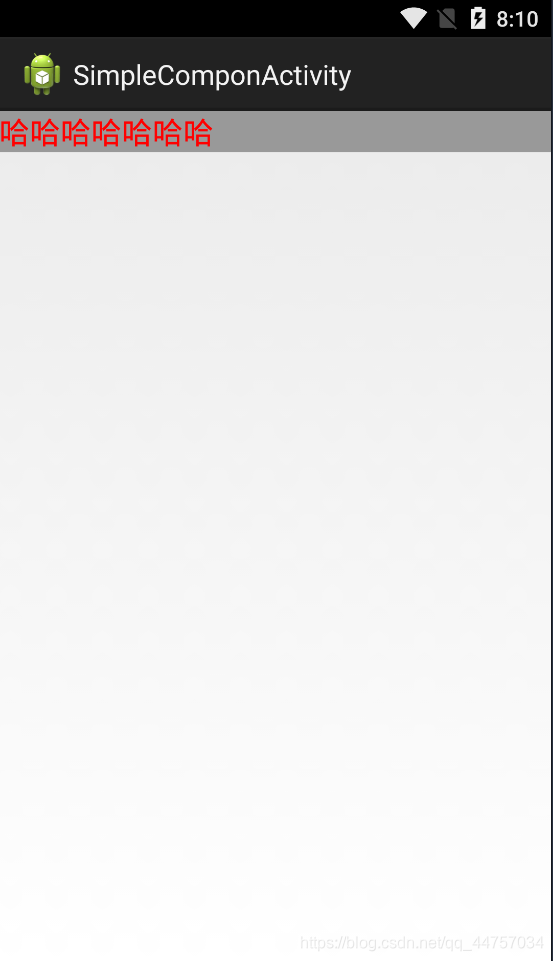
b、动态修改上面文本的开发,修改SimpleComponActivity
package com.itzheng.l03_compoment;
import org.w3c.dom.Text;
import android.app.Activity;
import android.os.Bundle;
import android.view.Menu;
import android.view.MenuItem;
import android.widget.TextView;
/*
* 简单的component
*/
public class SimpleComponActivity extends Activity {
private TextView tv_simple_message;
@Override
protected void onCreate(Bundle savedInstanceState) {
super.onCreate(savedInstanceState);
setContentView(R.layout.activity_simple_compon);
//1、TextView
tv_simple_message = (TextView)findViewById(R.id.tv_simple_message);
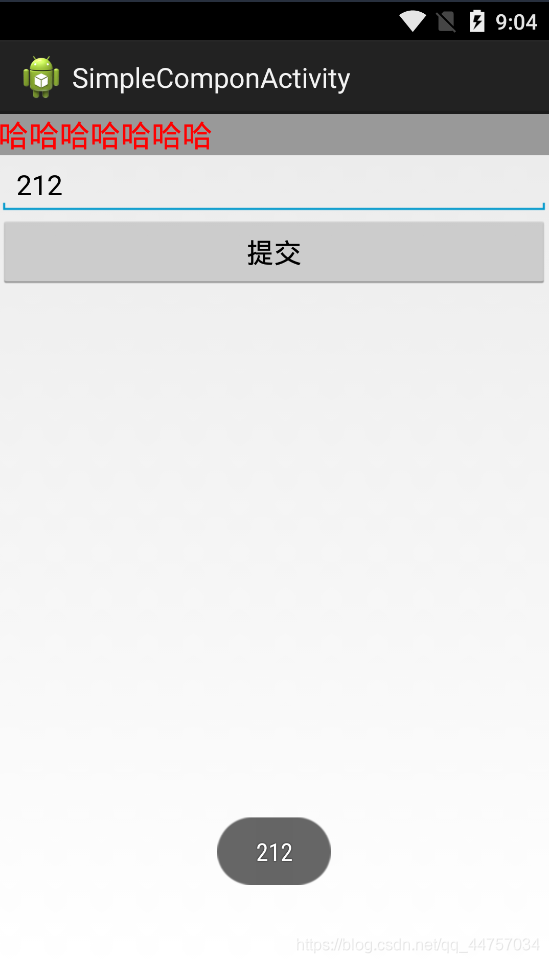
tv_simple_message.setText("哈哈哈哈哈哈哈");
}
}
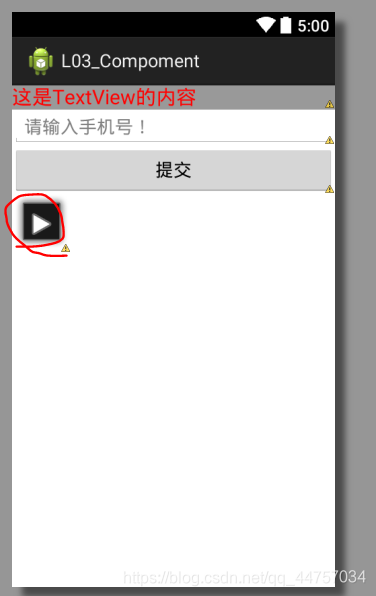
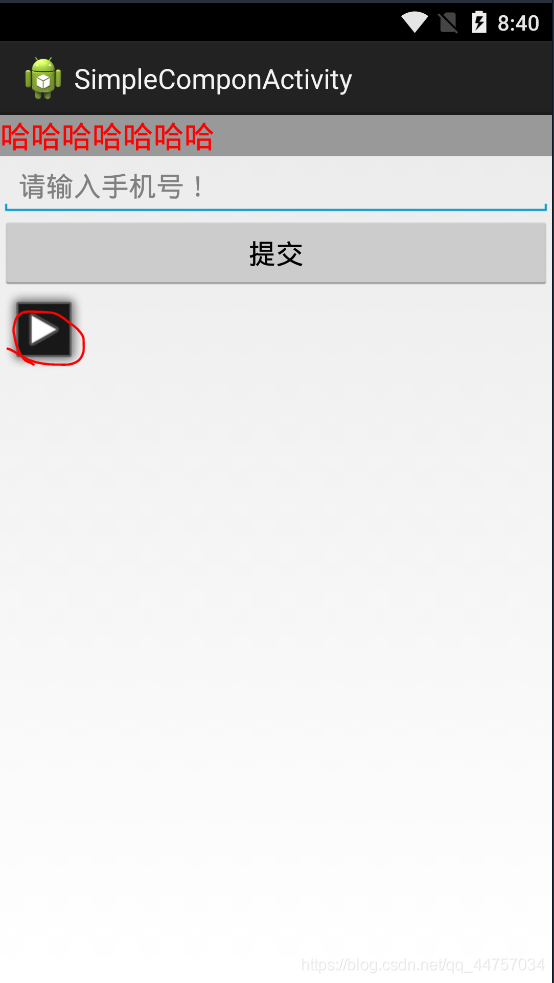
e、测试
(2)EditText:文本输入框
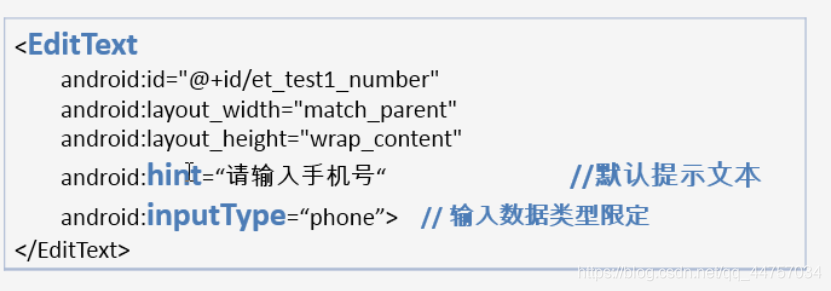
a、修改activity_simple_compon.xml
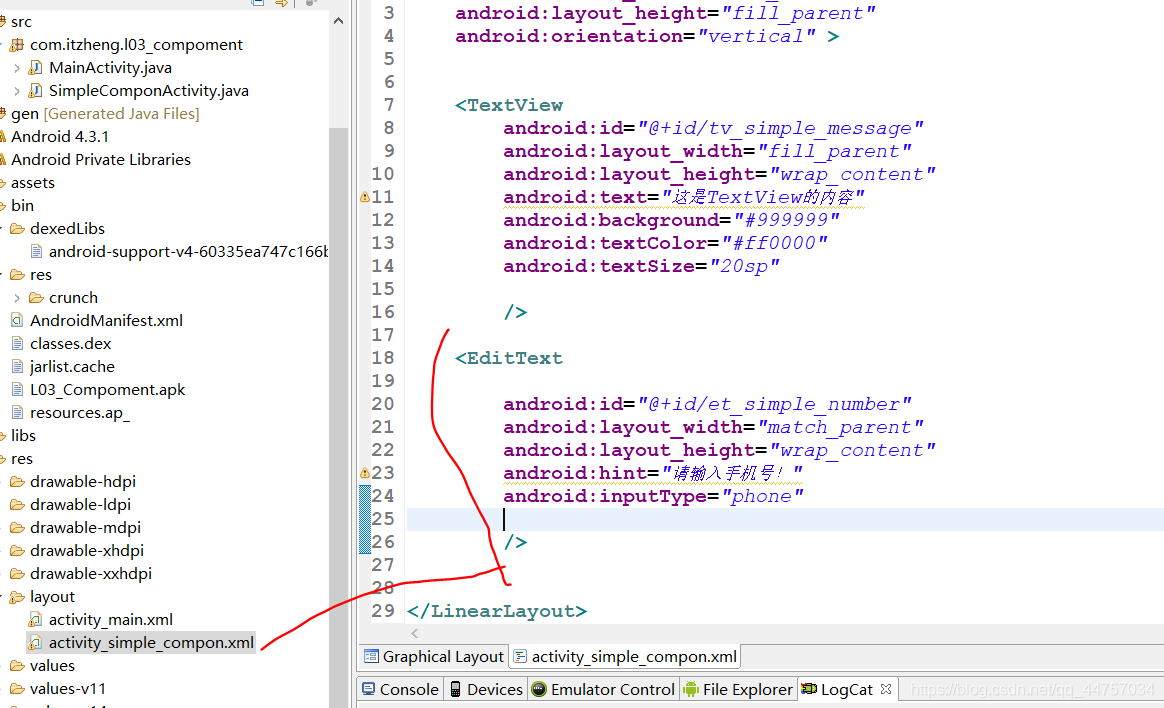
<EditText
        android:id="@+id/et_simple_number"
        android:layout_width="match_parent"
        android:layout_height="wrap_content"
        android:hint="请输入手机号!"
        android:inputType="phone"
        />
b、设置phone属性后只能输入数字

(3)Button:按钮
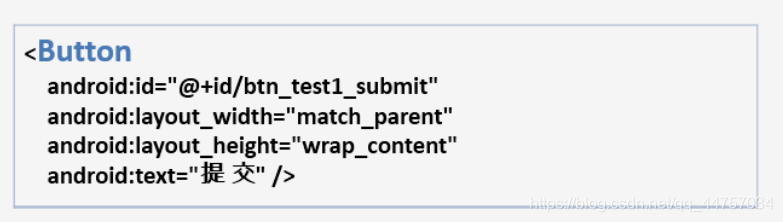
a、修改activity_simple_compon.xml
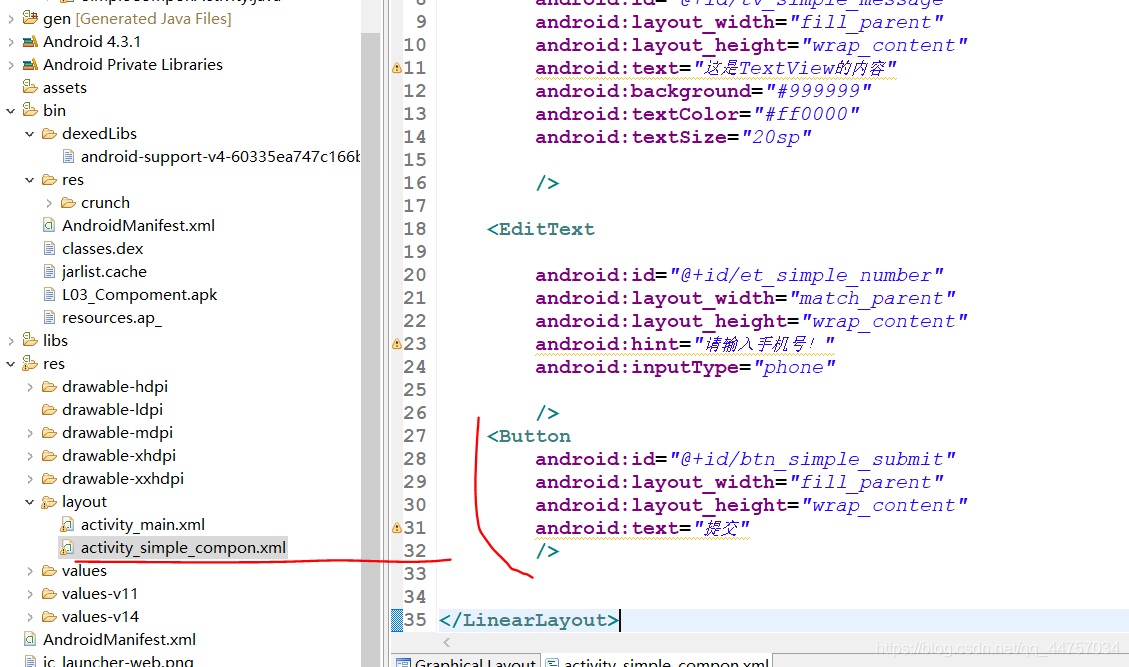
<Button
        android:id="@+id/btn_simple_submit"
        android:layout_width="fill_parent"
        android:layout_height="wrap_content"
        android:text="提交"
        />
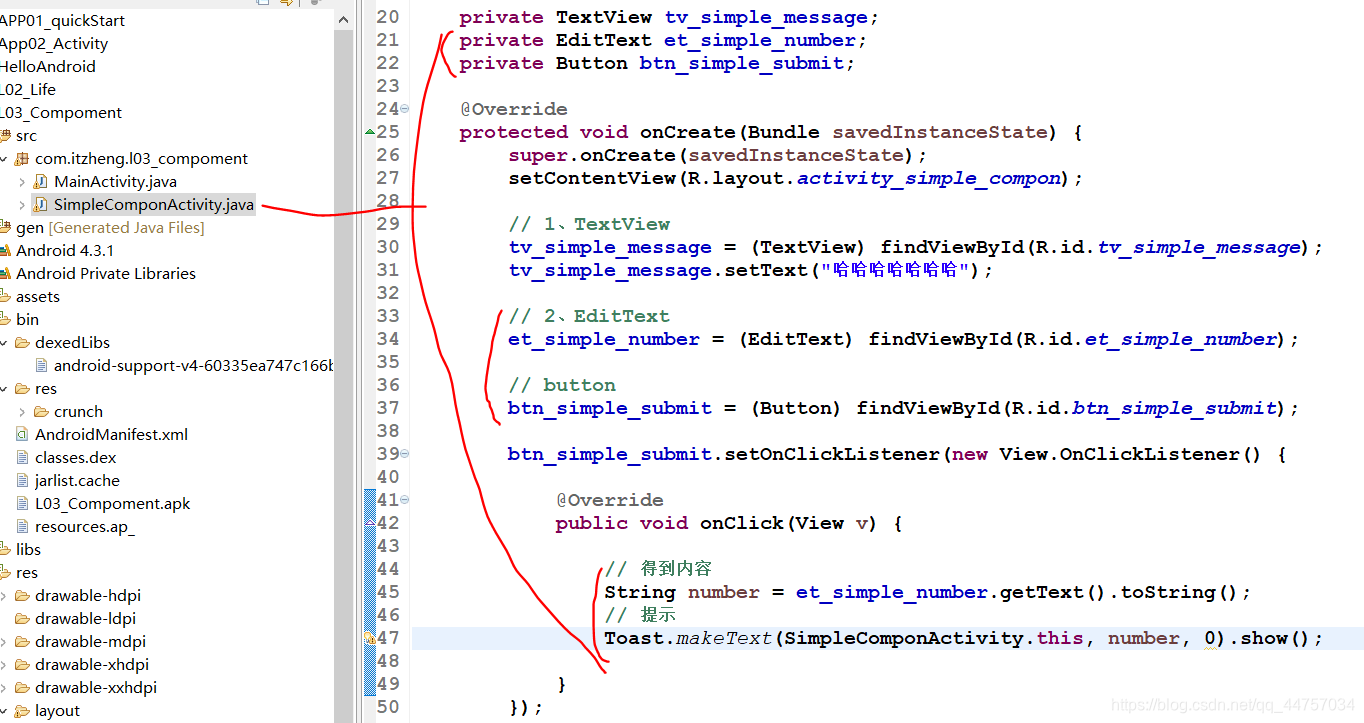
b、实现功能,点击按钮将输入框当中的内容提交弹出,修改SimpleComponActivity
(4)ImageView
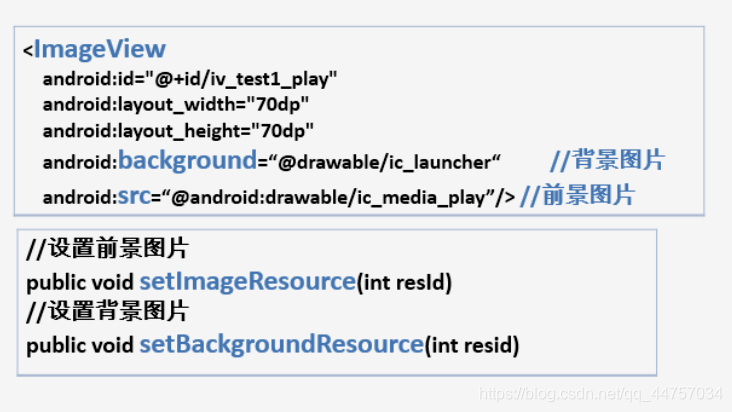
a、修改activity_simple_compon.xml
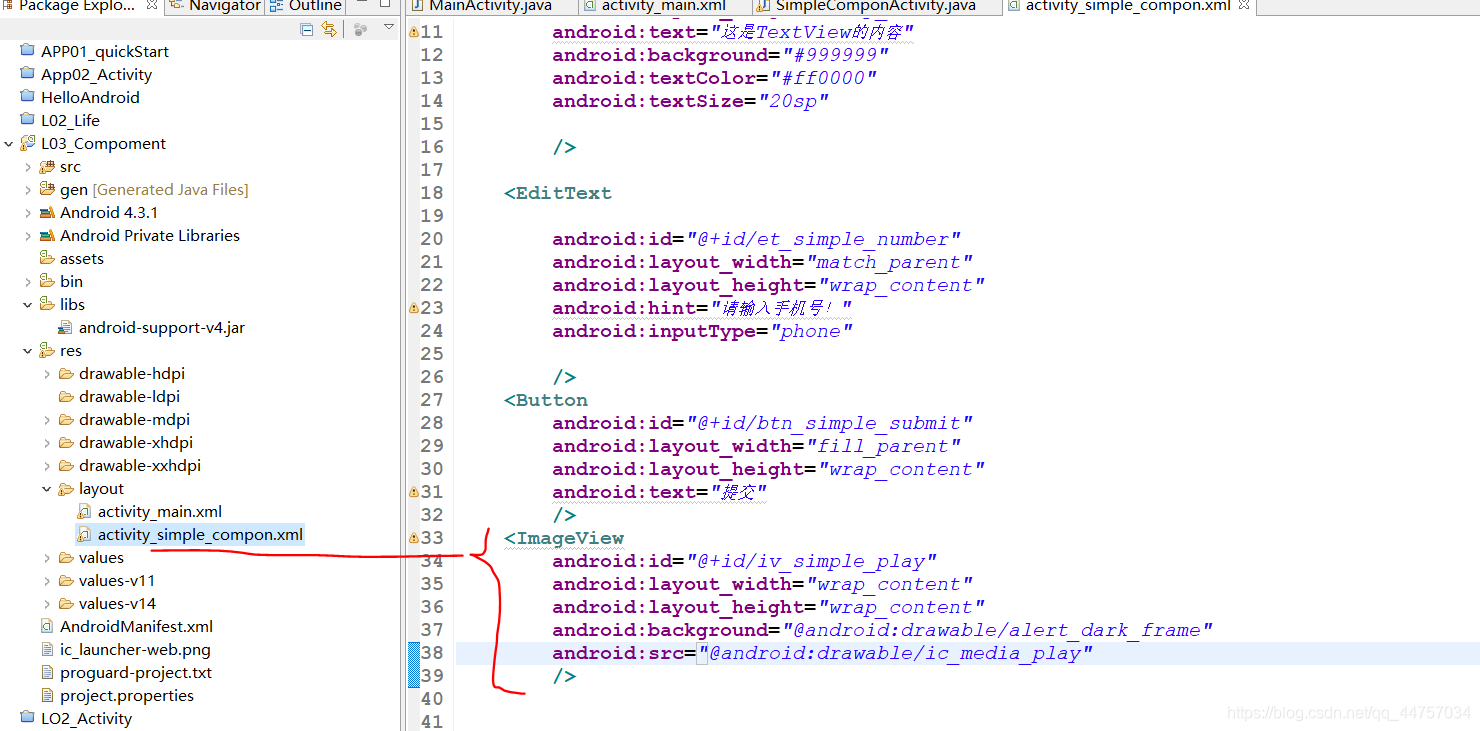
<ImageView
        android:id="@+id/iv_simple_play"
        android:layout_width="wrap_content"
        android:layout_height="wrap_content"
        android:background="@android:drawable/alert_dark_frame"
        android:src="@android:drawable/ic_media_play"
        />
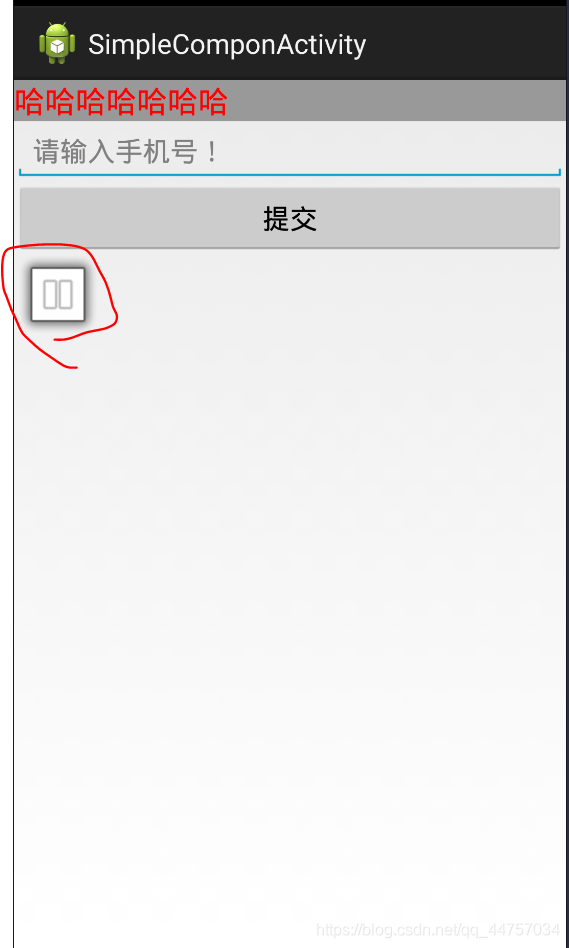
b、实现功能:点击图片变换图片:修改SimpleComponActivity
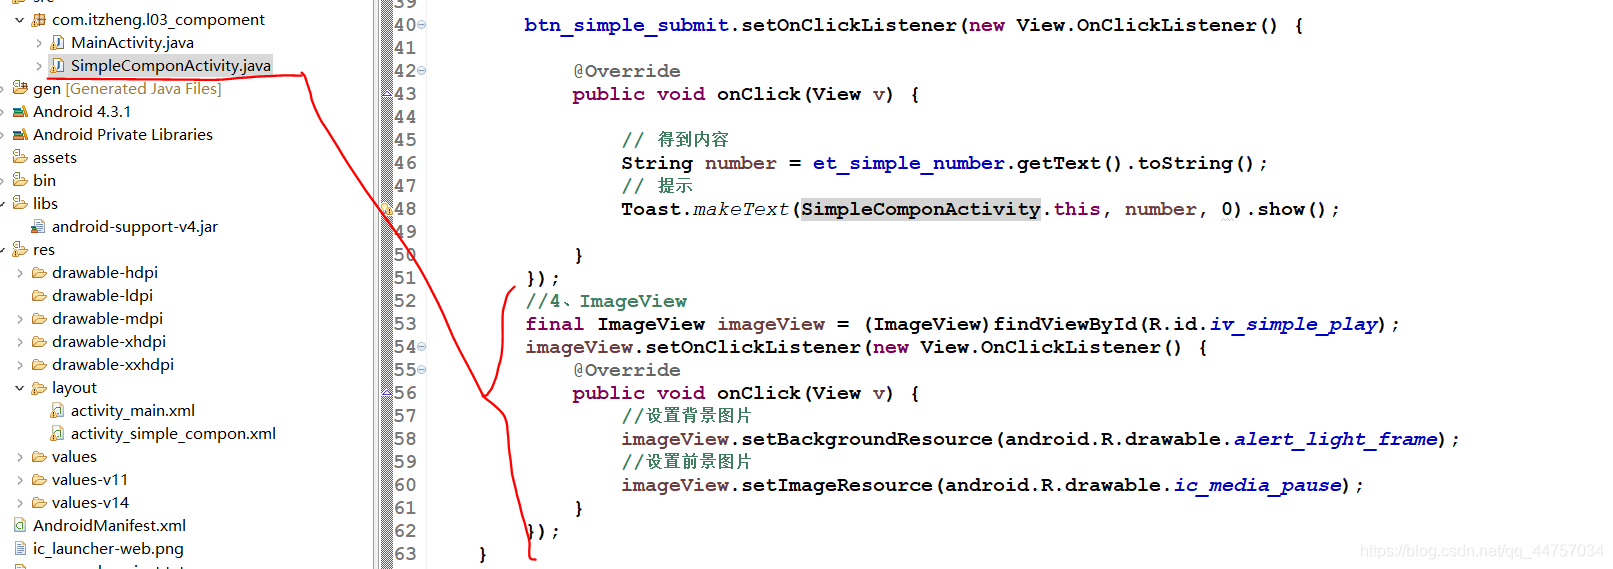
//4、ImageView
		final ImageView imageView = (ImageView)findViewById(R.id.iv_simple_play);
		imageView.setOnClickListener(new View.OnClickListener() {


			@Override
			public void onClick(View v) {


				//设置背景图片
				imageView.setBackgroundResource(android.R.drawable.alert_light_frame);
				//设置前景图片
				imageView.setImageResource(android.R.drawable.ic_media_pause);
			}
		});
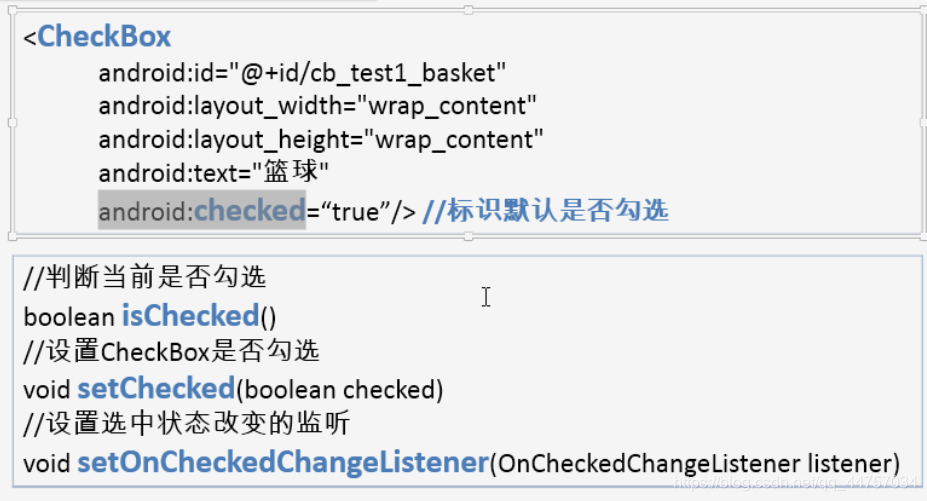
(5)CheckBox多选框
a、修改activity_simple_compon.xml
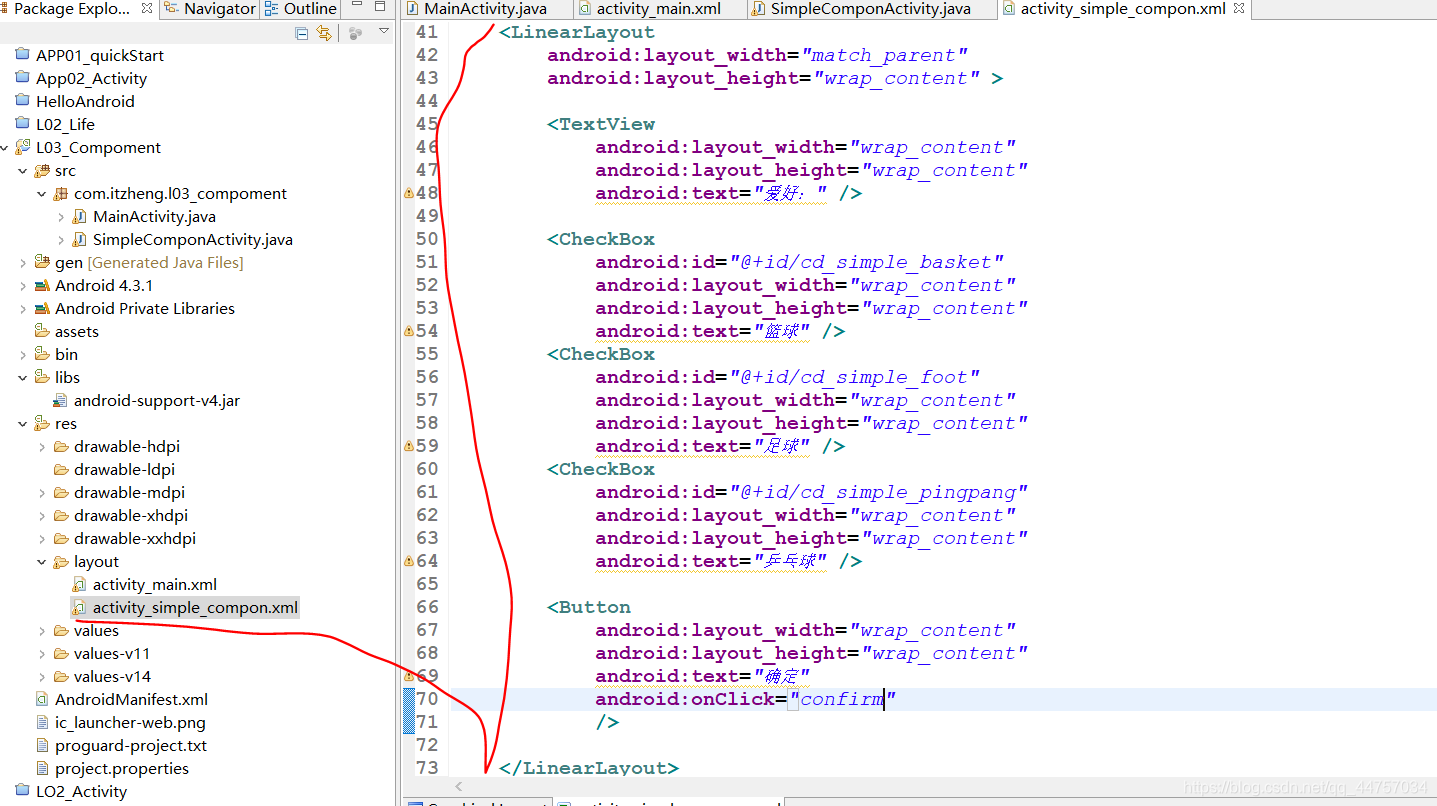
<LinearLayout
        android:layout_width="match_parent"
        android:layout_height="wrap_content" >
        <TextView
            android:layout_width="wrap_content"
            android:layout_height="wrap_content"
            android:text="爱好:" />
        <CheckBox
            android:id="@+id/cd_simple_basket"
            android:layout_width="wrap_content"
            android:layout_height="wrap_content"
            android:text="篮球" />
        <CheckBox
            android:id="@+id/cd_simple_foot"
            android:layout_width="wrap_content"
            android:layout_height="wrap_content"
            android:text="足球" />
        <CheckBox
            android:id="@+id/cd_simple_pingpang"
            android:layout_width="wrap_content"
            android:layout_height="wrap_content"
            android:text="乒乓球" />
        <Button
            android:layout_width="wrap_content"
            android:layout_height="wrap_content"
            android:text="确定"
            android:onClick="confirm"
            />
    </LinearLayout>
b、实现勾选框,点击确定提示信息,修改SimpleComponActivity
全部代码
package com.itzheng.l03_compoment;
import org.w3c.dom.Text;
import android.app.Activity;
import android.os.Bundle;
import android.view.Menu;
import android.view.MenuItem;
import android.view.View;
import android.widget.Button;
import android.widget.CheckBox;
import android.widget.EditText;
import android.widget.ImageView;
import android.widget.TextView;
import android.widget.Toast;
/*
* 简单的component
*/
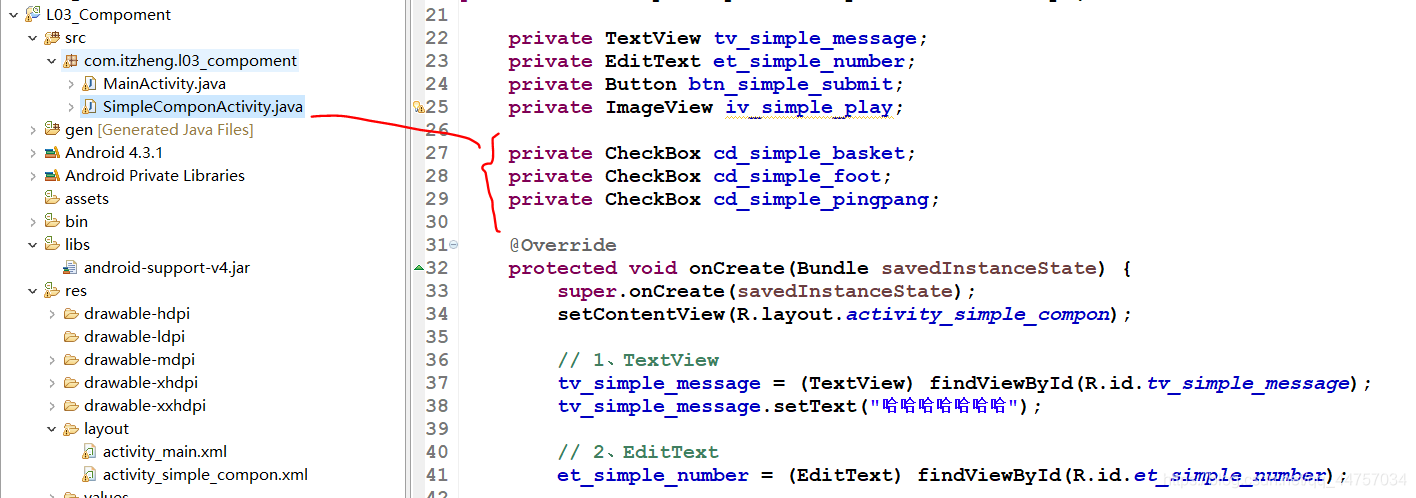
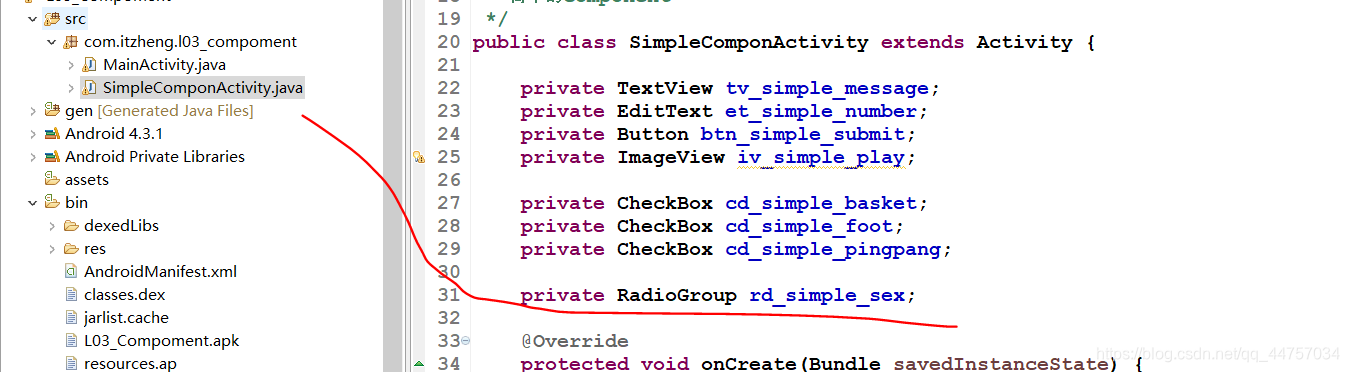
public class SimpleComponActivity extends Activity {
private TextView tv_simple_message;
private EditText et_simple_number;
private Button btn_simple_submit;
private ImageView iv_simple_play;
private CheckBox cd_simple_basket;
private CheckBox cd_simple_foot;
private CheckBox cd_simple_pingpang;
@Override
protected void onCreate(Bundle savedInstanceState) {
super.onCreate(savedInstanceState);
setContentView(R.layout.activity_simple_compon);
// 1、TextView
tv_simple_message = (TextView) findViewById(R.id.tv_simple_message);
tv_simple_message.setText("哈哈哈哈哈哈哈");
// 2、EditText
et_simple_number = (EditText) findViewById(R.id.et_simple_number);
// button
btn_simple_submit = (Button) findViewById(R.id.btn_simple_submit);
btn_simple_submit.setOnClickListener(new View.OnClickListener() {
@Override
public void onClick(View v) {
// 得到内容
String number = et_simple_number.getText().toString();
// 提示
Toast.makeText(SimpleComponActivity.this, number, 0).show();
}
});
// 4、ImageView
final ImageView imageView = (ImageView) findViewById(R.id.iv_simple_play);
imageView.setOnClickListener(new View.OnClickListener() {
@Override
public void onClick(View v) {
// 设置背景图片
imageView
.setBackgroundResource(android.R.drawable.alert_light_frame);
// 设置前景图片
imageView.setImageResource(android.R.drawable.ic_media_pause);
}
});
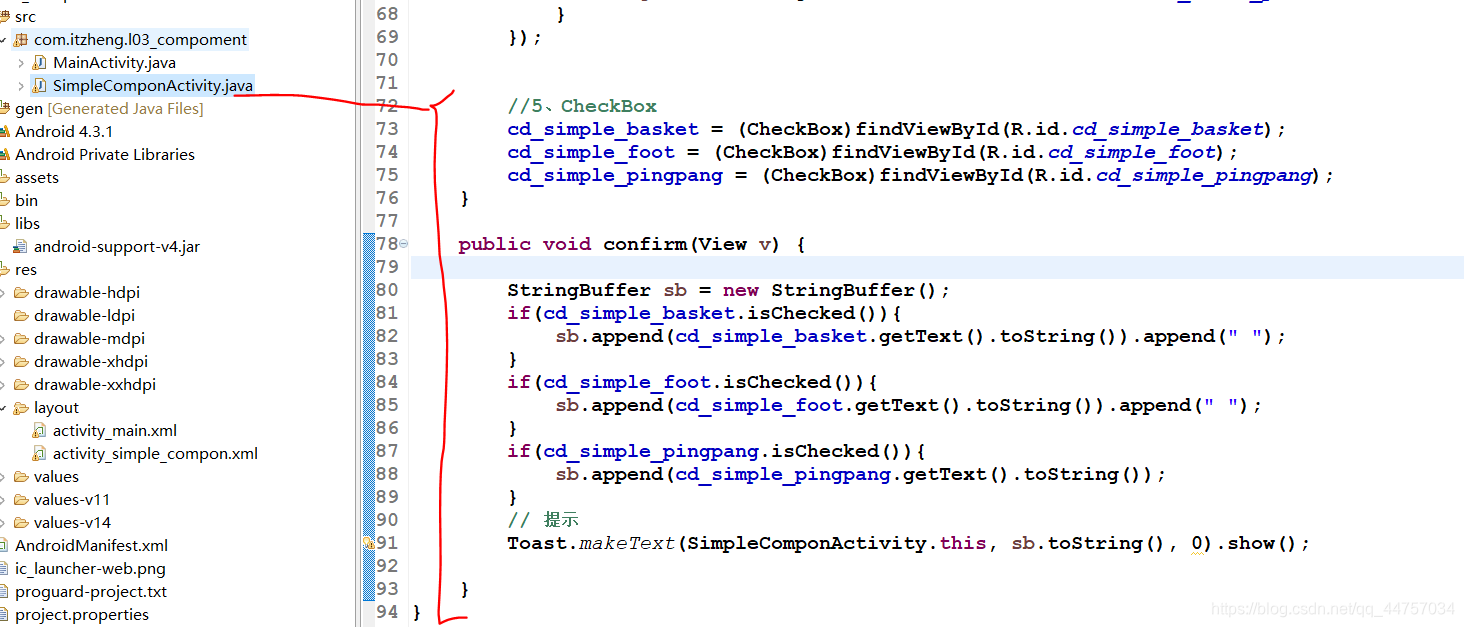
//5、CheckBox
cd_simple_basket = (CheckBox)findViewById(R.id.cd_simple_basket);
cd_simple_foot = (CheckBox)findViewById(R.id.cd_simple_foot);
cd_simple_pingpang = (CheckBox)findViewById(R.id.cd_simple_pingpang);
}
public void confirm(View v) {
StringBuffer sb = new StringBuffer();
if(cd_simple_basket.isChecked()){
sb.append(cd_simple_basket.getText().toString()).append(" ");
}
if(cd_simple_foot.isChecked()){
sb.append(cd_simple_foot.getText().toString()).append(" ");
}
if(cd_simple_pingpang.isChecked()){
sb.append(cd_simple_pingpang.getText().toString());
}
// 提示
Toast.makeText(SimpleComponActivity.this, sb.toString(), 0).show();
}
}

e、实现勾选框提示信息,修改SimpleComponActivity

	//给上面三个设置选中状态改变监听
		cd_simple_pingpang.setOnCheckedChangeListener(new CompoundButton.OnCheckedChangeListener() {


			@Override
			public void onCheckedChanged(CompoundButton buttonView, boolean isChecked) {


				if(isChecked){


					// 提示
					Toast.makeText(SimpleComponActivity.this, cd_simple_pingpang.getText().toString(), 0).show();
				}
			}
		});
		cd_simple_foot.setOnCheckedChangeListener(new CompoundButton.OnCheckedChangeListener() {


			@Override
			public void onCheckedChanged(CompoundButton buttonView, boolean isChecked) {


				if(isChecked){


					// 提示
					Toast.makeText(SimpleComponActivity.this, cd_simple_foot.getText().toString(), 0).show();
				}
			}
		});
		cd_simple_basket.setOnCheckedChangeListener(new CompoundButton.OnCheckedChangeListener() {


			@Override
			public void onCheckedChanged(CompoundButton buttonView, boolean isChecked) {


				if(isChecked){


					// 提示
					Toast.makeText(SimpleComponActivity.this, cd_simple_basket.getText().toString(), 0).show();
				}
			}
		});
(6)RadioGroup/RadioButtion:单选框
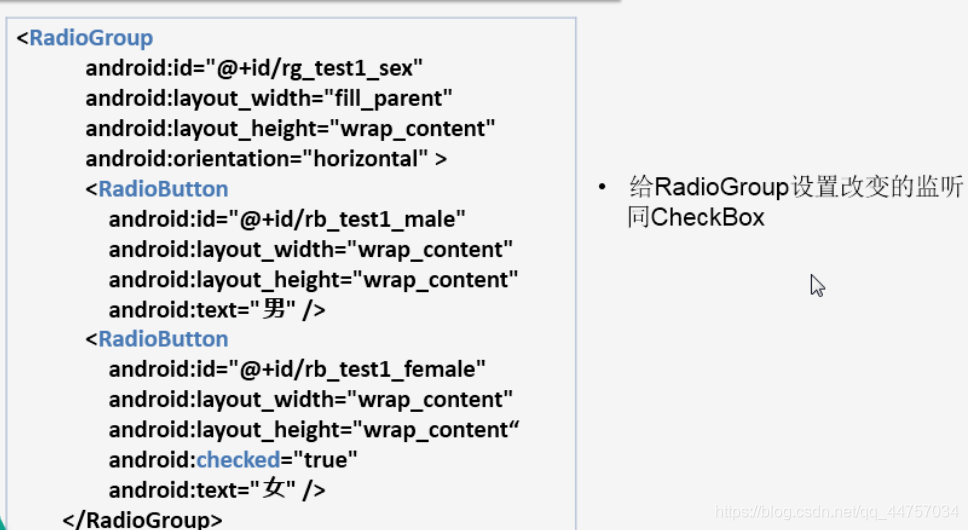
a、修改activity_simple_compon.xml
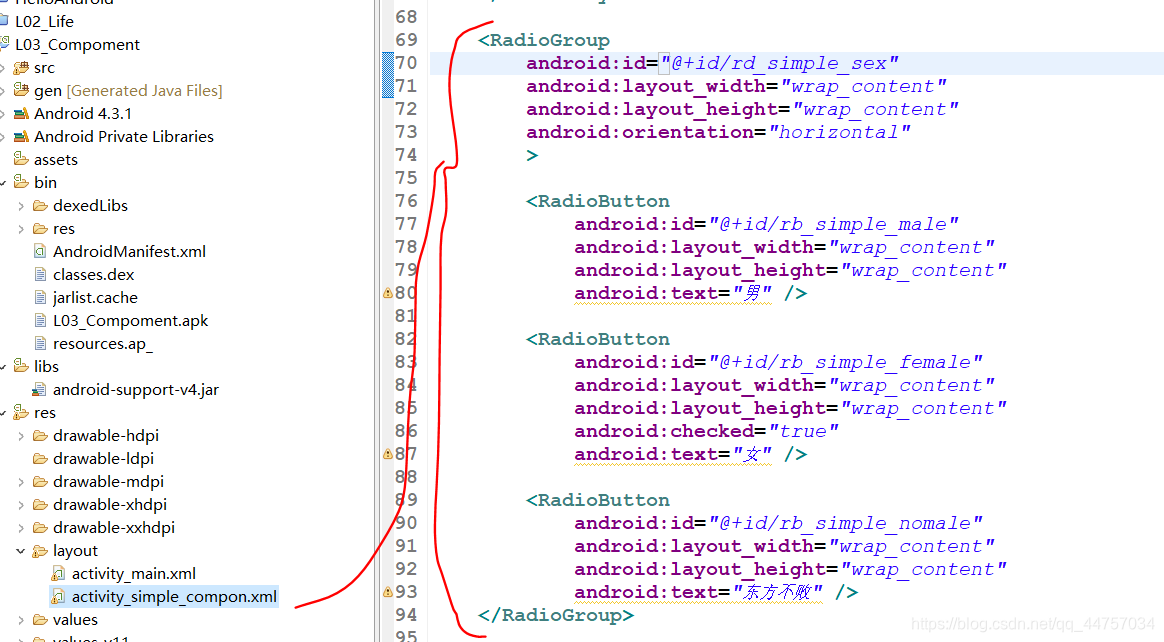
    <RadioGroup
        android:id="@+id/rd_simple_sex"
        android:layout_width="wrap_content"
        android:layout_height="wrap_content"
        android:orientation="horizontal"
        >
        <RadioButton
            android:id="@+id/rb_simple_male"
            android:layout_width="wrap_content"
            android:layout_height="wrap_content"
            android:text="男" />

        <RadioButton
            android:id="@+id/rb_simple_female"
            android:layout_width="wrap_content"
            android:layout_height="wrap_content"
            android:checked="true"
            android:text="女" />

        <RadioButton
            android:id="@+id/rb_simple_nomale"
            android:layout_width="wrap_content"
            android:layout_height="wrap_content"
            android:text="东方不败" />
    </RadioGroup>
b、修改SimpleComponActivity
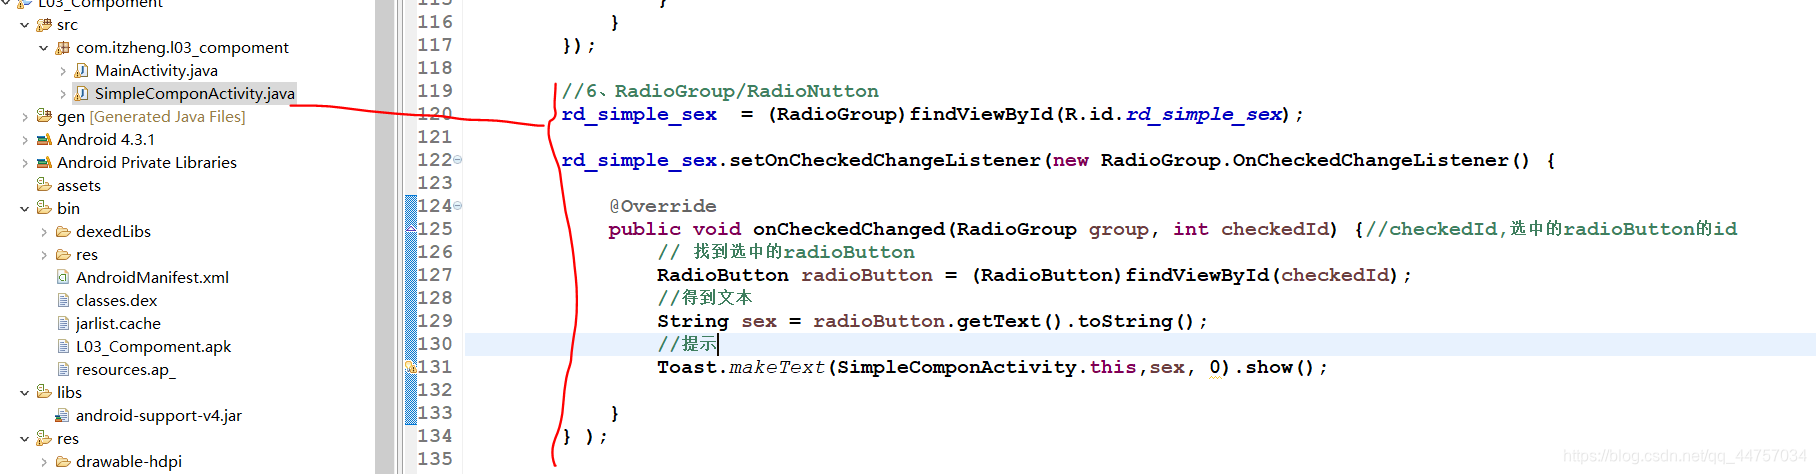
//6、RadioGroup/RadioNutton
		rd_simple_sex  = (RadioGroup)findViewById(R.id.rd_simple_sex);

		rd_simple_sex.setOnCheckedChangeListener(new RadioGroup.OnCheckedChangeListener() {


			@Override
			public void onCheckedChanged(RadioGroup group, int checkedId) {

    //checkedId,选中的radioButton的id
				// 找到选中的radioButton
				RadioButton radioButton = (RadioButton)findViewById(checkedId);
				//得到文本
				String sex = radioButton.getText().toString();
				//提示
				Toast.makeText(SimpleComponActivity.this,sex, 0).show();

			}
		} );
c、测试

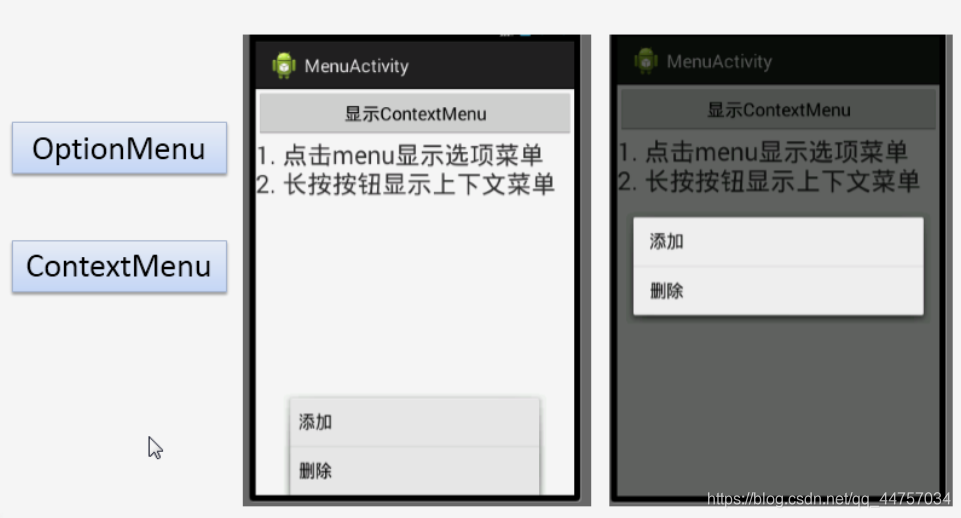
(7)菜单Component(Menu)
a、修改MainActivity

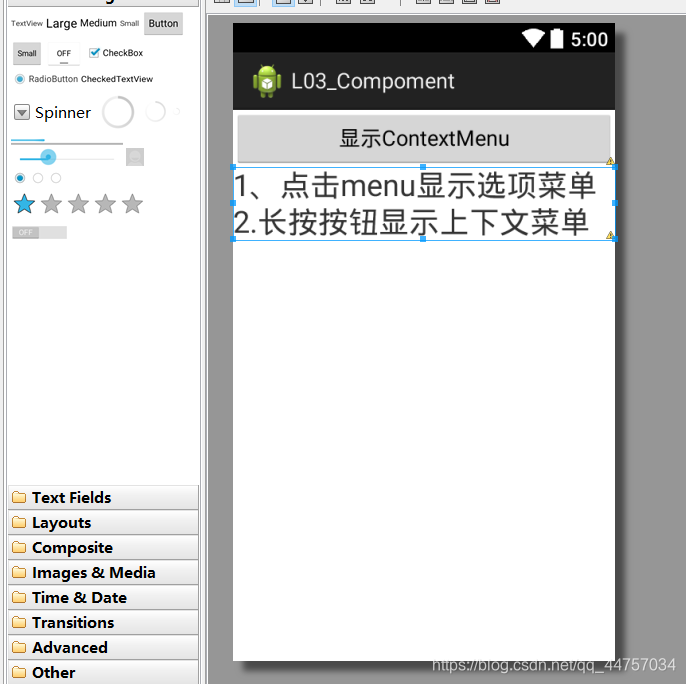
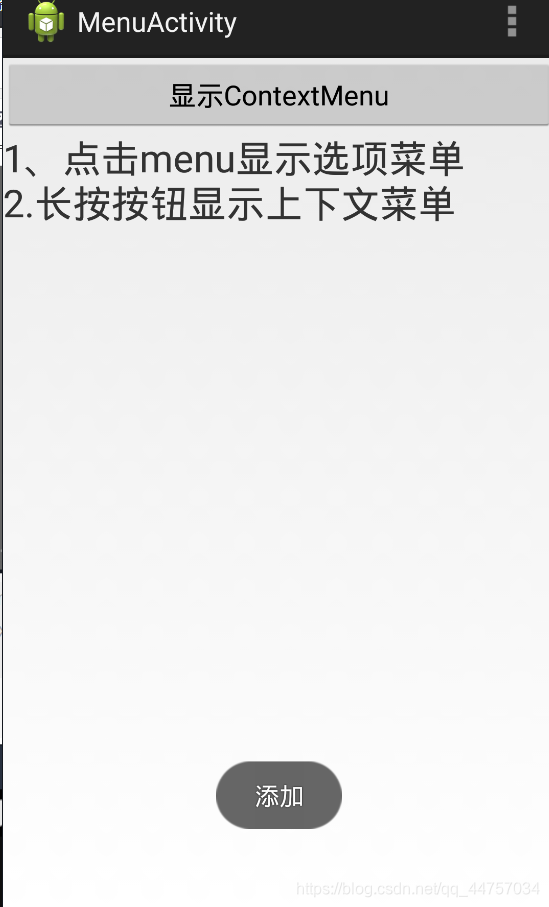
b、创建MenuActivity,修改activity_menu.xml
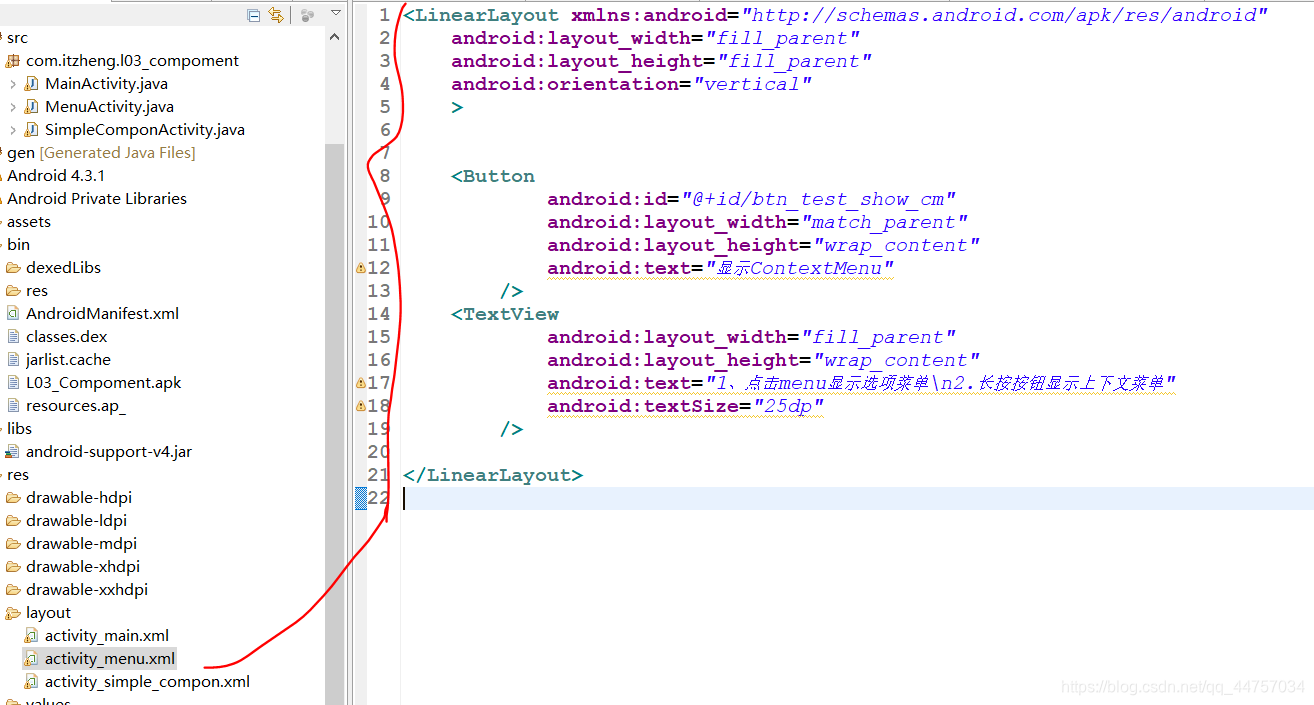
<LinearLayout xmlns:android="http://schemas.android.com/apk/res/android"
android:layout_width="fill_parent"
android:layout_height="fill_parent"
android:orientation="vertical"
>
<Button
android:id="@+id/btn_test_show_cm"
android:layout_width="match_parent"
android:layout_height="wrap_content"
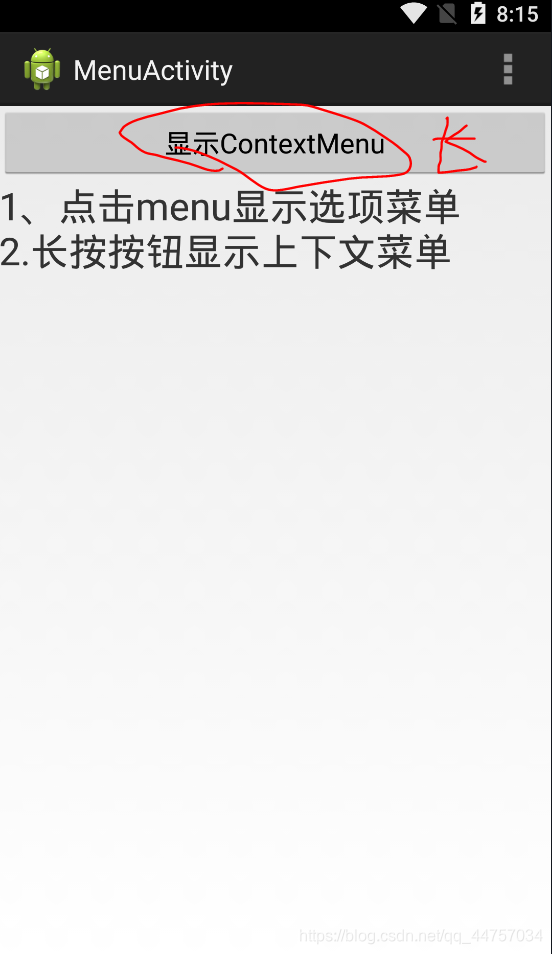
android:text="显示ContextMenu"
/>
<TextView
android:layout_width="fill_parent"
android:layout_height="wrap_content"
android:text="1、点击menu显示选项菜单\n2.长按按钮显示上下文菜单"
android:textSize="25dp"
/>
</LinearLayout>
1)关于Menu的三个问题

2)OptionMenu

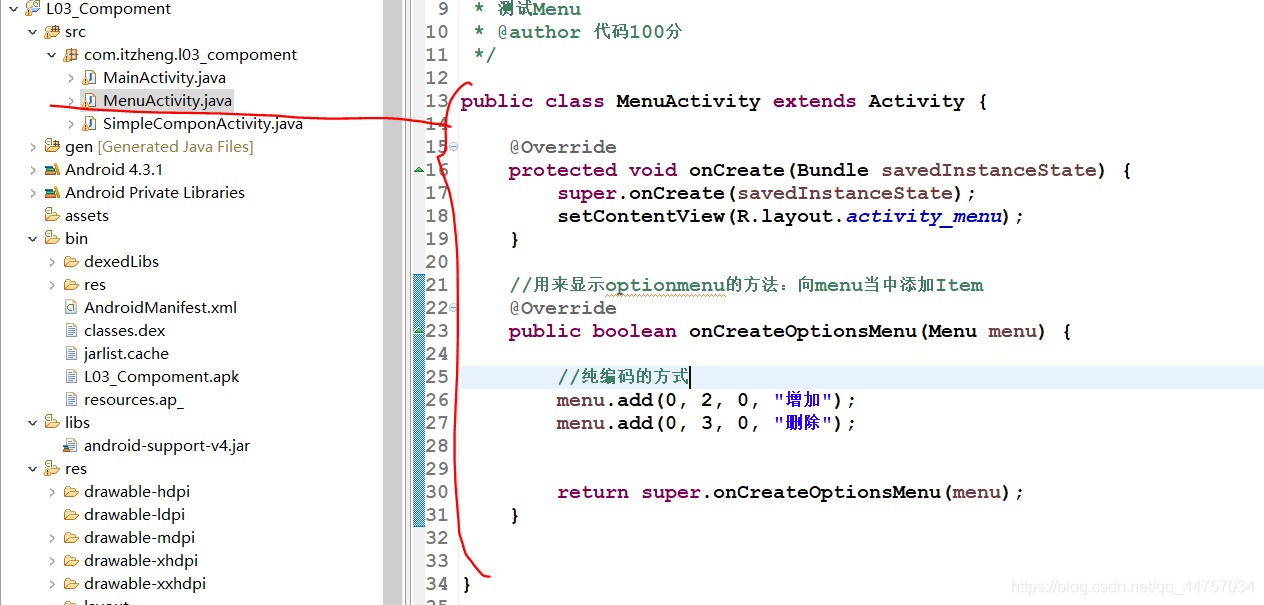
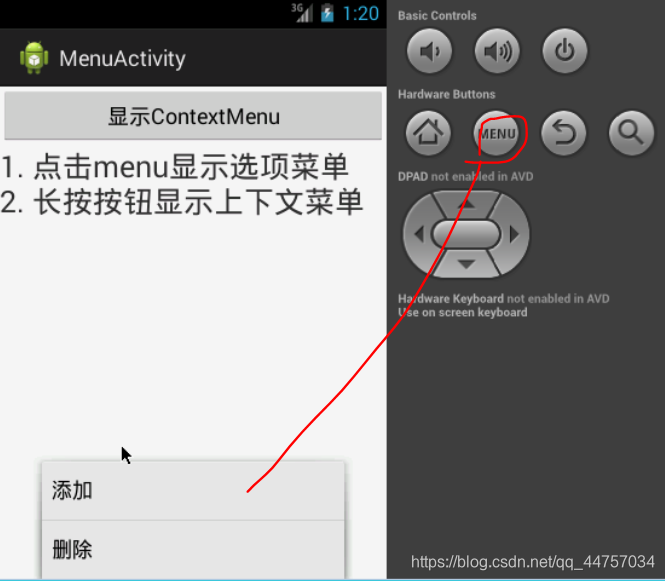
a、修改MenuActivity(实现OptionMenu)点击Menu键实现上述效果(menu.add())
b、测试
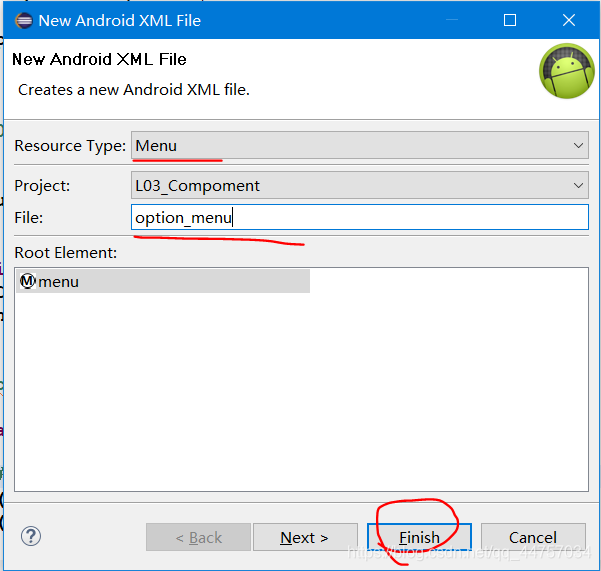
c、通过定义菜单文件的方式实现上述功能(创建菜单文件)
在res上创建XML文件
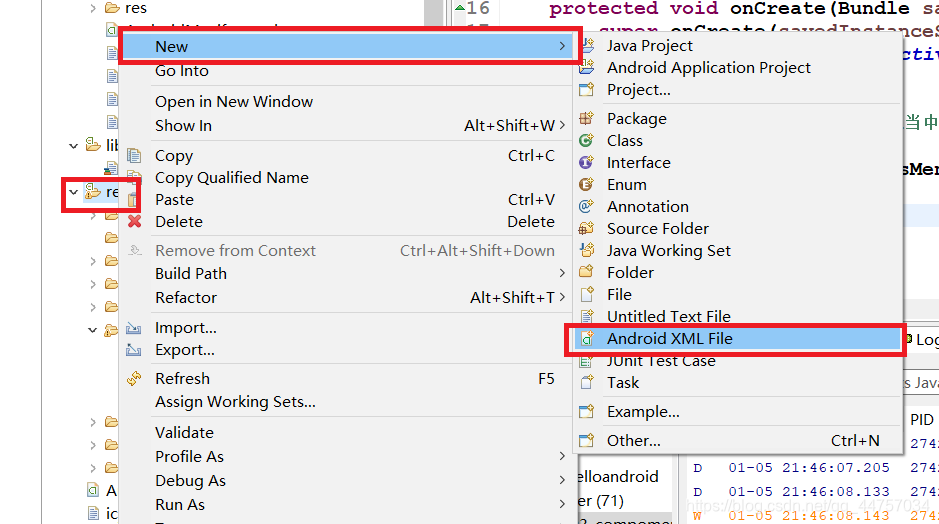
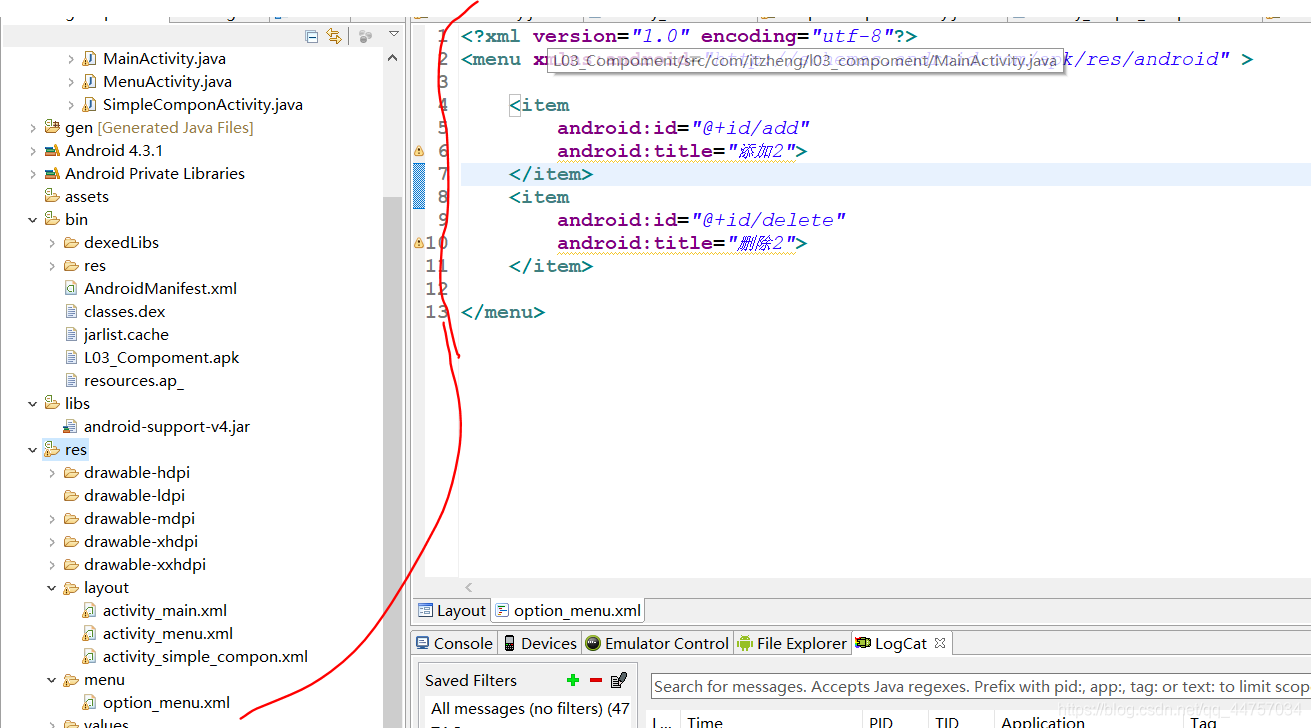
<?xml version="1.0" encoding="utf-8"?>
<menu xmlns:android="http://schemas.android.com/apk/res/android" >
    <item
        android:id="@+id/add"
        android:title="添加2">
    </item>
    <item
        android:id="@+id/delete"
        android:title="删除2">
    </item>
</menu>
d、修改MenuActivity
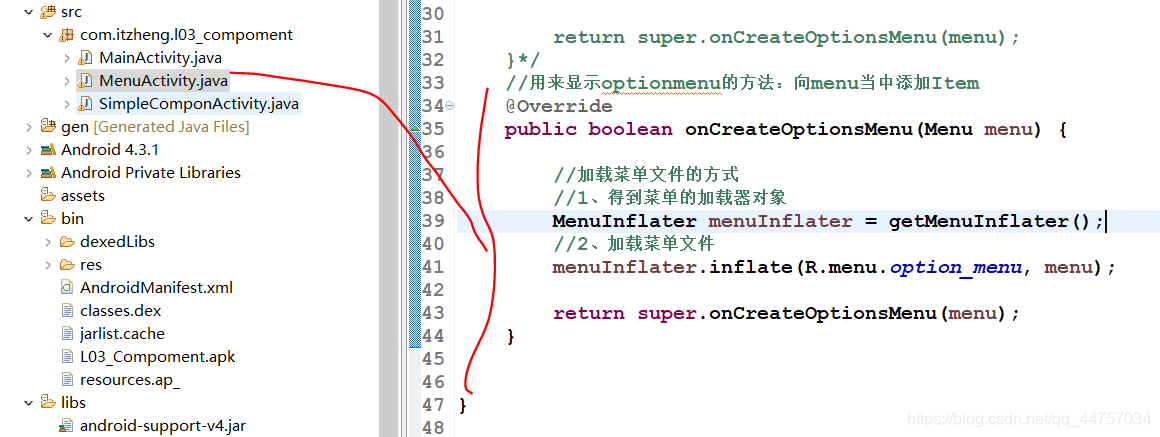
//用来显示optionmenu的方法:向menu当中添加Item
	@Override
	public boolean onCreateOptionsMenu(Menu menu) {


		//加载菜单文件的方式
		//1、得到菜单的加载器对象
		MenuInflater menuInflater = getMenuInflater();
		//2、加载菜单文件
		menuInflater.inflate(R.menu.option_menu, menu);

		return super.onCreateOptionsMenu(menu);
	}
实现效果和上面相同
3)选择某个MenuItem时如何响应,修改MenuActivity
重写一个方法onOptionsItemSelected
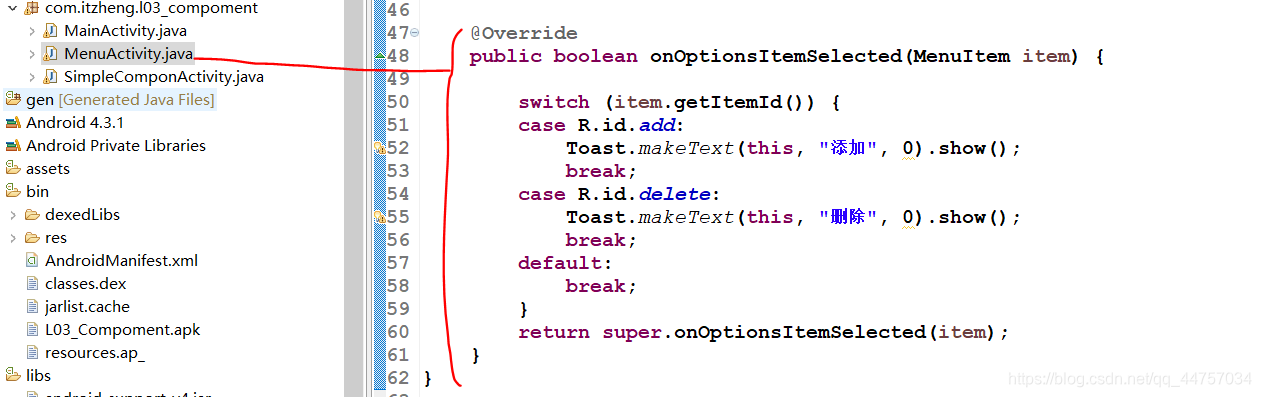
@Override
	public boolean onOptionsItemSelected(MenuItem item) {


		switch (item.getItemId()) {


		case R.id.add:
			Toast.makeText(this, "添加", 0).show();
			break;
		case R.id.delete:
			Toast.makeText(this, "删除", 0).show();
			break;
		default:
			break;
		}
		return super.onOptionsItemSelected(item);
	}
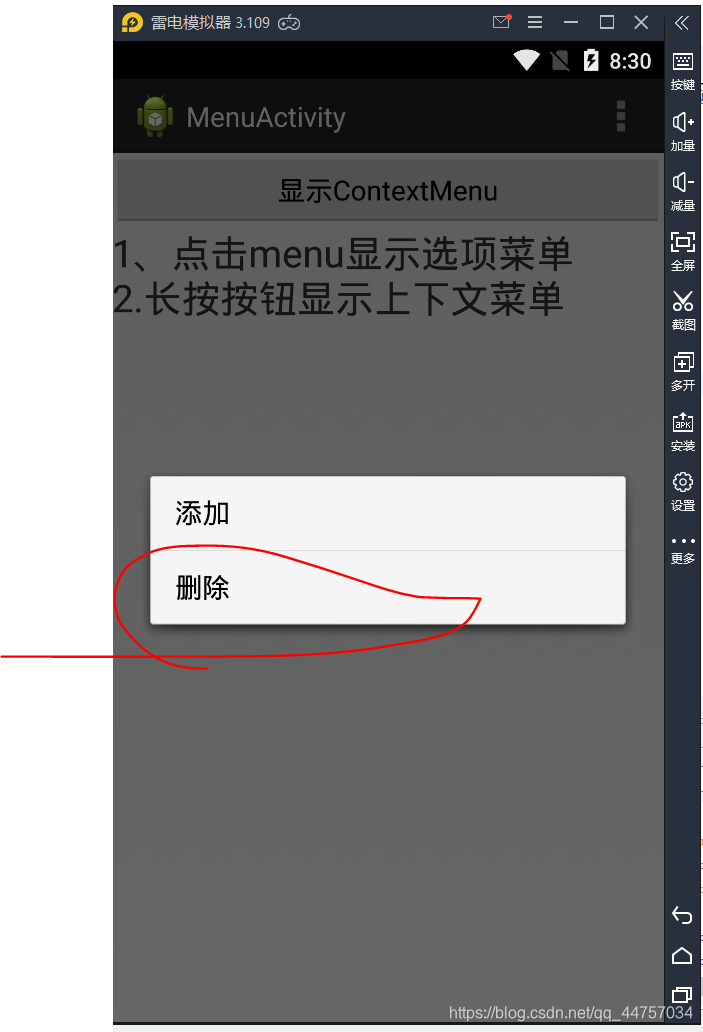
(8)ContextMenu:上下文菜单

ContextMenu
1)如何触发Menu的显示?长按某一个视图,修改MenuActivity
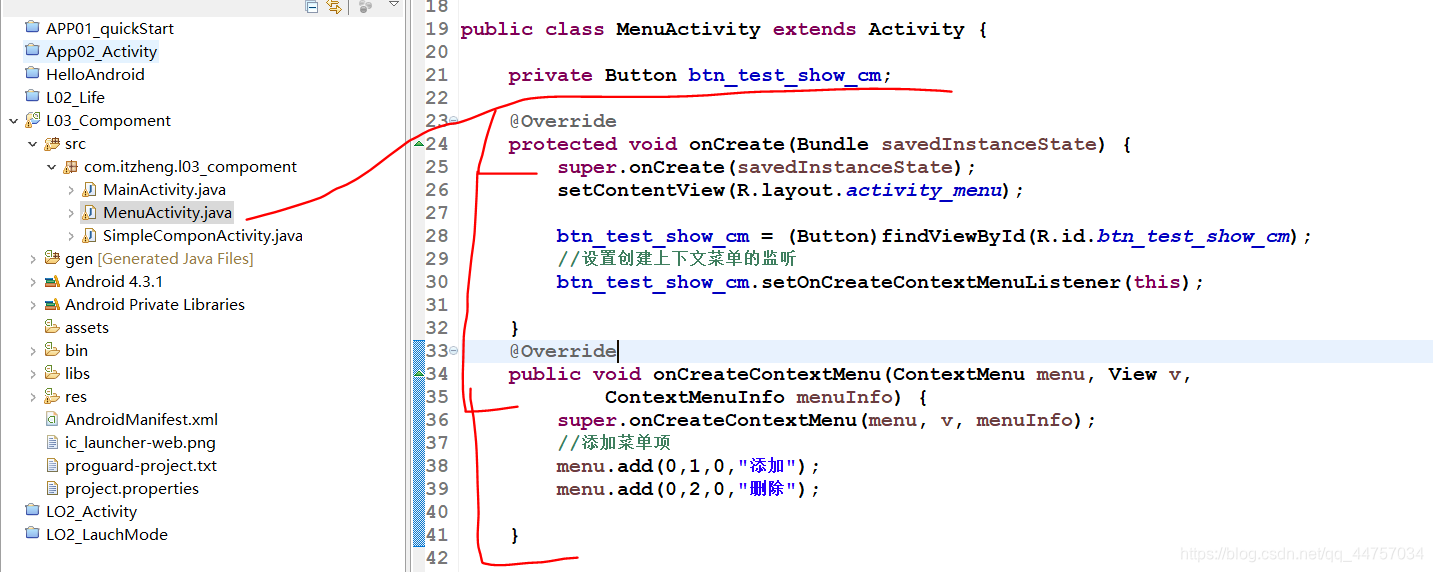
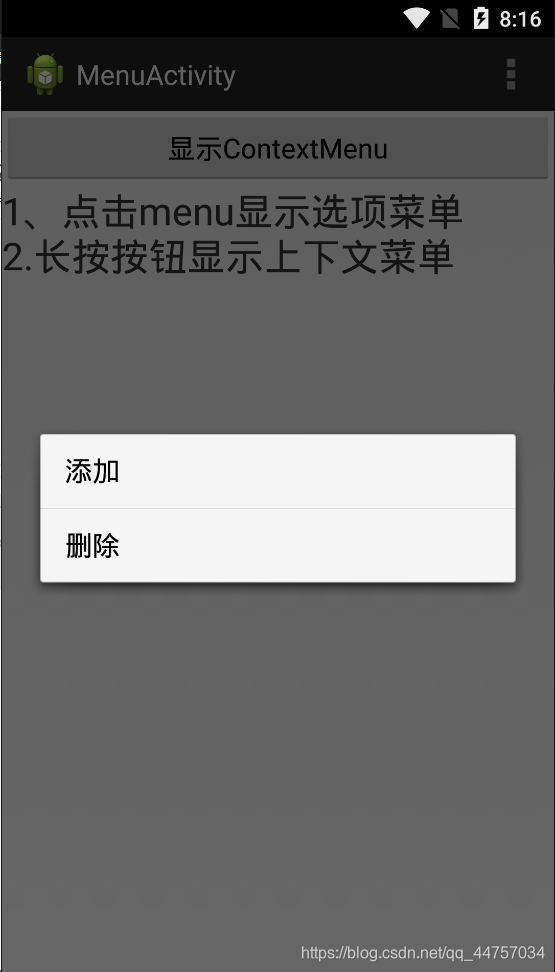
2)向Menu当中添加MenuItem,重写onCreateContextMenu(),menu.add()
3)选择某一个MenuItem时如何响应?重写onContextItemSelected(),根据itemId做响应(修改MenuActivity)
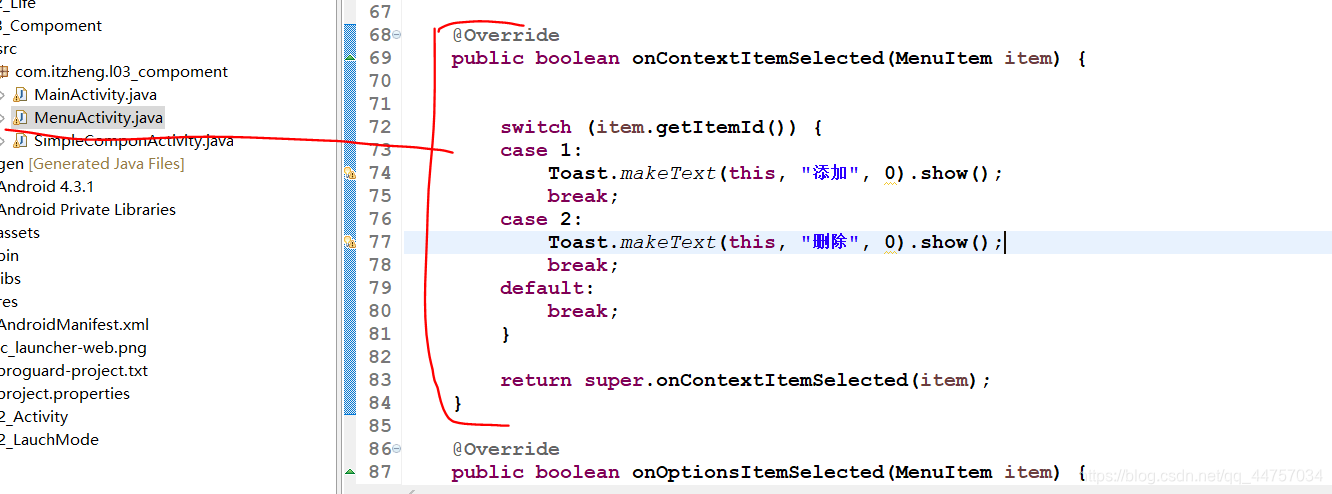
@Override
public boolean onContextItemSelected(MenuItem item) {
switch (item.getItemId()) {
case 1:
Toast.makeText(this, "添加", 0).show();
break;
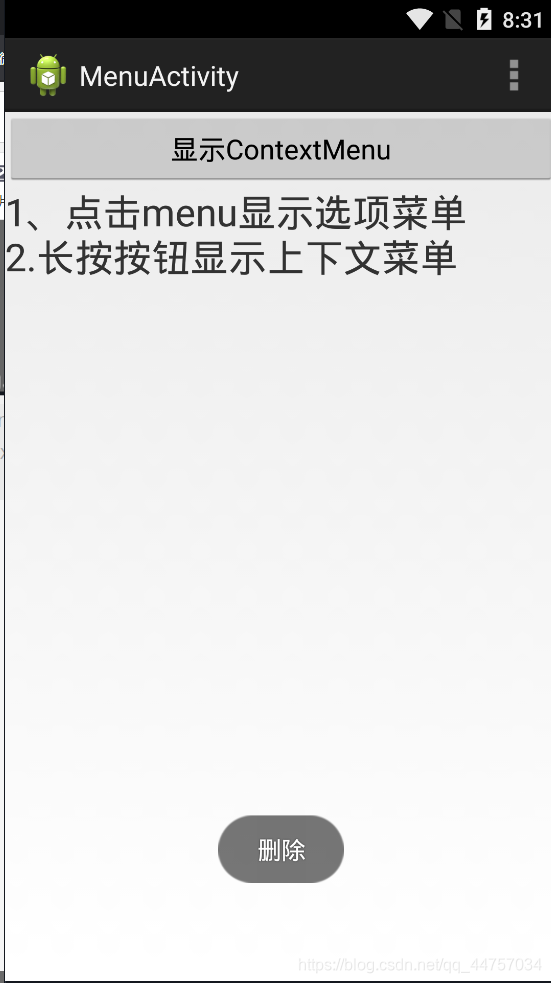
case 2:
Toast.makeText(this, "删除", 0).show();
break;
default:
break;
}
return super.onContextItemSelected(item);
}

(9)进度条Component

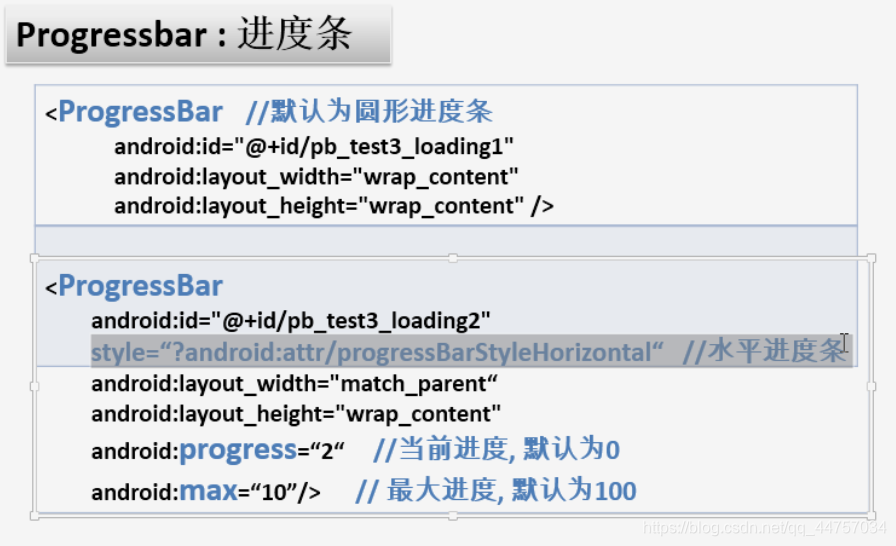
1)Progressbar进度条
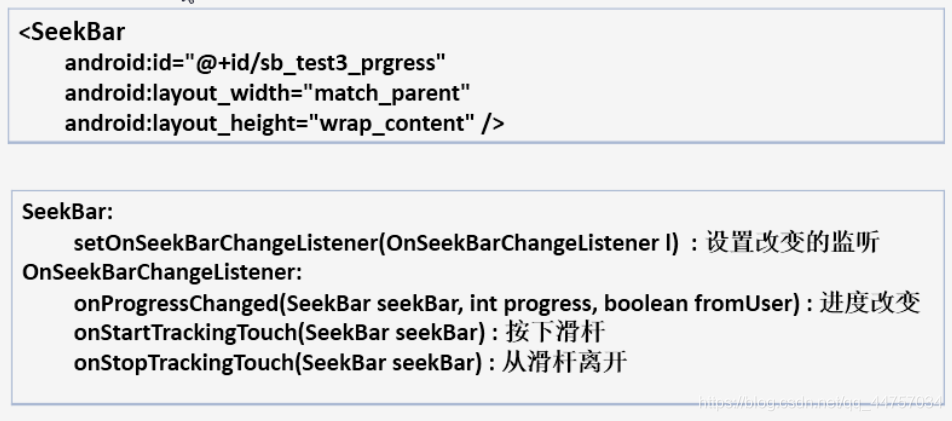
2)SeekBar:可以手动滑动的进度条
3)功能实现
a、修改MainActivity
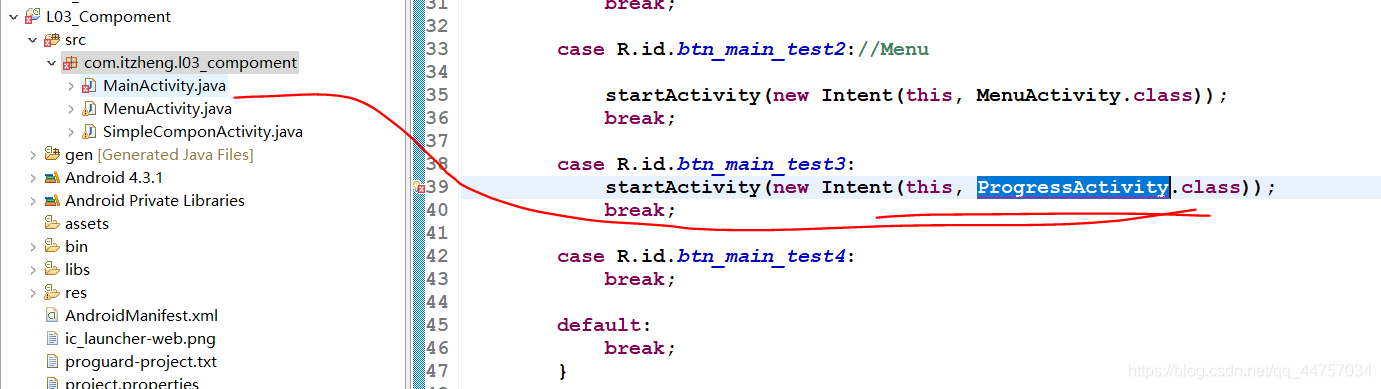
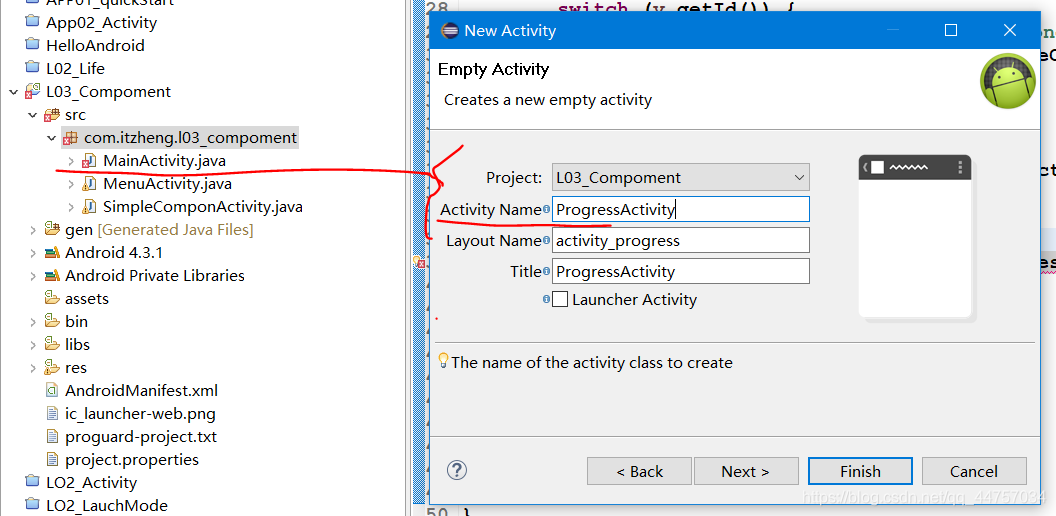
b、创建ProgressActivity
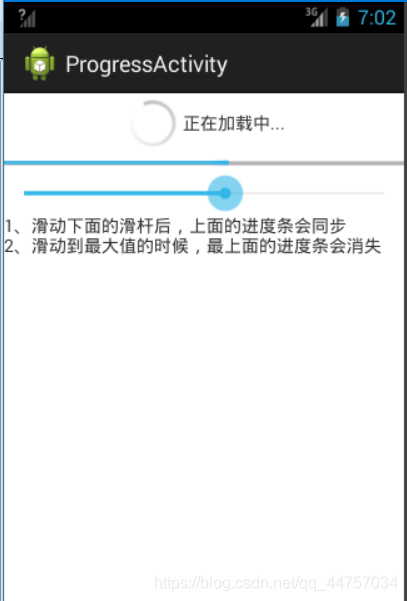
c、修改activity_progress.xml
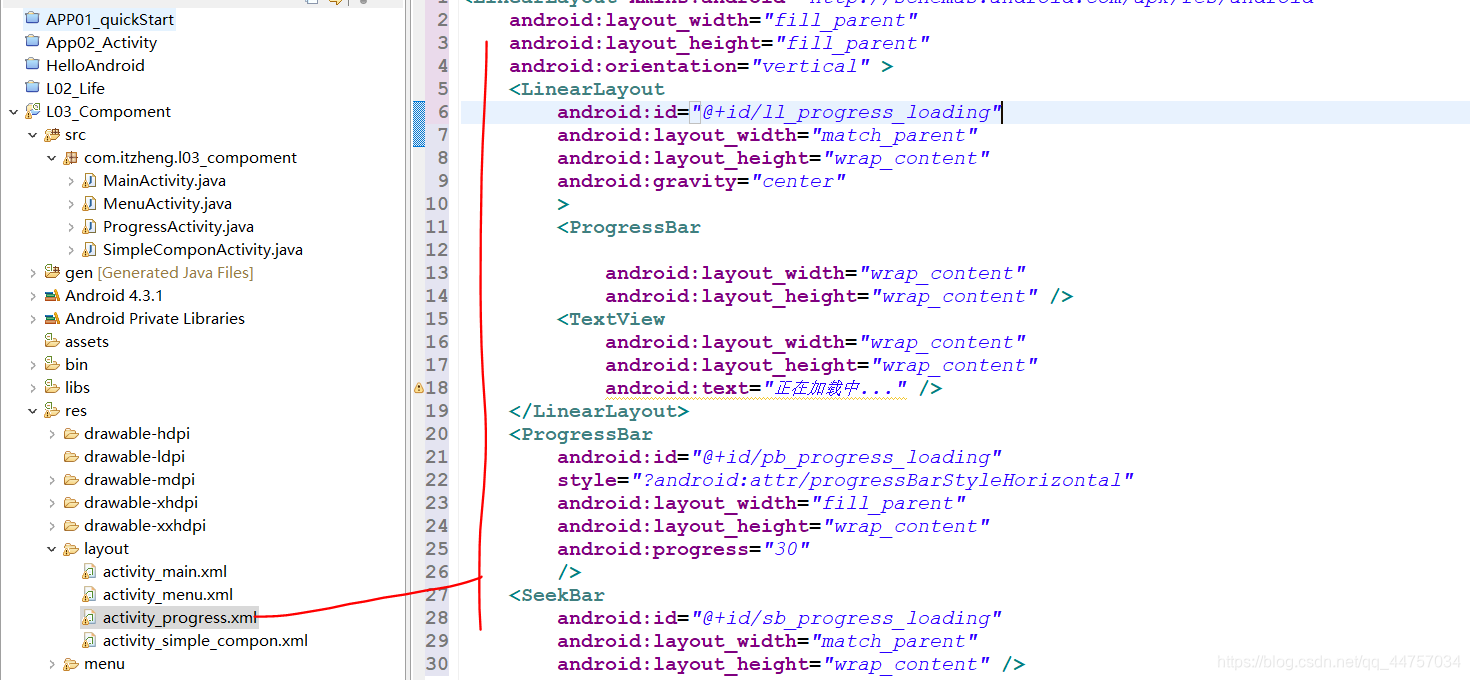
<LinearLayout xmlns:android="http://schemas.android.com/apk/res/android"
android:layout_width="fill_parent"
android:layout_height="fill_parent"
android:orientation="vertical" >
<LinearLayout
android:id="@+id/ll_progress_loading"
android:layout_width="match_parent"
android:layout_height="wrap_content"
android:gravity="center"
>
<ProgressBar
android:layout_width="wrap_content"
android:layout_height="wrap_content" />
<TextView
android:layout_width="wrap_content"
android:layout_height="wrap_content"
android:text="正在加载中..." />
</LinearLayout>
<ProgressBar
android:id="@+id/pb_progress_loading"
style="?android:attr/progressBarStyleHorizontal"
android:layout_width="fill_parent"
android:layout_height="wrap_content"
android:progress="30"
/>
<SeekBar
android:id="@+id/sb_progress_loading"
android:layout_width="match_parent"
android:layout_height="wrap_content" />
<TextView
android:layout_width="fill_parent"
android:layout_height="wrap_content"
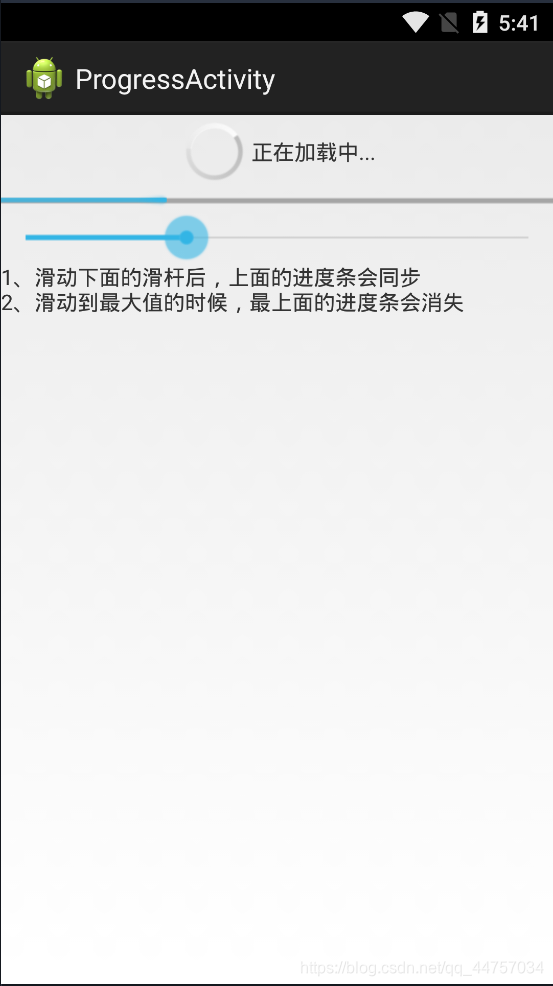
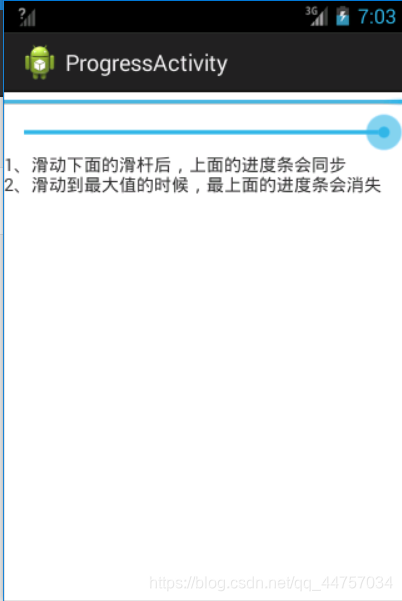
android:text="1、滑动下面的滑杆后,上面的进度条会同步\n 2、滑动到最大值的时候,最上面的进度条会消失" />
</LinearLayout>
效果
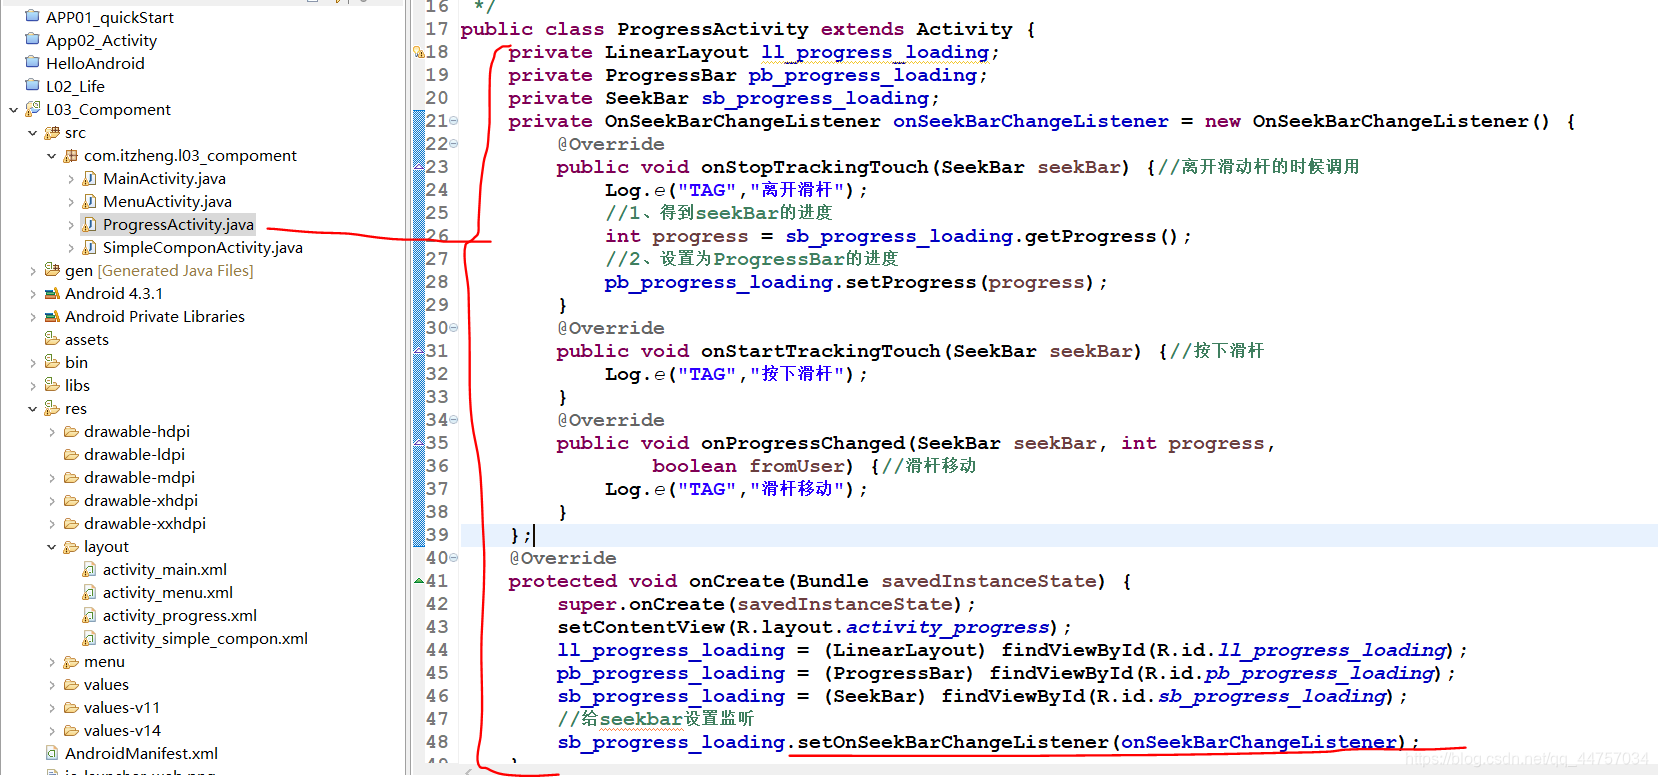
d、完成上述第一个功能ProgressActivity
package com.itzheng.l03_compoment;
import android.app.Activity;
import android.os.Bundle;
import android.util.Log;
import android.view.Menu;
import android.view.MenuItem;
import android.widget.LinearLayout;
import android.widget.ProgressBar;
import android.widget.SeekBar;
import android.widget.SeekBar.OnSeekBarChangeListener;
/*
 * 测试进度条
 *
 */
public class ProgressActivity extends Activity {


	private LinearLayout ll_progress_loading;
	private ProgressBar pb_progress_loading;
	private SeekBar sb_progress_loading;
	private OnSeekBarChangeListener onSeekBarChangeListener = new OnSeekBarChangeListener() {


		@Override
		public void onStopTrackingTouch(SeekBar seekBar) {

    //离开滑杆
			Log.e("TAG", "离开滑杆");
			//1. 得到seekBar的进度
			int progress = sb_progress_loading.getProgress();
			//2. 设置为ProgressBar的进度
			pb_progress_loading.setProgress(progress);
		}
		@Override
		public void onStartTrackingTouch(SeekBar seekBar) {

    //按下滑杆
			Log.e("TAG", "按下滑杆");
		}
		@Override
		public void onProgressChanged(SeekBar seekBar, int progress,
				boolean fromUser) {

    //滑杆移动
			Log.e("TAG", "滑杆移动");
		}
	};
	@Override
	protected void onCreate(Bundle savedInstanceState) {


		super.onCreate(savedInstanceState);
		setContentView(R.layout.activity_progress);
		ll_progress_loading = (LinearLayout) findViewById(R.id.ll_progress_loading);
		pb_progress_loading = (ProgressBar) findViewById(R.id.pb_progress_loading);
		sb_progress_loading = (SeekBar) findViewById(R.id.sb_progress_loading);
		//给seekbar设置监听
		sb_progress_loading.setOnSeekBarChangeListener(onSeekBarChangeListener );
	}
}
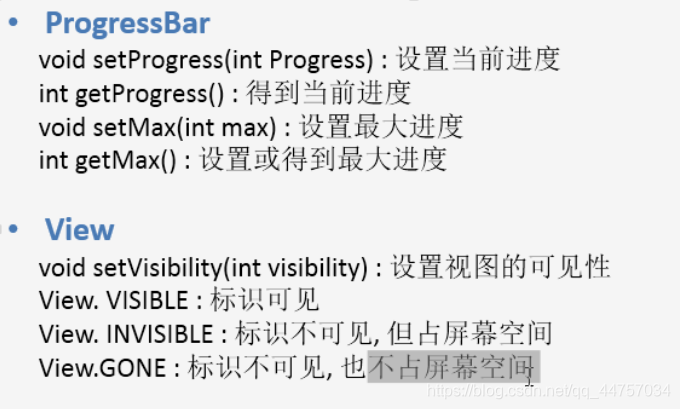
e、完善上述第二个功能:修改ProgressActivity
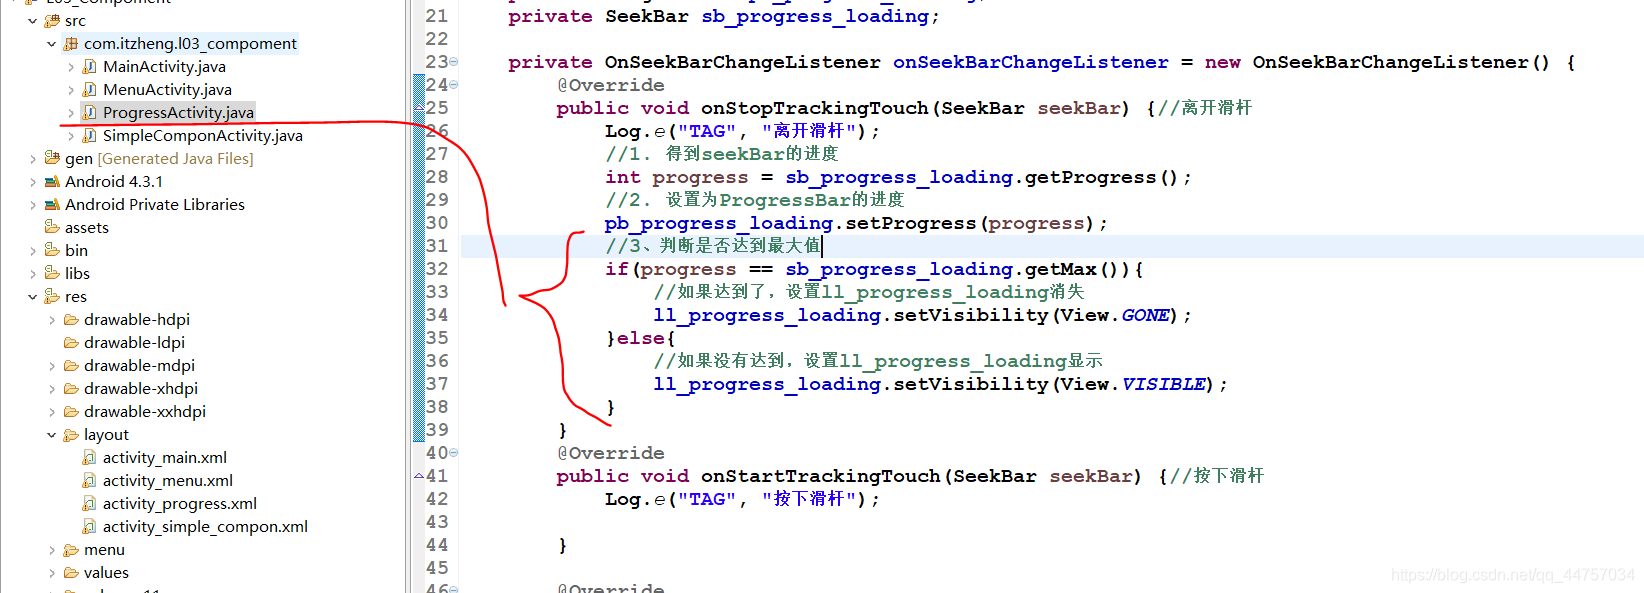
			//3、判断是否达到最大值
			if(progress == sb_progress_loading.getMax()){


				//如果达到了,设置ll_progress_loading消失
				//ll_progress_loading.setVisibility(View.INVISIBLE);不可见但是占用空间
				ll_progress_loading.setVisibility(View.GONE);//不可见不占用空间
			}else{


				//如果没有达到,设置ll_progress_loading显示
				ll_progress_loading.setVisibility(View.VISIBLE);
			}
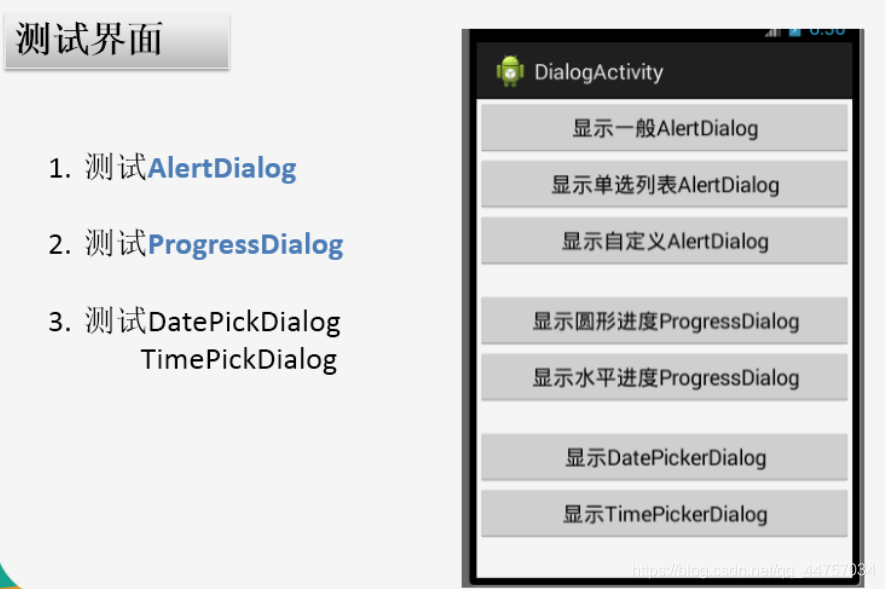
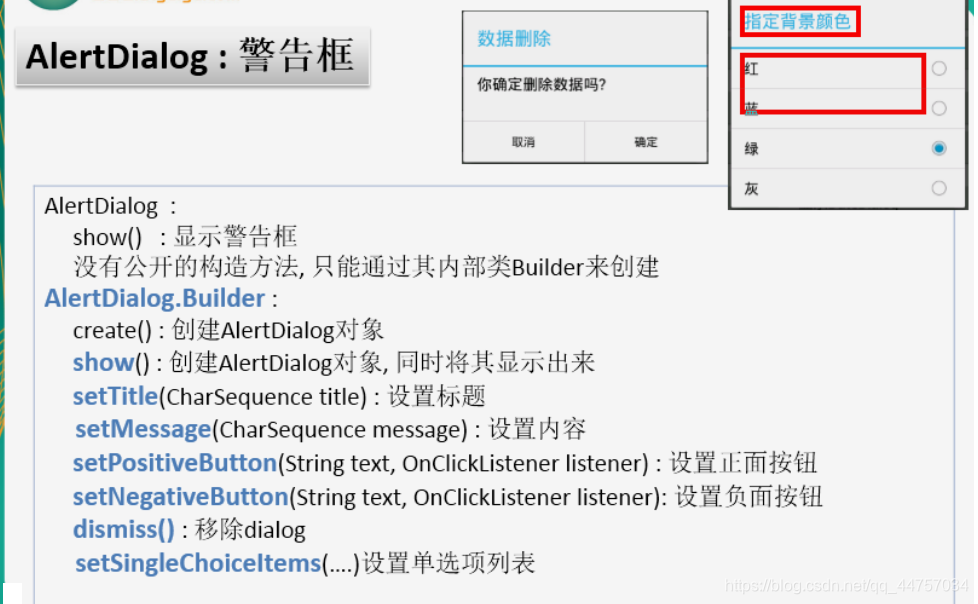
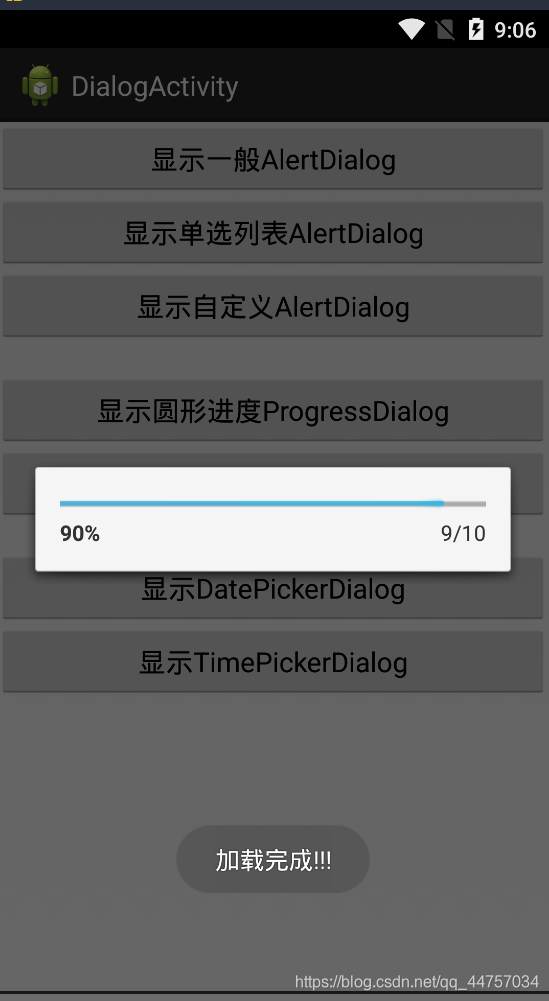
(10)对话框Component

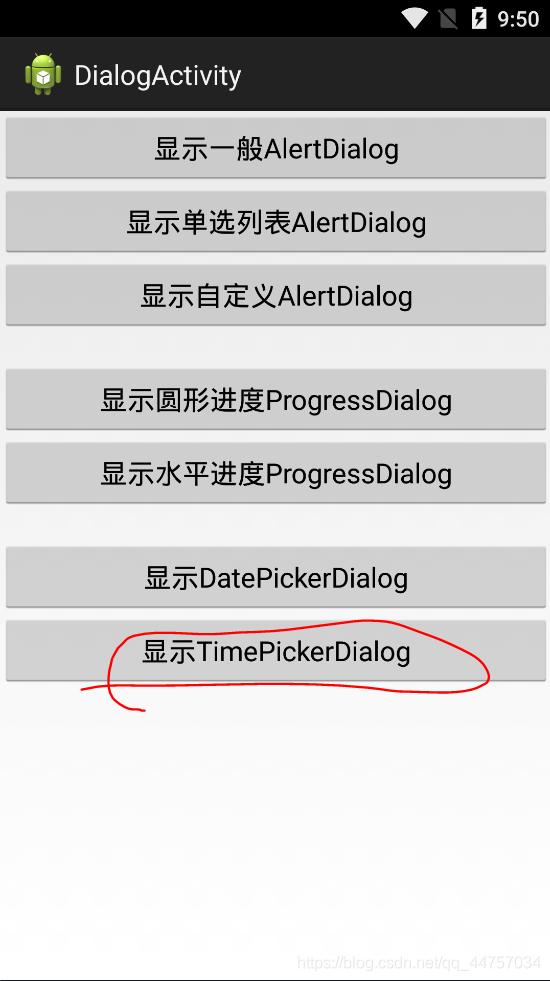
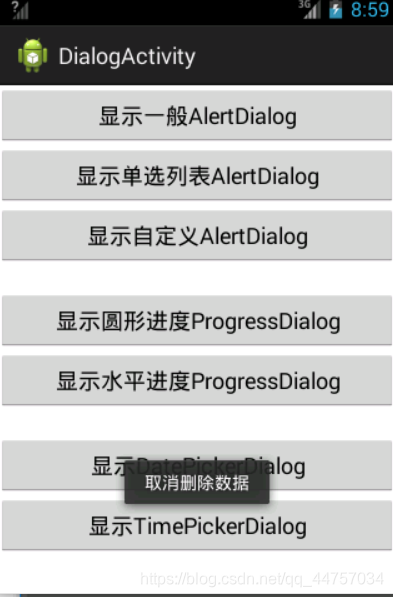
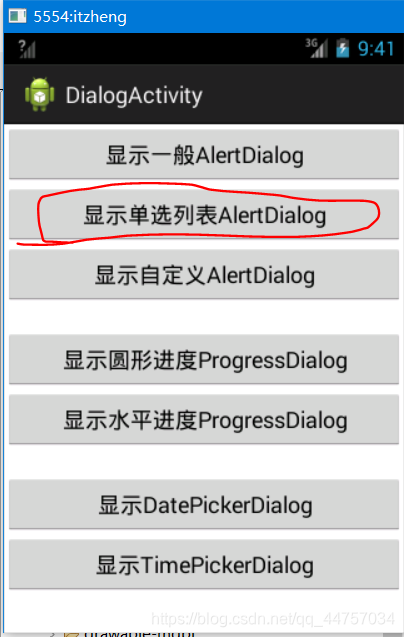
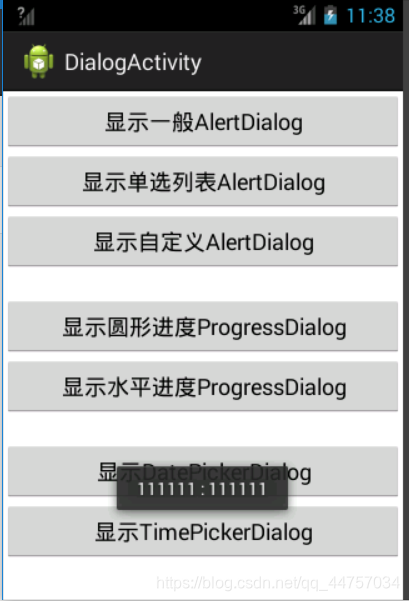
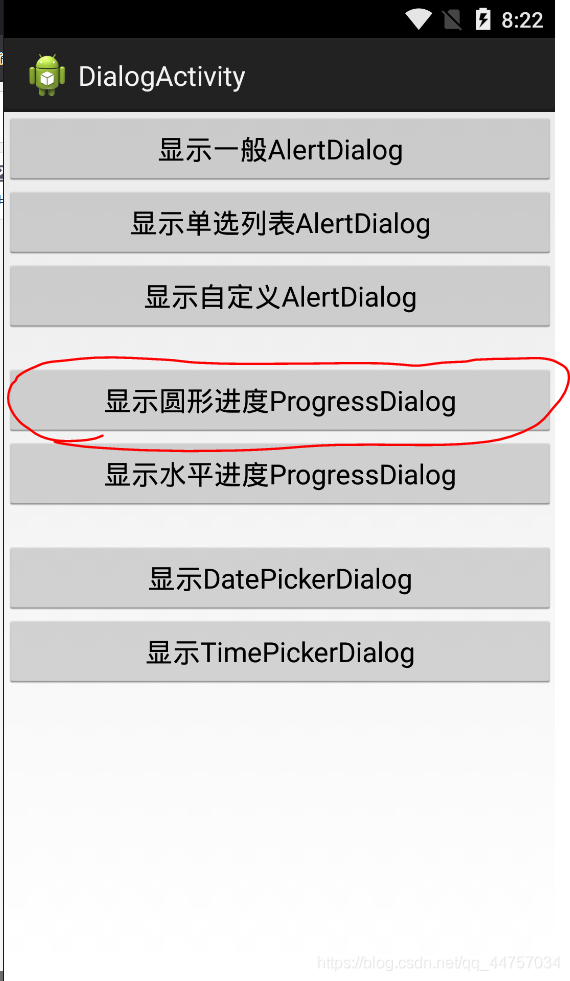
1)测试界面
2)代码实现(AlertDialog)
a、创建DialogActivity

b、修改activity_dialog.xml
<LinearLayout xmlns:android="http://schemas.android.com/apk/res/android"
android:layout_width="fill_parent"
android:layout_height="fill_parent"
android:orientation="vertical" >
<!-- AlertDialog -->
<Button
android:id="@+id/btn_test4_ad"
android:layout_width="match_parent"
android:layout_height="wrap_content"
android:onClick="showAD"
android:text="显示一般AlertDialog" />
<Button
android:id="@+id/btn_test4_ld"
android:layout_width="match_parent"
android:layout_height="wrap_content"
android:onClick="showLD"
android:text="显示单选列表AlertDialog" />
<Button
android:id="@+id/btn_test4_custom"
android:layout_width="match_parent"
android:layout_height="wrap_content"
android:onClick="showCD"
android:text="显示自定义AlertDialog" />
<!-- ProgressDialog -->
<Button
android:id="@+id/btn_test4_pd"
android:layout_width="match_parent"
android:layout_height="wrap_content"
android:onClick="showPD"
android:text="显示圆形进度ProgressDialog"
android:layout_marginTop="20dp"/>
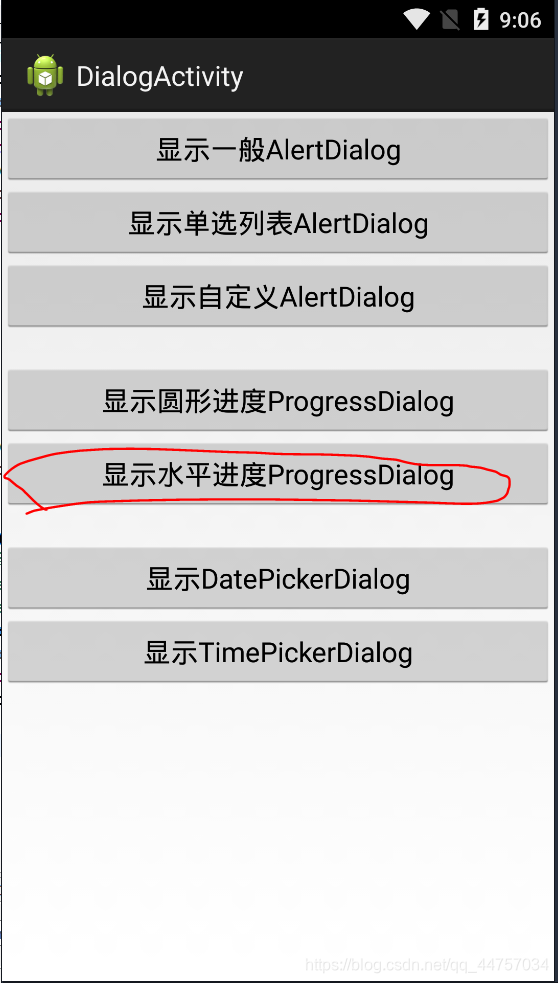
<Button
android:id="@+id/btn_test4_pd2"
android:layout_width="match_parent"
android:layout_height="wrap_content"
android:onClick="showPD2"
android:text="显示水平进度ProgressDialog" />
<!-- DatePickerDialog与TimePickerDialog -->
<Button
android:id="@+id/btn_test4_dd"
android:layout_width="match_parent"
android:layout_height="wrap_content"
android:onClick="showDateAD"
android:text="显示DatePickerDialog"
android:layout_marginTop="20dp"/>
<Button
android:id="@+id/btn_test4_td"
android:layout_width="match_parent"
android:layout_height="wrap_content"
android:onClick="showTimeAD"
android:text="显示TimePickerDialog" />
</LinearLayout>
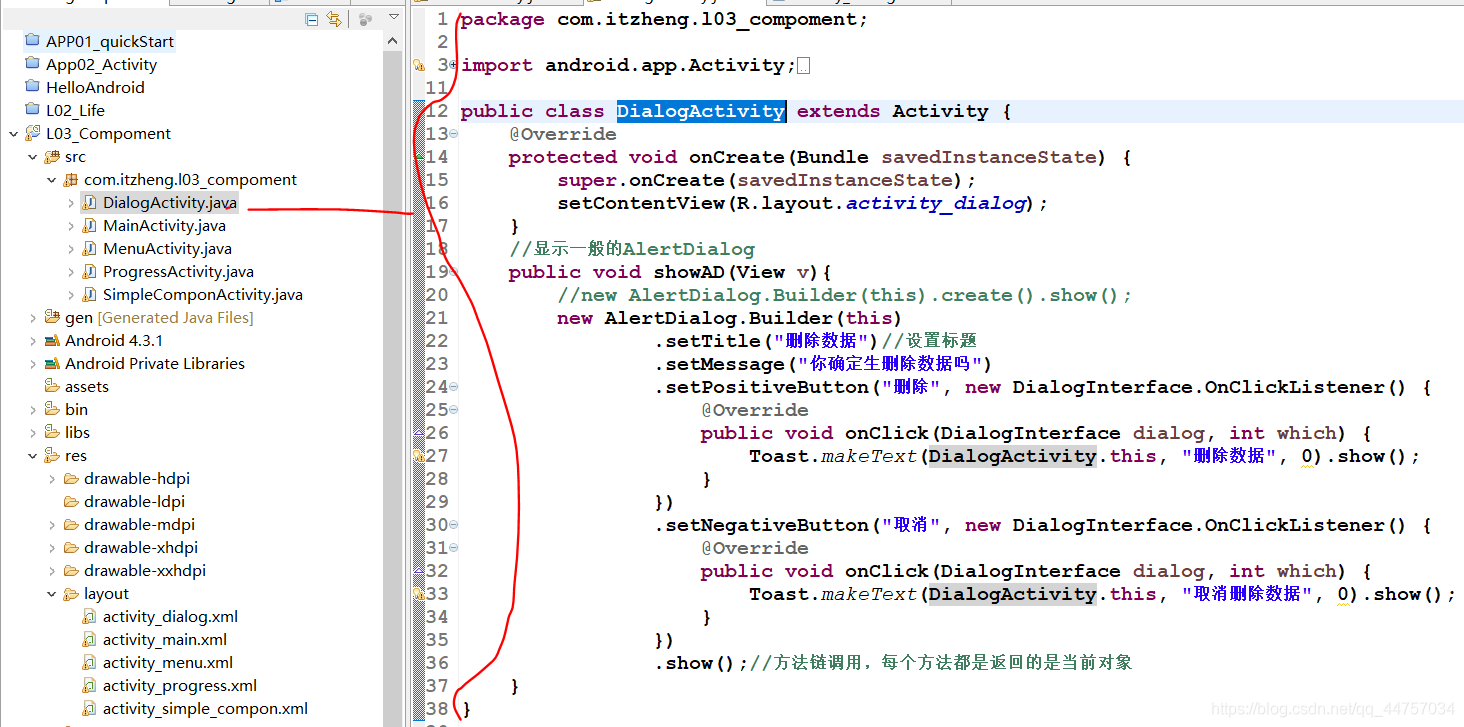
c、修改DialogActivity
package com.itzheng.l03_compoment;
import android.app.Activity;
import android.app.AlertDialog;
import android.content.DialogInterface;
import android.os.Bundle;
import android.view.Menu;
import android.view.MenuItem;
import android.view.View;
import android.widget.Toast;
public class DialogActivity extends Activity {
@Override
protected void onCreate(Bundle savedInstanceState) {
super.onCreate(savedInstanceState);
setContentView(R.layout.activity_dialog);
}
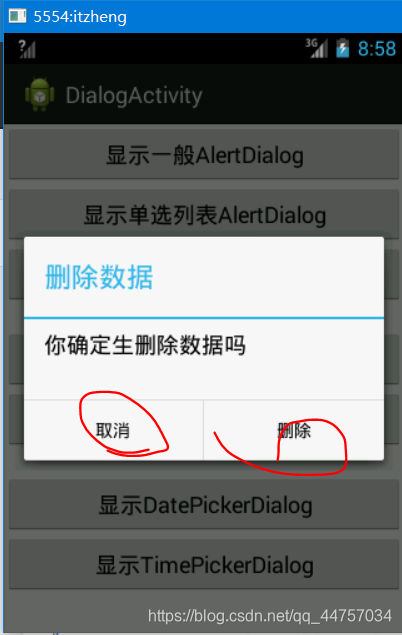
//显示一般的AlertDialog
public void showAD(View v){
//new AlertDialog.Builder(this).create().show();
new AlertDialog.Builder(this)
.setTitle("删除数据")//设置标题
.setMessage("你确定生删除数据吗")
.setPositiveButton("删除", new DialogInterface.OnClickListener() {
@Override
public void onClick(DialogInterface dialog, int which) {
Toast.makeText(DialogActivity.this, "删除数据", 0).show();
}
})
.setNegativeButton("取消", new DialogInterface.OnClickListener() {
@Override
public void onClick(DialogInterface dialog, int which) {
Toast.makeText(DialogActivity.this, "取消删除数据", 0).show();
}
})
.show();//方法链调用,每个方法都是返回的是当前对象
}
}
d、测试

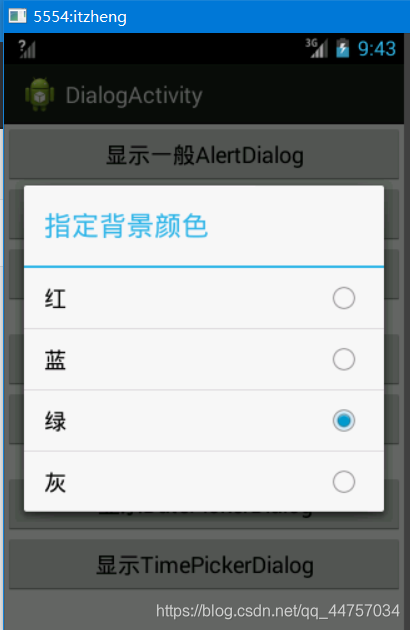
e、实现单选功能:修改DialogActivity添加showLD方法
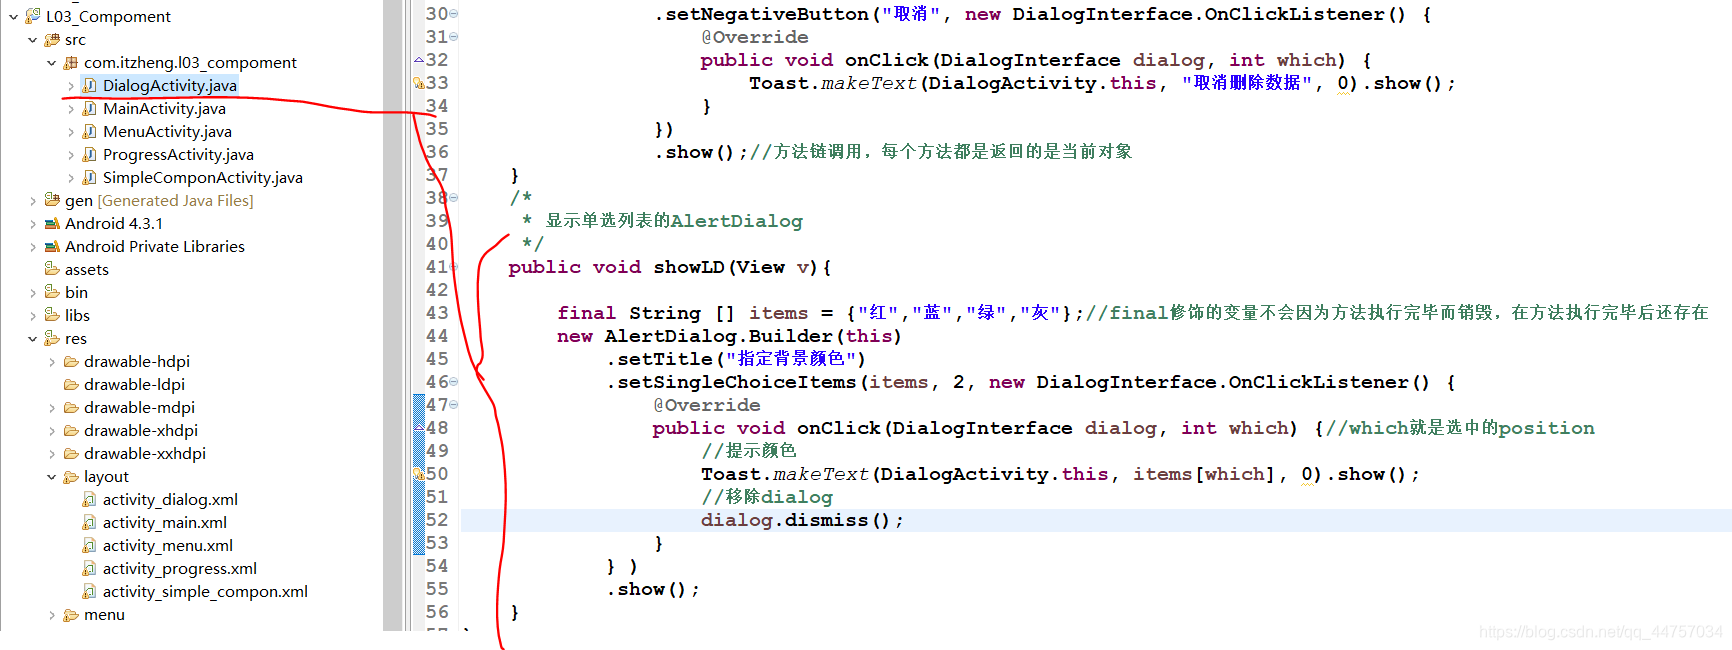
/*
	 * 显示单选列表的AlertDialog
	 */
	public void showLD(View v){


		final String [] items = {

    "红","蓝","绿","灰"};//final修饰的变量不会因为方法执行完毕而销毁,在方法执行完毕后还存在
		new AlertDialog.Builder(this)
			.setTitle("指定背景颜色")
			.setSingleChoiceItems(items, 2, new DialogInterface.OnClickListener() {


				@Override
				public void onClick(DialogInterface dialog, int which) {

    //which就是选中的position
					//提示颜色
					Toast.makeText(DialogActivity.this, items[which], 0).show();
					//移除dialog
					dialog.dismiss();
				}
			} )
			.show();
	}
f、测试
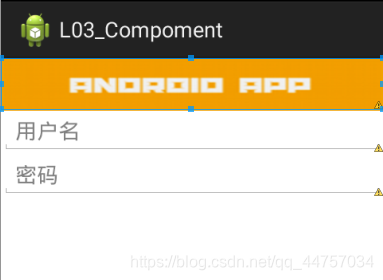
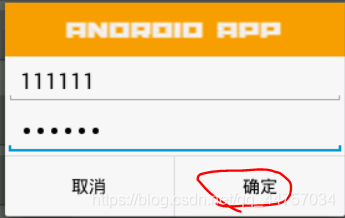
3)自定义AlertDialog

a、创建安卓XML


<?xml version="1.0" encoding="utf-8"?>
<LinearLayout xmlns:android="http://schemas.android.com/apk/res/android"
    android:layout_width="match_parent"
    android:layout_height="match_parent"
    android:orientation="vertical" >
    <ImageView
        android:id="@+id/imageView1"
        android:layout_width="fill_parent"
        android:layout_height="wrap_content"
        android:src="@drawable/title"
        android:scaleType="fitXY"
        />
    <EditText
        android:id="@+id/et_dialog_name"
        android:layout_width="match_parent"
        android:layout_height="wrap_content"
        android:hint="用户名"
        />
     <EditText
        android:id="@+id/et_dialog_pwd"
        android:layout_width="match_parent"
        android:layout_height="wrap_content"
        android:hint="密码"
        android:inputType="textPassword"
        />
</LinearLayout>
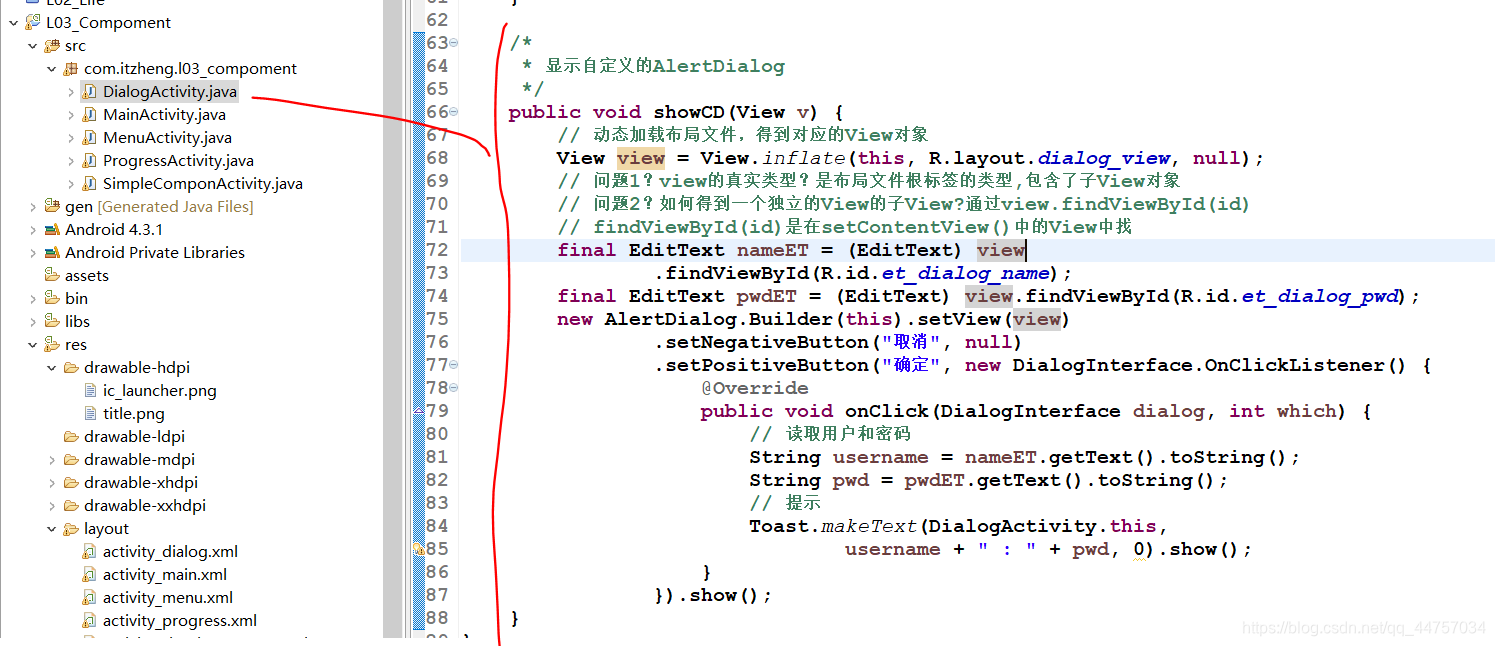
b、修改DialogActivity创建showCD方法
	/*
	 * 显示自定义的AlertDialog
	 */
	public void showCD(View v) {


		// 动态加载布局文件,得到对应的View对象
		View view = View.inflate(this, R.layout.dialog_view, null);
		// 问题1?view的真实类型?是布局文件根标签的类型,包含了子View对象
		// 问题2?如何得到一个独立的View的子View?通过view.findViewById(id)
		// findViewById(id)是在setContentView()中的View中找
		final EditText nameET = (EditText) view
				.findViewById(R.id.et_dialog_name);
		final EditText pwdET = (EditText) view.findViewById(R.id.et_dialog_pwd);
		new AlertDialog.Builder(this).setView(view)
				.setNegativeButton("取消", null)
				.setPositiveButton("确定", new DialogInterface.OnClickListener() {


					@Override
					public void onClick(DialogInterface dialog, int which) {


						// 读取用户和密码
						String username = nameET.getText().toString();
						String pwd = pwdET.getText().toString();
						// 提示
						Toast.makeText(DialogActivity.this,
								username + " : " + pwd, 0).show();
					}
				}).show();
	}
测试

(11)ProgreeDialog:带进度条Dialog
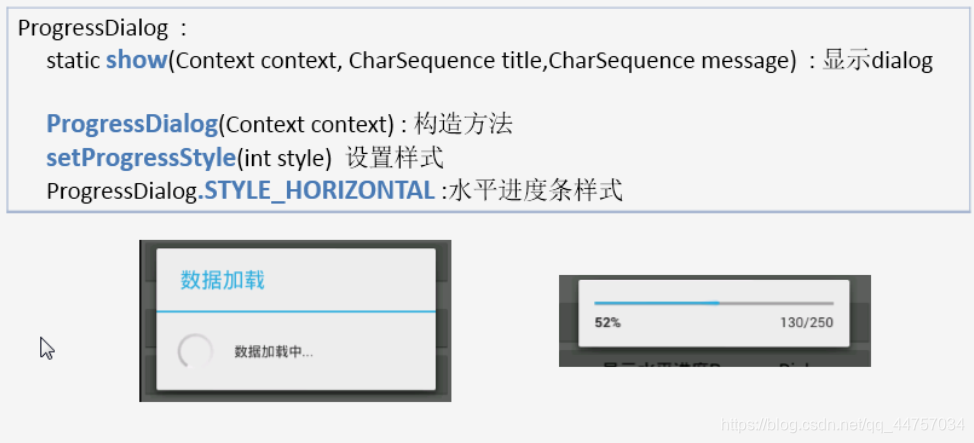
a、带圆形的进度条:修改DialogActivity,添加showPD方法

	/*
	 * 显示圆形进度的ProgressDialog
	 */
	public void showPD(View v) {

    // 回调方法都是在主线程执行的
		final ProgressDialog dialog = ProgressDialog.show(this, "数据加载", "数据加载中。。。");
		// 模拟一个长时间的工作
		// 长时间的工作不能在主线程当中做,得启动分线程去完成
		new Thread() {


			public void run() {

    // 分线程执行
				for (int i = 0; i < 20; i++) {


					// 休息一会
					try {


						Thread.sleep(100);
					} catch (InterruptedException e) {


						// TODO Auto-generated catch block
						e.printStackTrace();
					}
				}
				// 移除dialog
				dialog.dismiss();//方法是在分线程执行的,但是内部使用的Handler实现主线程移除dialog
				// 不能在分线程之间更新UI
				// 显示toast
				//Toast.makeText(DialogActivity.this, "加载完成!!!", 0).show();
				runOnUiThread(new Runnable() {


					@Override
					public void run() {


						Toast.makeText(DialogActivity.this, "加载完成!!!", 0).show();
					}
				});
			};
		}.start();
	}
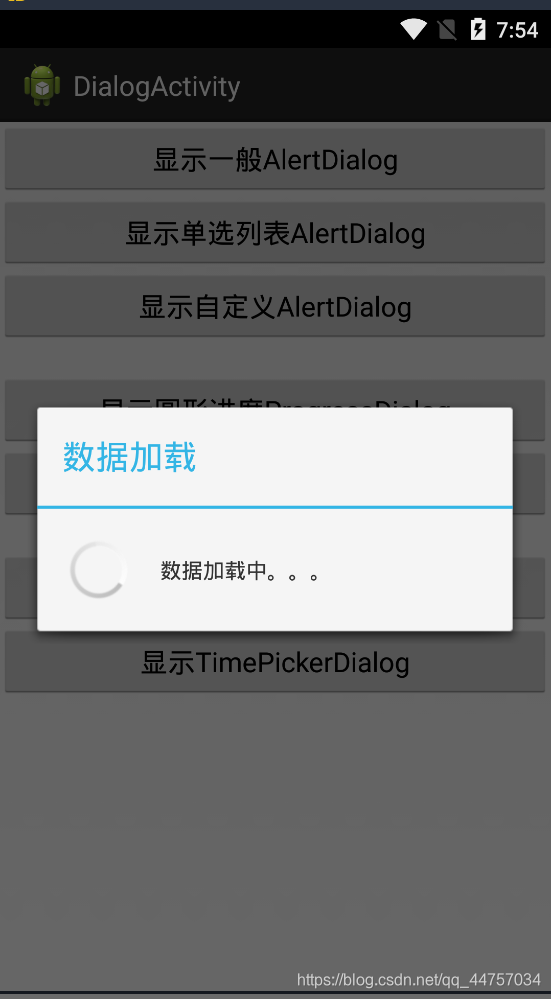
上面界面消失
b、水平的进度条
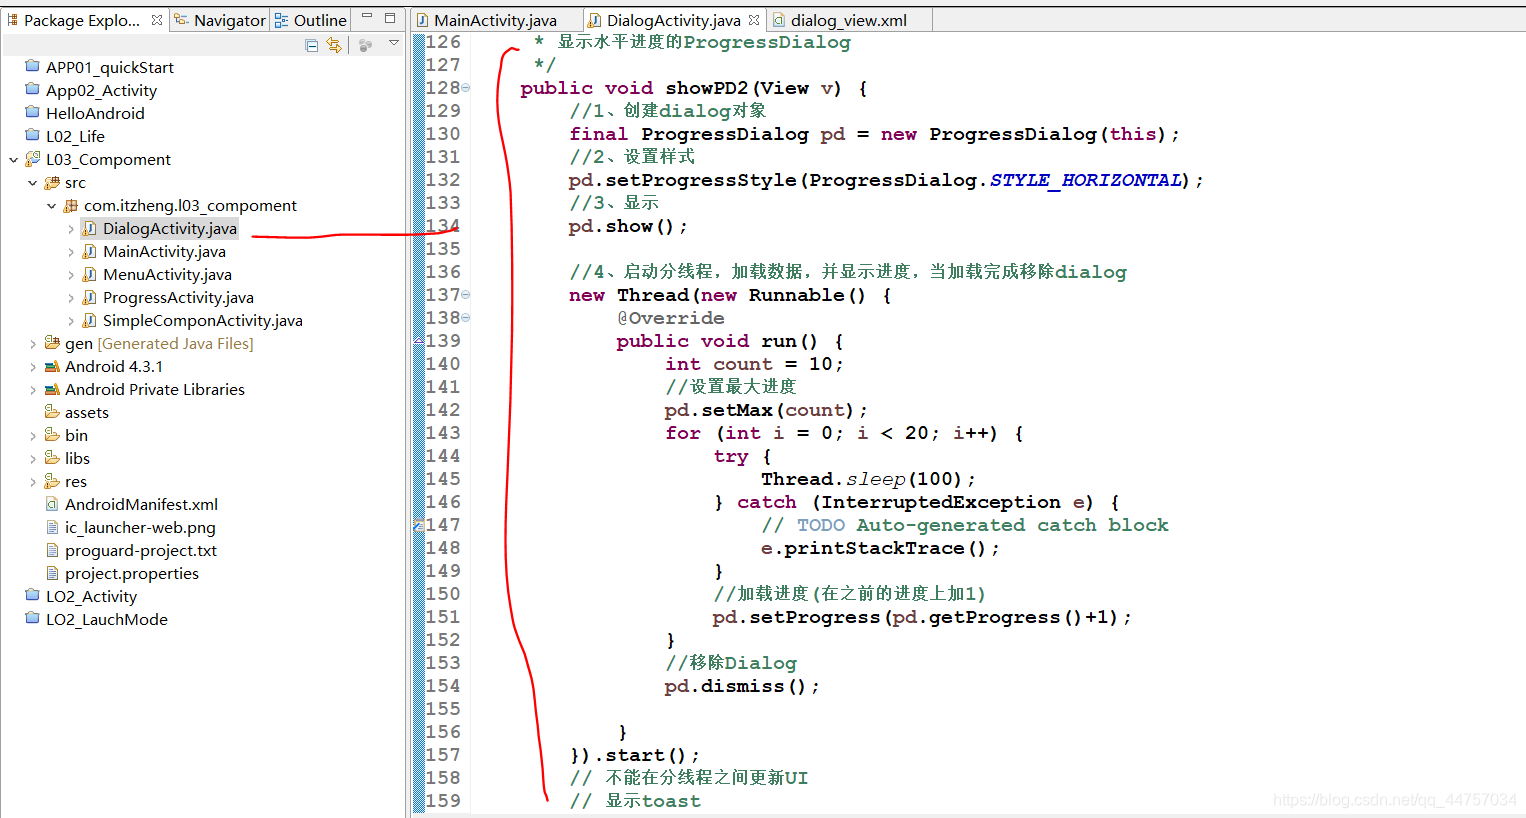
/*
	 * 显示水平进度的ProgressDialog
	 */
	public void showPD2(View v) {


		//1、创建dialog对象
		final ProgressDialog pd = new ProgressDialog(this);
		//2、设置样式
		pd.setProgressStyle(ProgressDialog.STYLE_HORIZONTAL);
		//3、显示
		pd.show();
		//4、启动分线程,加载数据,并显示进度,当加载完成移除dialog
		new Thread(new Runnable() {


			@Override
			public void run() {


				int count = 10;
				//设置最大进度
				pd.setMax(count);
				for (int i = 0; i < 20; i++) {


					try {


						Thread.sleep(100);
					} catch (InterruptedException e) {


						// TODO Auto-generated catch block
						e.printStackTrace();
					}
					//加载进度(在之前的进度上加1)
					pd.setProgress(pd.getProgress()+1);
				}
				//移除Dialog
				pd.dismiss();

			}
		}).start();
		// 不能在分线程之间更新UI
		// 显示toast
		//Toast.makeText(DialogActivity.this, "加载完成!!!", 0).show();
		runOnUiThread(new Runnable() {


			@Override
			public void run() {

    //在主线执行
				Toast.makeText(DialogActivity.this, "加载完成!!!", 0).show();
			}
		});
	}
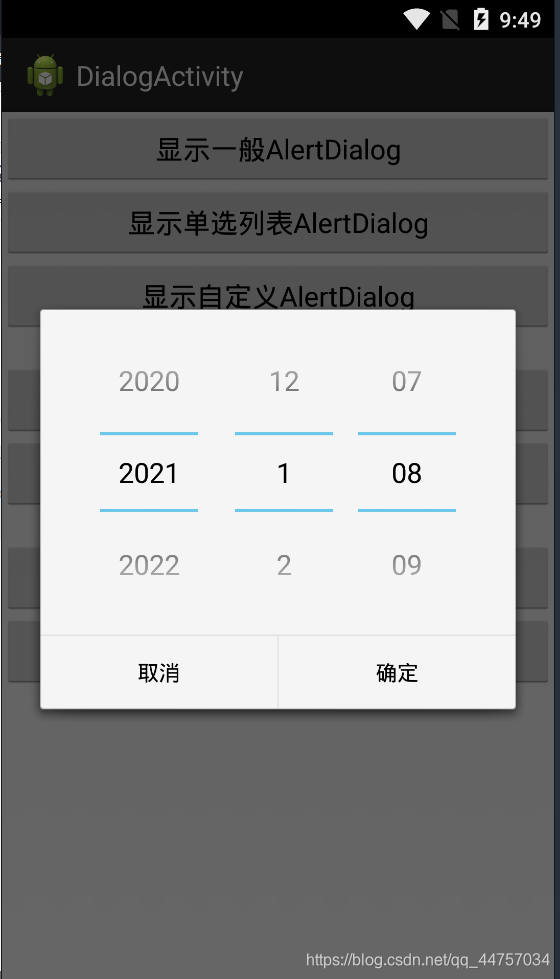
(12)DateDialog:日期Dialog
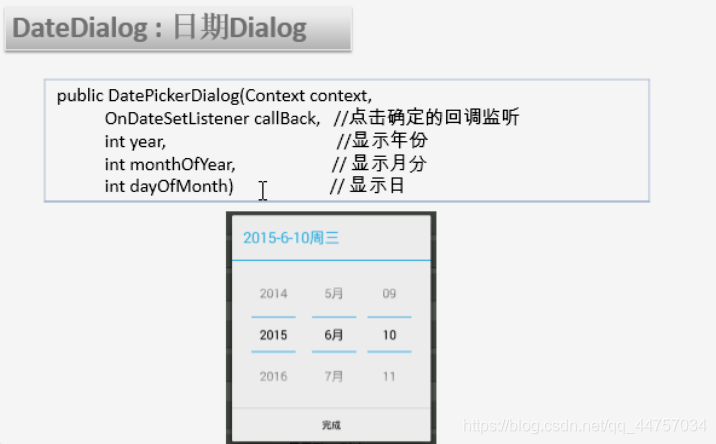
修改DialogActivity创建showDateAD方法和showTimeAD方法
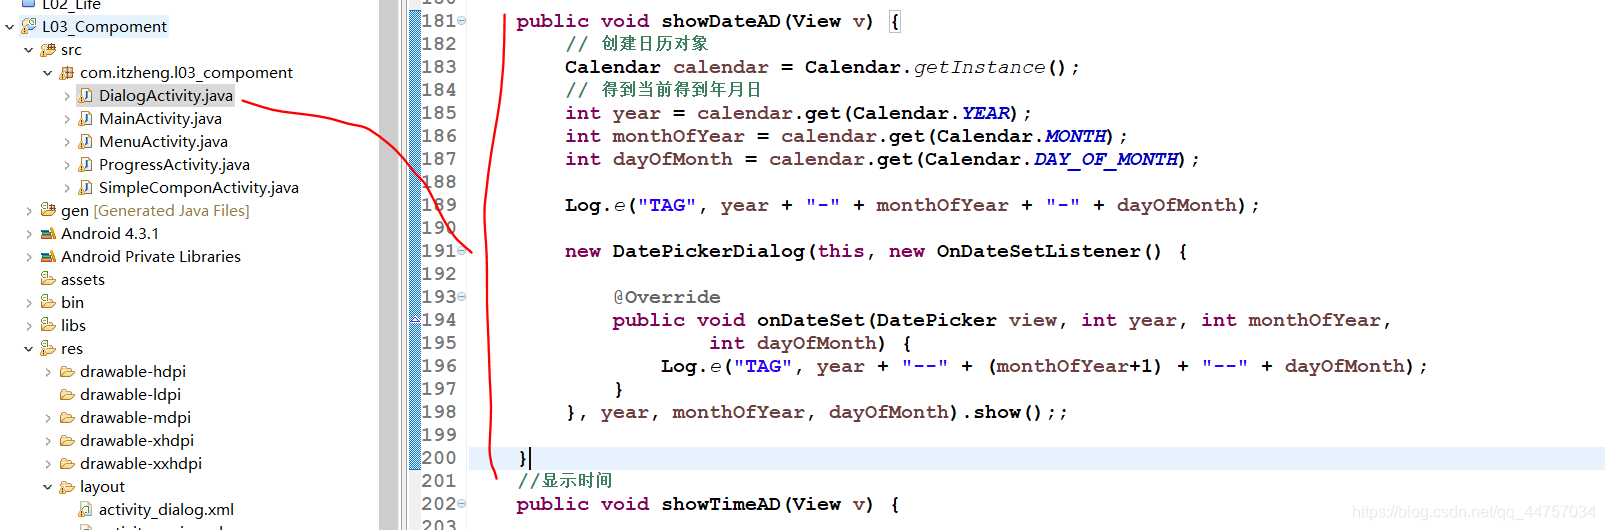

public void showDateAD(View v) {
// 创建日历对象
Calendar calendar = Calendar.getInstance();
// 得到当前得到年月日
int year = calendar.get(Calendar.YEAR);
int monthOfYear = calendar.get(Calendar.MONTH);
int dayOfMonth = calendar.get(Calendar.DAY_OF_MONTH);
Log.e("TAG", year + "-" + monthOfYear + "-" + dayOfMonth);
new DatePickerDialog(this, new OnDateSetListener() {
@Override
public void onDateSet(DatePicker view, int year, int monthOfYear,
int dayOfMonth) {
Log.e("TAG", year + "--" + (monthOfYear +1)+ "--" + dayOfMonth);
}
}, year, monthOfYear, dayOfMonth).show();;
}
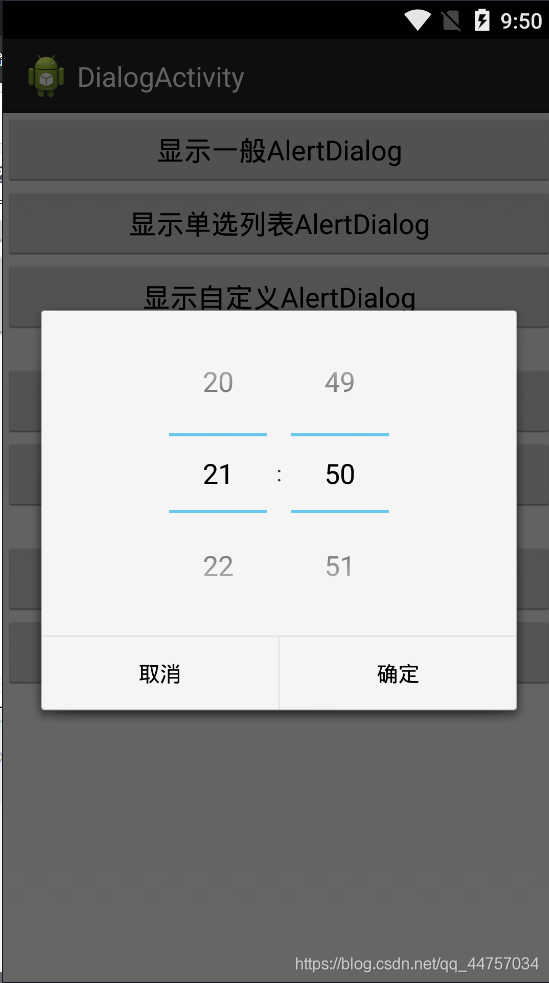
//显示时间
public void showTimeAD(View v) {
Calendar c = Calendar.getInstance();
int hourOfDay = c.get(Calendar.HOUR_OF_DAY);
int minute = c.get(Calendar.MINUTE);
Log.e("TAG", hourOfDay + ":" + minute );
new TimePickerDialog(this, new OnTimeSetListener() {
@Override
public void onTimeSet(TimePicker view, int hourOfDay, int minute) {
// TODO Auto-generated method stub
Log.e("TAG", hourOfDay + "::" + minute );
}
}, hourOfDay, minute, true).show();;
}