Android布局
LinearLayout(线性布局)
RelativeLayout(相对布局)
TableLayout(表格布局)
FrameLayout(帧布局)
AbsoluteLayout(绝对布局)
GridLayout(网格布局)
LinerLayout
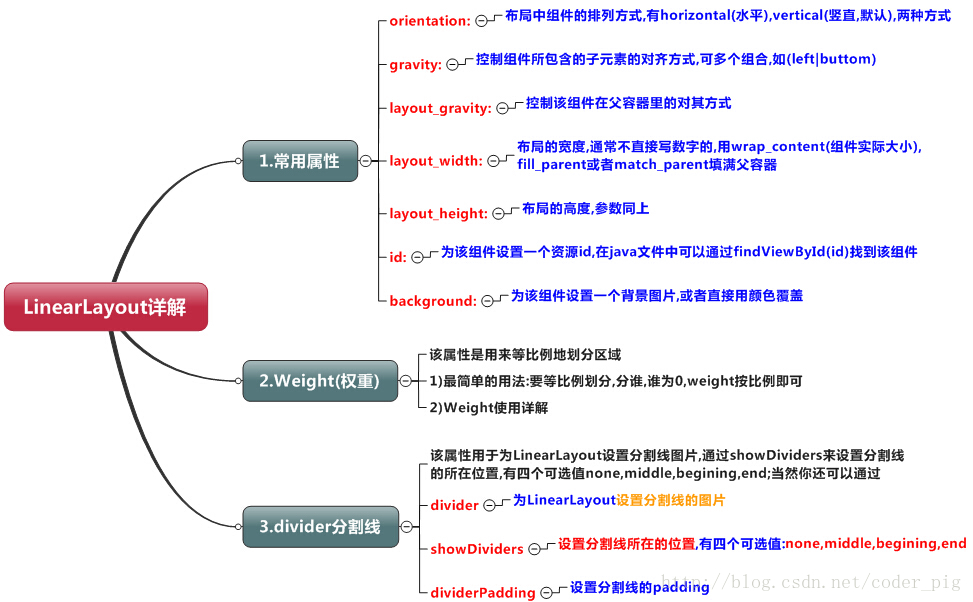
weight(权重)属性详解
实现代码
<LinearLayout xmlns:android="http://schemas.android.com/apk/res/android"
    xmlns:tools="http://schemas.android.com/tools"
    android:id="@+id/LinearLayout1"
    android:layout_width="match_parent"
    android:layout_height="match_parent"
    android:orientation="horizontal">

    <LinearLayout
        android:layout_width="0dp"
        android:layout_height="fill_parent"
        android:background="#ADFF2F"
        android:layout_weight="1"/>


    <LinearLayout
        android:layout_width="0dp"
        android:layout_height="fill_parent"
        android:background="#DA70D6"
        android:layout_weight="2"/>

</LinearLayout>
实现效果
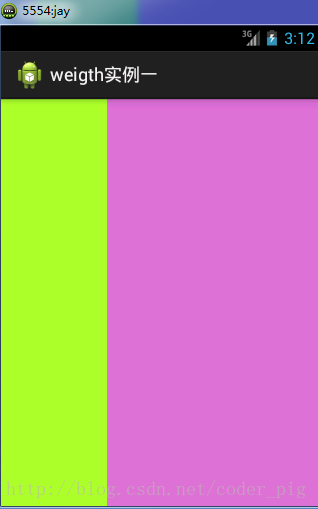
按比例划分
水平方向:将涉及到的View的android:width属性设置为0dp,然后设置为android weight属性设置比例即可;类推,竖直方向,只需设android:height为0dp,然后设weight属性即可!
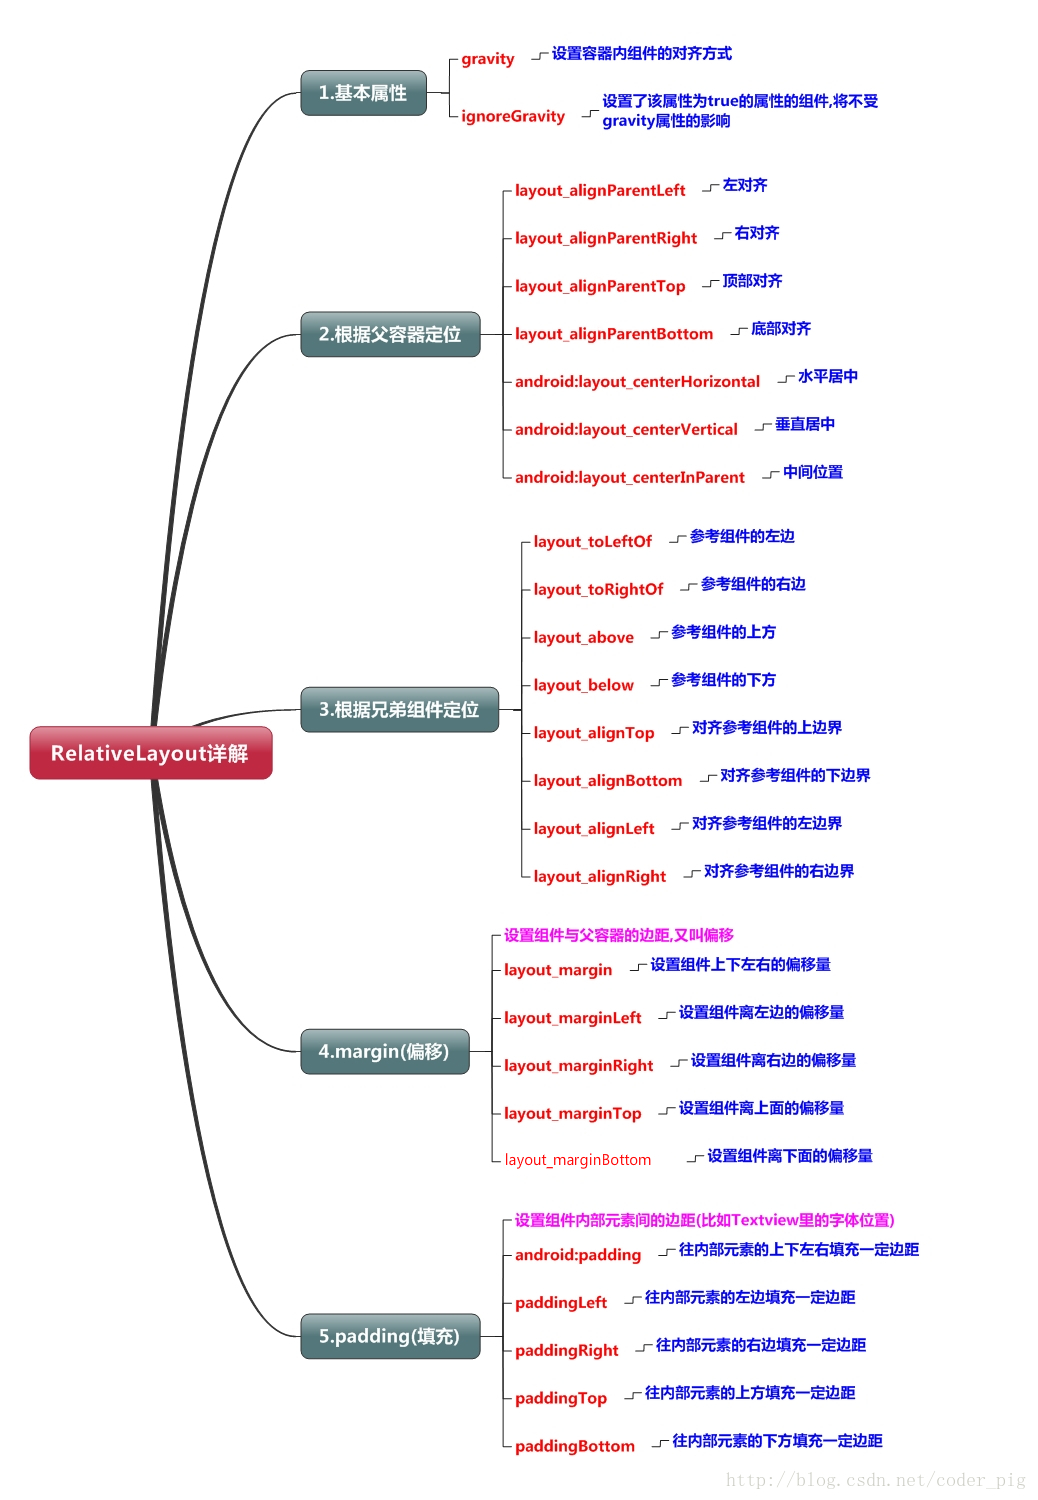
RelativeLayout
组件属性

父容器定位属性示意图

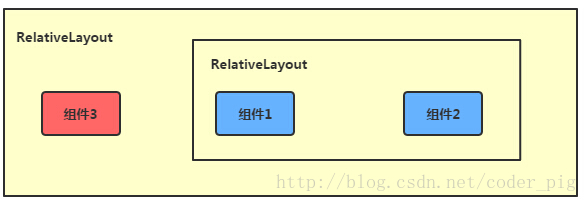
兄弟组件定位
所谓的兄弟组件就是处于同一层次容器的组件
图中的组件1,2就是兄弟组件了,而组件3与组件1或组件2并不是兄弟组件,所以组件3不能通过 组件1或2来进行定位,比如layout_toleftof = "组件1"这样是会报错的!切记! 关于这个兄弟组件定位的最经典例子就是"梅花布局"了
//实现代码
<RelativeLayout xmlns:android="http://schemas.android.com/apk/res/android"
    xmlns:tools="http://schemas.android.com/tools"
    android:id="@+id/RelativeLayout1"
    android:layout_width="match_parent"
    android:layout_height="match_parent" >

    <!-- 这个是在容器中央的 -->

    <ImageView
        android:id="@+id/img1"
        android:layout_width="80dp"
        android:layout_height="80dp"
        android:layout_centerInParent="true"
        android:src="@drawable/pic1"/>

    <!-- 在中间图片的左边 -->
    <ImageView
        android:id="@+id/img2"
        android:layout_width="80dp"
        android:layout_height="80dp"
        android:layout_toLeftOf="@id/img1"
        android:layout_centerVertical="true"
        android:src="@drawable/pic2"/>

    <!-- 在中间图片的右边 -->
    <ImageView
        android:id="@+id/img3"
        android:layout_width="80dp"
        android:layout_height="80dp"
        android:layout_toRightOf="@id/img1"
        android:layout_centerVertical="true"
        android:src="@drawable/pic3"/>

    <!-- 在中间图片的上面-->
    <ImageView
        android:id="@+id/img4"
        android:layout_width="80dp"
        android:layout_height="80dp"
        android:layout_above="@id/img1"
        android:layout_centerHorizontal="true"
        android:src="@drawable/pic4"/>

    <!-- 在中间图片的下面 -->
    <ImageView
        android:id="@+id/img5"
        android:layout_width="80dp"
        android:layout_height="80dp"
        android:layout_below="@id/img1"
        android:layout_centerHorizontal="true"
        android:src="@drawable/pic5"/>

</RelativeLayout>
TableLayout
属性图
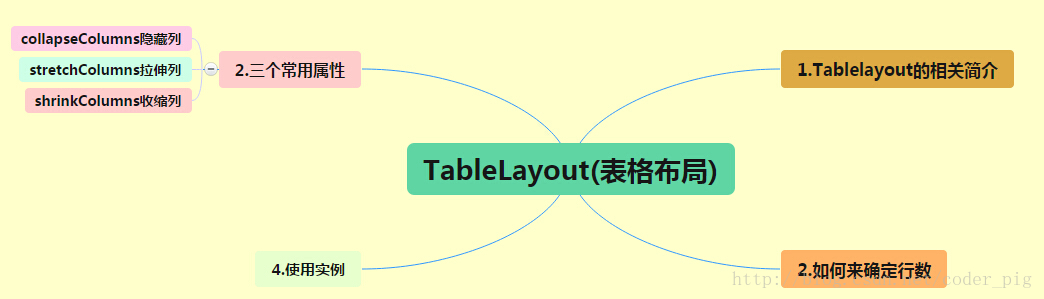
如何确定行数与列数
①如果我们直接往TableLayout中添加组件的话,那么这个组件将占满一行!!!
②如果我们想一行上有多个组件的话,就要添加一个TableRow的容器,把组件都丢到里面!
③tablerow中的组件个数就决定了该行有多少列,而列的宽度由该列中最宽的单元格决定
④tablerow的layout_width属性,默认是fill_parent的,我们自己设置成其他的值也不会生效!!! 但是layout_height默认是wrapten——content的,我们却可以自己设置大小!
⑤整个表格布局的宽度取决于父容器的宽度(占满父容器本身)
⑥有多少行就要自己数啦,一个tablerow一行,一个单独的组件也一行!多少列则是看tableRow中 的组件个数,组件最多的就是TableLayout的列数
三个常用属性
android:collapseColumns:设置需要被隐藏的列的序号
android:shrinkColumns:设置允许被收缩的列的列序号
android:stretchColumns:设置运行被拉伸的列的列序号
以上这三个属性的列号都是
从0开始算的,比如shrinkColunmns = “2”,对应的是第三列!
可以设置多个,用逗号隔开比如"0,2",如果是所有列都生效,则用"*"号即可
除了这三个常用属性,还有两个属性,分别就是跳格子以及合并单元格,这和HTML中的Table类似:
android:layout_column="2":表示的就是跳过第二个,直接显示到第三个格子处,从1开始算的!
android:layout_span="4":表示合并4个单元格,也就说这个组件占4个单元格
FrameLayout
常用属性
前景图像:永远处于帧布局最上面,直接面对用户的图像,就是不会被覆盖的图片。
- android:foreground:*设置改帧布局容器的前景图像
- android:foregroundGravity:设置前景图像显示的位置
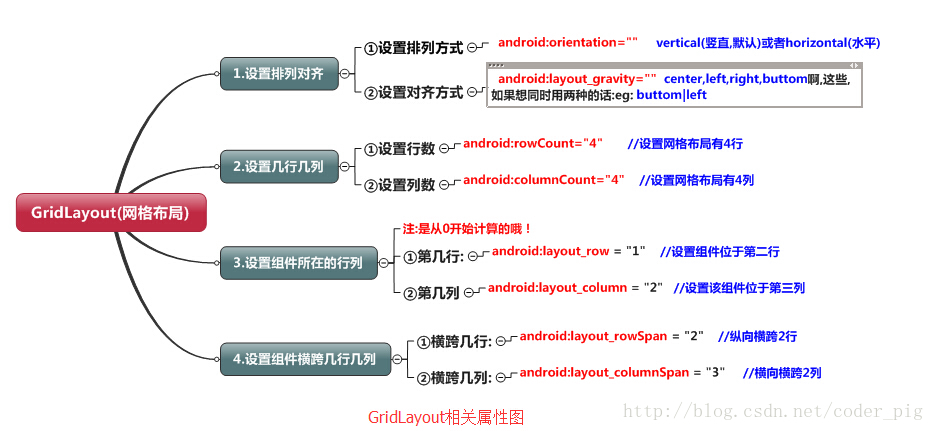
GridLayout
特点
- 可以自己设置布局中组件的排列方式
- 可以自定义网格布局有多少行,多少列
- 可以直接设置组件位于某行某列
- 可以设置组件横跨几行或者几列
属性
AbsoluteLayout
几乎不做使用,略过