一、nginx简介
1.1 nginx特点


1.2 web服务产品对比

二、编译安装nginx
2.1安装nginx
#首次安装先安装Pcre库   https://ftp.pcre.org/pub/pcre/
#该pcre版本是2012年,酌情下载。
wget https://ftp.pcre.org/pub/pcre/pcre-8.31.tar.gz
tar -zxvf pcre-8.31.tar.gz
cd pcre-8.31/
./configure
make && make install

#编译安装nginx   1.18
useradd nginx -s /sbin/nologin -M
wget http://nginx.org/download/nginx-1.18.0.tar.gz
tar -zxvf nginx-1.18.0.tar.gz
cd nginx-1.18.0/
./configure --user=nginx --group=nginx --prefix=/application/nginx-1.18.0 \
--with-http_stub_status_module --with-http_ssl_module
make && make install

ln -s /application/nginx-1.18.0/ /application/nginx
#检查语法
/application/nginx/sbin/nginx -t
#启动服务:
/application/nginx/sbin/nginx

lsof -i:80
netstat -naltp | grep nginx
ps -aux | grep nginx
#iptables -I INPUT -p tcp -dport=80 -j ACCEPT


2.2 nginx默认web站点目录/application/nginx/html
[root@lvs2-139 html]# pwd
/application/nginx/html
[root@lvs2-139 html]# ls
50x.html  index.html

grep html /application/nginx/conf/nginx.conf

三、nginx配置及基于域名的虚拟主机配置(都用80端)
3.1 nginx目录结构说明
只列出重要的,注意蓝字

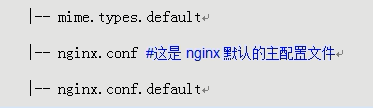


3.2 nginx.conf内容
初始时nginx.conf的内容:
[root@lvs2-139 conf]# egrep -v "#|^$" nginx.conf
user nginx nginx;
worker_processes  1 ; #nginx启动时的进程数
events {


    worker_connections  1024;
    ##使用epoll模型
    use epoll;
}
http {


    include       mime.types;
    default_type  application/octet-stream;
    sendfile        on;
    keepalive_timeout  65;
    server {

       #重点关注server标签
        listen       80;
        server_name  www.etiantian.org etiantian.org;
        location / {


            root   html;
            index  index.html index.htm;
        }
        error_page   500 502 503 504  /50x.html;
        location = /50x.html {


            root   html;
        }
    }
}
还可关注下
fastcgi.conf 和 fastcgi_params 的内容(本节略)
创建项目目录:
#web目录
mkdir /data0/www/{
www,bbs,blog} -p
chown -R nginx.nginx /data0/www
#日志目录:
mkdir /app/logs -p
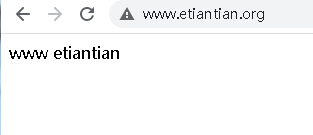
echo "www etiantian" > /data0/www/www/index.html
更改nginx.conf为: (改web站点内容)
user nginx nginx;
worker_processes  1 ; #nginx启动时的进程数
events {


    worker_connections  1024;
    ##使用epoll模型
    use epoll;
}
http {


    include       mime.types;
    default_type  application/octet-stream;
    sendfile        on;
    keepalive_timeout  65;
    server {

       #重点关注server标签
        listen       80;
        server_name  www.etiantian.org etiantian.org;
        location / {


            root   /data0/www/www;
            index  index.html index.htm;
        }
        error_page   500 502 503 504  /50x.html;
        location = /50x.html {


            root   html;
        }
    }
}
#检查语法 和 平滑重启
/application/nginx/sbin/nginx -t
/application/nginx/sbin/nginx -s reload
3.3 新配置其他web站点
新增 bbs.etiantian.org , blog.etiantian.org虚拟主机
echo "bbs etiantian" > /data0/www/bbs/index.html
echo "blog etiantian 123" > /data0/www/blog/index.html

编辑nginx.conf
值得注意的是,如果要用access_log,之前日志log_format是#注释掉的,则需要开启。参考:https://blog.csdn.net/lgm252008/article/details/8453913 《解决错误:nginx: [emerg] unknown log format “main” in》
user nginx nginx;
worker_processes  4;
events {


    worker_connections  1024;
    use epoll;
}
http {


    include       mime.types;
    default_type  application/octet-stream;

    log_format  main  '$remote_addr - $remote_user [$time_local] "$request" '
                      '$status $body_bytes_sent "$http_referer" '
                      '"$http_user_agent" "$http_x_forwarded_for"';

    sendfile        on;
    keepalive_timeout  65;
    ### www.etiantian
    server {


        listen       80;
        server_name  www.etiantian.org etiantian.org;
        location / {


            root   /data0/www/www;
            index  index.html index.htm;
        }
        error_page   500 502 503 504  /50x.html;
        location = /50x.html {


            root   html;
        }
    }
    ### blog.etiantian
    server {


        listen       80;
        server_name  blog.etiantian.org;
#	access_log /app/logs/blog_access.log main;
        access_log  /app/logs/blog_access.log  main;
        location / {


            root   /data0/www/blog;
            index  index.html index.htm;
        }
        error_page   500 502 503 504  /50x.html;
        location = /50x.html {


            root   html;
        }
    }
  ### bbs.etiantian
  server {


        listen       80;
        server_name  bbs.etiantian.org ;
	access_log /app/logs/bbs_access.log main;
        location / {


            root   /data0/www/bbs;
            index  index.html index.htm;
        }
        error_page   500 502 503 504  /50x.html;
        location = /50x.html {


            root   html;
        }
    }
}


3.4 使用include导入配置
模拟像Apache那样,在 extra下面引用conf文件。
include extra/nginx_vhosts.conf;
mkdir /application/nginx/conf/extra
cp nginx.conf extra/nginx_vhosts.conf
此时主配文件nginx.conf只留下面内容:
user nginx nginx;
worker_processes  4;
events {


    worker_connections  1024;
    use epoll;
}
http {


    include       mime.types;
    default_type  application/octet-stream;

    log_format  main  '$remote_addr - $remote_user [$time_local] "$request" '
                      '$status $body_bytes_sent "$http_referer" '
                      '"$http_user_agent" "$http_x_forwarded_for"';

    sendfile        on;
    keepalive_timeout  65;
    ### www.etiantian
    ### blog.etiantian
  ### bbs.etiantian
    include extra/nginx_vhosts.conf;
}
nginx_vhosts.conf只保留 server{ }结构体:
    ### www.etiantian
    server {


        listen       80;
        server_name  www.etiantian.org etiantian.org;
        location / {


            root   /data0/www/www;
            index  index.html index.htm;
        }
        error_page   500 502 503 504  /50x.html;
        location = /50x.html {


            root   html;
        }
    }
    ### blog.etiantian
    server {


        listen       80;
        server_name  blog.etiantian.org;
        access_log  /app/logs/blog_access.log  main;
        location / {


            root   /data0/www/blog;
            index  index.html index.htm;
        }
        error_page   500 502 503 504  /50x.html;
        location = /50x.html {


            root   html;
        }
    }
  ### bbs.etiantian
  server {


        listen       80;
        server_name  bbs.etiantian.org ;
	access_log /app/logs/bbs_access.log main;
        location / {


            root   /data0/www/bbs;
            index  index.html index.htm;
        }
        error_page   500 502 503 504  /50x.html;
        location = /50x.html {


            root   html;
        }
    }
还可以对其“解耦”,将每个server{}块,拆出来为对应的conf,比如: www.conf 。
然后nginx.conf主配文件 include extra/www.conf 即可
### www.etiantian
    server {


        listen       80;
        server_name  www.etiantian.org etiantian.org;
        location / {


            root   /data0/www/www;
            index  index.html index.htm;
        }
        error_page   500 502 503 504  /50x.html;
        location = /50x.html {


            root   html;
        }
    }
3.5 配置nginx状态信息 stub_status on
新增 在结尾追加内容,修改 nginx_vhosts.conf

四、基于IP及端口的虚拟主机配置
4.1 不同端口 不同域名的配置 (常用)
修改nginx_vhosts.conf 修改的是 listen后面的端口数字
 ### www.etiantian
    server {


        listen       8060;
        server_name  www.etiantian.org etiantian.org;
        location / {


            root   /data0/www/www;
            index  index.html index.htm;
        }
        error_page   500 502 503 504  /50x.html;
        location = /50x.html {


            root   html;
        }
    }
    ### blog.etiantian
    server {


        listen       8070;
        server_name  blog.etiantian.org;
        access_log  /app/logs/blog_access.log  main;
        location / {


            root   /data0/www/blog;
            index  index.html index.htm;
        }
        error_page   500 502 503 504  /50x.html;
        location = /50x.html {


            root   html;
        }
    }
  ### bbs.etiantian
  server {


        listen       8080;
        server_name  bbs.etiantian.org ;
	access_log /app/logs/bbs_access.log main;
        location / {


            root   /data0/www/bbs;
            index  index.html index.htm;
        }
        error_page   500 502 503 504  /50x.html;
        location = /50x.html {


            root   html;
        }
    }
检查语法,重启。 查看端口 。 访问页面


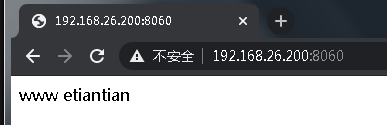
4.2 基于IP的虚拟主机配置 (少见 不常用)
添加子接口IP 192.168.26.200
ifconfig ens33:200 192.168.26.200 netmask 255.255.255.0 up
修改nginx_vhosts.conf 其中一个server{}结构体 , 更改listen和server_name 后面内容即可
### www.etiantian
    server {


        #listen       8060;
        #server_name  www.etiantian.org etiantian.org;
        listen       192.168.26.200:8060;
        server_name  192.168.26.200
        location / {


            root   /data0/www/www;
            index  index.html index.htm;
        }
        error_page   500 502 503 504  /50x.html;
        location = /50x.html {


            root   html;
        }
    }
4.3 nginx配置域名的别名
就在server_name 后面多写一个域名即可,如
#其中etiantian.org就是别名
server_name  www.etiantian.org etiantian.org;

五、多实例架构 (配置多个nginx实例)
-v 查看版本信息及编译安装的配置
[root@lvs2-139 extra]# /application/nginx/sbin/nginx -V
nginx version: nginx/1.18.0
built by gcc 4.8.5 20150623 (Red Hat 4.8.5-36) (GCC)
built with OpenSSL 1.0.2k-fips  26 Jan 2017
TLS SNI support enabled
configure arguments: --user=nginx --group=nginx --prefix=/application/nginx-1.18.0 --with-http_stub_status_module --with-http_ssl_module

5.1 增加一个nginx实例
1、复制一份新的配置文件夹并改名
cd /application/nginx
cp -a conf cmsconf
cd cmsconf/extra
注意不要与之前的conf里面的配置有重复项,否则会产生冲突

vim cmsconf/extra/nginx_vhosts.conf (这里用8080端口,如果用80端口会与原来的冲突)
 ### cms.etiantian
    server {


        listen       8080;
        server_name  cms.etiantian.org;
        location / {


            root   /data0/www/cms;
            index  index.html index.htm;
        }
        error_page   500 502 503 504  /50x.html;
        location = /50x.html {


            root   html;
        }
    }
    ### pic.etiantian
    server {


        listen       8080;
        server_name  pic.etiantian.org;
        access_log  /app/logs/pic_access.log  main;
        location / {


            root   /data0/www/pic;
            index  index.html index.htm;
        }
        error_page   500 502 503 504  /50x.html;
        location = /50x.html {


            root   html;
        }
    }
#创建对应web站点和index文件
mkdir -p /data0/www/{

    pic,cms}
echo " cms etiantian ....." > /data0/www/cms/index.html
echo " pic etiantian aa....." > /data0/www/pic/index.html

#检查语法 && 启动
/application/nginx/sbin/nginx -c /application/nginx/cmsconf/nginx.conf -t
/application/nginx/sbin/nginx -c /application/nginx/cmsconf/nginx.conf
/application/nginx/sbin/nginx -c /application/nginx/cmsconf/nginx.conf -s reload

#从下面两图可看出 启动了两个nginx实例,并且使用了端口80和端口8080
ps -ef | grep nginx
netstat -naltp | grep 80


访问cmsconf配置的web站点 (记得配置hosts文件,此处略)

=分割线=
5.2 多实例nginx相同端口,不同IP实例
如果另一个nginx实例不想用特殊端口8080,而用默认80,则新建个子接口IP,然后修改conf文件。(基于IP 基于域名的虚拟主机形式)
ifconfig eth0:196 10.0.0.196 up

vim /application/nginx/cmsconf/extra/nginx_vhosts.conf

而且原配置也要做修改:/application/nginx/conf/extra/nginx_vhosts.conf
原配置:

此时要指定IP+端口, 否则他会直接占用所有的80端口。

pkill nginx
#启动第一个实例
/application/nginx/sbin/nginx -c /application/nginx/conf/nginx.conf
#启动第二个实例
/application/nginx/sbin/nginx -c /application/nginx/cmsconf/nginx.conf
此时就有两个IP都使用80端口了。

(其实还有个 fenyonghu_nginx的脚本实例的,略)
END