www.sgkbc.com
cv::Point
opencv中的一种数据结构,表示在2D平面上的一个点,坐标为(x,y)
就是我们初中学的笛卡尔坐标系
赋值方法如下:
Point p;
p.x = 10;
p.y = 8;
或者
Point p;
p = Pont(10,8);
cv::Scalar
opencv中,通过设置这个数据结构来设置颜色。
typedef struct
{


    double val[4];
}Scalar;
绘图
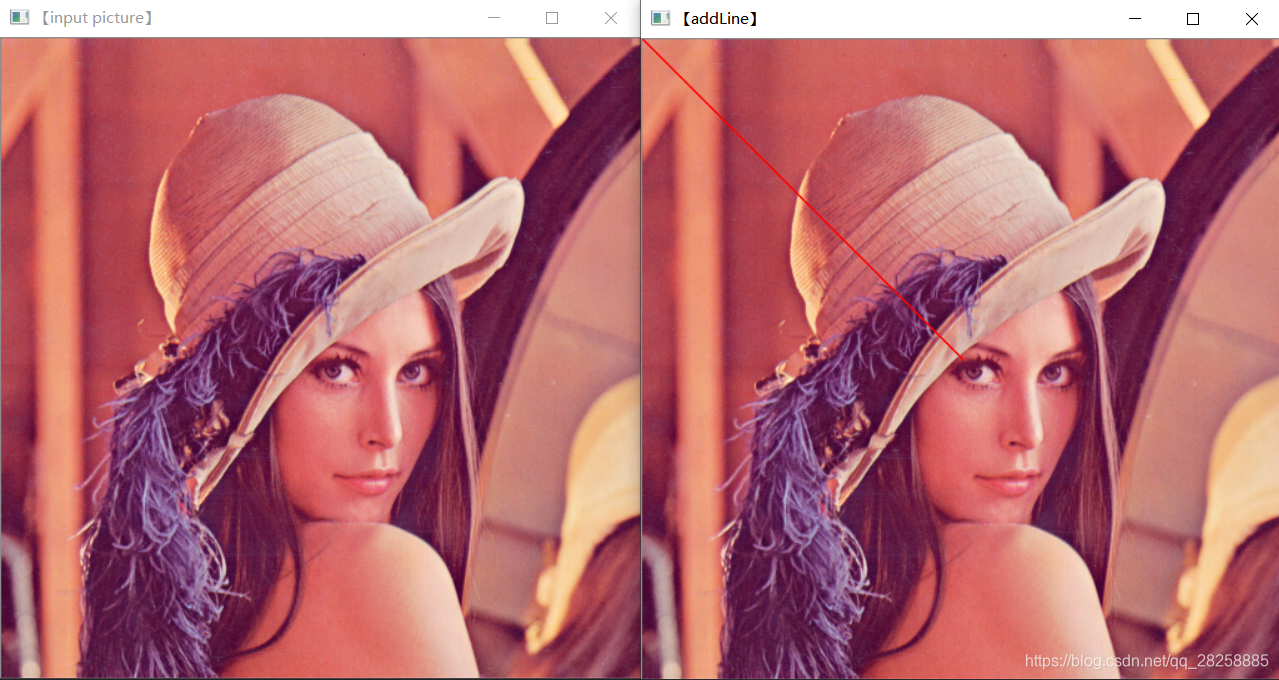
绘制直线
cv::line
API
void line(
            InputOutputArray img,
            Point pt1,
            Point pt2,
            const Scalar& color,
            int thickness = 1,
            int lineType = LINE_8,
            int shift = 0
        );
@param img :输入图像。
@param pt1 :直线的第一个端点。
@param pt2 :直线的第二个端点。
@param color :直线的颜色。
@param thickness :直线的粗细程度。
@param lineType :直线类型,一共有三个:LINE_4,LINE_8,LINE_AA.其中LINE_AA是无锯齿直线。
这里就要注意,反锯齿就是在画完线后再进行渲染处理,占用资源也就更多。根据需要去选择是否使用。@param shift :点坐标中的小数位数,一般用默认值。可以不写
代码
#include<opencv2/opencv.hpp>
#include<iostream>

using namespace std;
using namespace cv;
Mat src1 = imread("C:/Users/86176/Desktop/pics/lena(1).tiff");

void addLine()
{


	Point p1 = Point(src1.cols / 2, src1.rows / 2);
	Point p2;
	p2.x = 0;
	p2.y = 0;
	Scalar color = Scalar(0, 0, 255);
	line(src1, p1, p2, color, 1, LINE_4);
	imshow("【addLine】", src1);
}

void main()
{


	if (!src1.data)
	{


		printf("could not load image...\n");
		return;
	}
	imshow("【input picture】", src1);
	addLine();
	waitKey(0);
}
效果
绘制矩形
cv::rectangle
API
void rectangle(
        Mat& img,
        Rect rec,
        const Scalar& color,
        int thickness = 1,
        int lineType = LINE_8,
        int shift = 0
    );
@param img :输入图像。
@param rec :一个矩形,包含四个参数,横纵坐标以及长宽。
@param color :直线的颜色。
@param thickness :直线的粗细程度。
@param lineType :直线类型,一共有三个:LINE_4,LINE_8,LINE_AA.其中LINE_AA是无锯齿直线。
@param shift :点坐标中的小数位数,一般用默认值。可以不写
代码
#include<opencv2/opencv.hpp>
#include<iostream>

using namespace std;
using namespace cv;
Mat src1 = imread("C:/Users/86176/Desktop/pics/lena(1).tiff");

void addRectangle()
{


	Rect rect = Rect(220, 200, 150, 200);//横纵长款
	Scalar color = Scalar(0, 0, 255);
	rectangle(src1, rect, color, 2, LINE_4);
	imshow("【addRectangle】", src1);
}

void main()
{


	if (!src1.data)
	{


		printf("could not load image...\n");
		return;
	}
	imshow("【input picture】", src1);
	addRectangle();
	waitKey(0);
}
效果
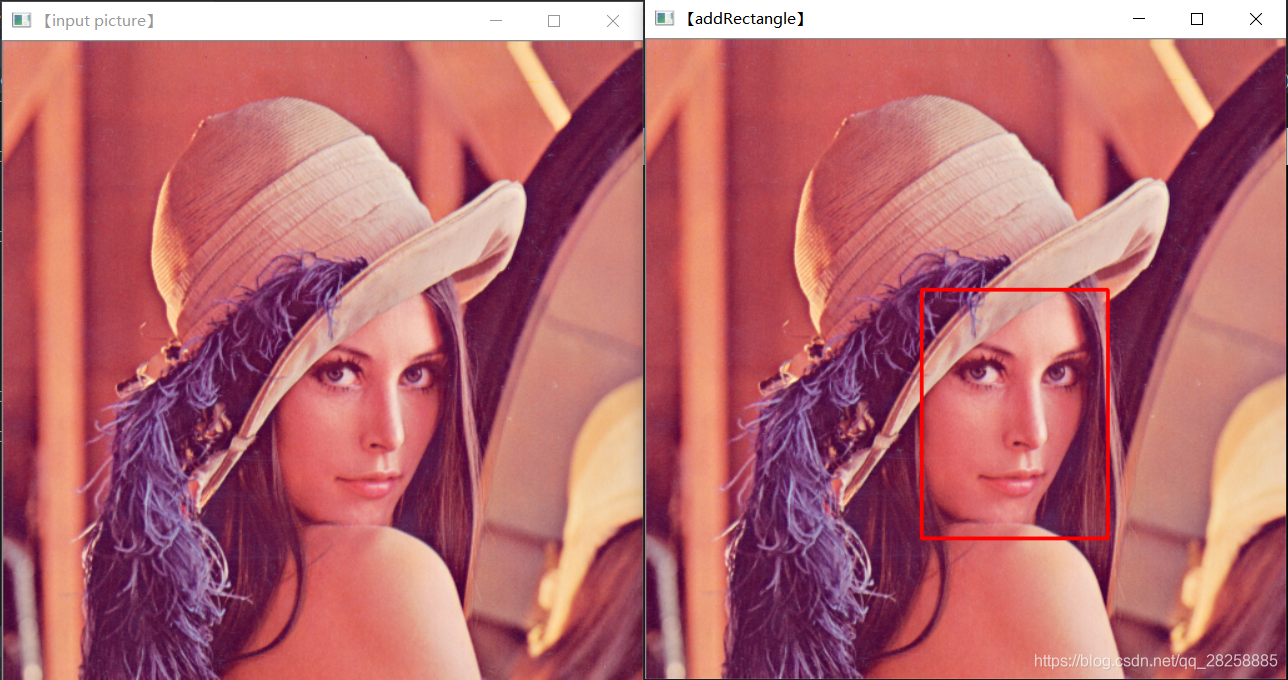
人脸检测定位就是用这个方法来画框
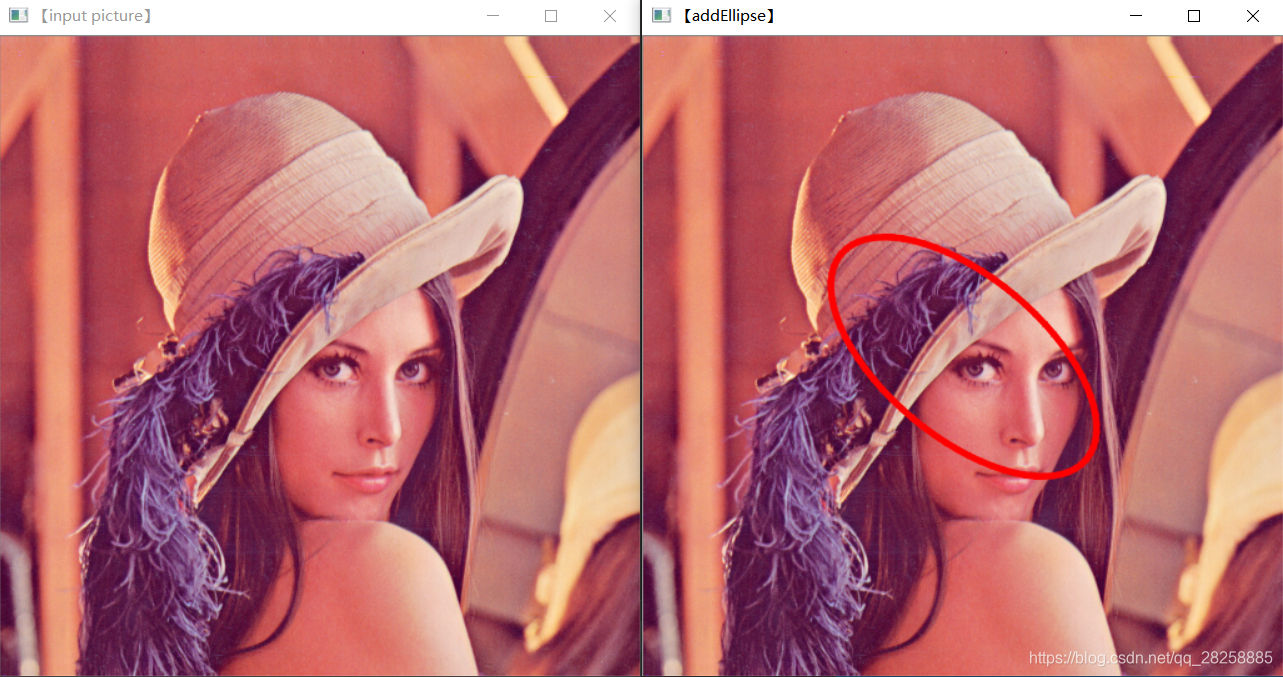
绘制椭圆
cv::line
椭圆所需要的参数就比较多
一个是位置(中心);
一个是长轴短轴;
一个是方向,是横着还是竖着还是斜着?
一个是哪个角度开始;
一个是哪个角度结束;(一般这两个为0-360,表示完整的椭圆)
剩下的就是颜色啊,粗细啊,线的类型之类的。
API
void ellipse(
        InputOutputArray img,
        Point center,
        Size axes,
        double angle,
        double startAngle,
        double endAngle,
        const Scalar& color,
        int thickness = 1,
        int lineType = LINE_8,
        int shift = 0
    );
@param img :输入图像。
@param center :椭圆中心。
@param axes :轴线。
@param angle :椭圆旋转角度,单位为度。
@param startAngle :椭圆弧的起始角,单位为度。
@param endAngle :椭圆弧的终止角,单位为度。
@param color :椭圆的颜色。
@param thickness :椭圆的粗细程度。
@param lineType :椭圆线类型,一共有三个:LINE_4,LINE_8,LINE_AA.其中LINE_AA是无锯齿直线。
@param shift :点坐标中的小数位数,一般用默认值。可以不写
若轴线的XY一样,那么这个椭圆就是一个圆
代码
#include<opencv2/opencv.hpp>
#include<iostream>

using namespace std;
using namespace cv;
Mat src1 = imread("C:/Users/86176/Desktop/pics/lena(1).tiff");

void addEllipse()
{


	Point p1 = Point(src1.cols / 2, src1.rows / 2);
	Size s1 = Size(src1.cols / 4, src1.rows / 8);
	Scalar color = Scalar(0, 0, 255);
	ellipse(src1, p1, s1, 40, 0, 360, color, 4, LINE_AA);
	imshow("【addEllipse】", src1);
}

void main()
{


	if (!src1.data)
	{


		printf("could not load image...\n");
		return;
	}
	imshow("【input picture】", src1);
	addEllipse();
	waitKey(0);
}
效果
绘制圆
除了上面绘制椭圆时,将轴线xy设置成一样的,还可以用
cv::circle
API
圆的话只需要知道圆心和半径就可以了
void circle(
        InputOutputArray img,
        Point center,
        int radius,
        const Scalar& color,
        int thickness = 1,
        int lineType = LINE_8,
        int shift = 0
    );
@param img:输入图像。
@param center:圆心。
@param radius:半径。
@param color :圆的颜色。
@param thickness :圆的粗细程度。
@param lineType :圆线的类型,一共有三个:LINE_4,LINE_8,LINE_AA.其中LINE_AA是无锯齿直线。
@param shift:点坐标中的小数位数,一般用默认值。可以不设置
代码
#include<opencv2/opencv.hpp>
#include<iostream>
using namespace std;
using namespace cv;
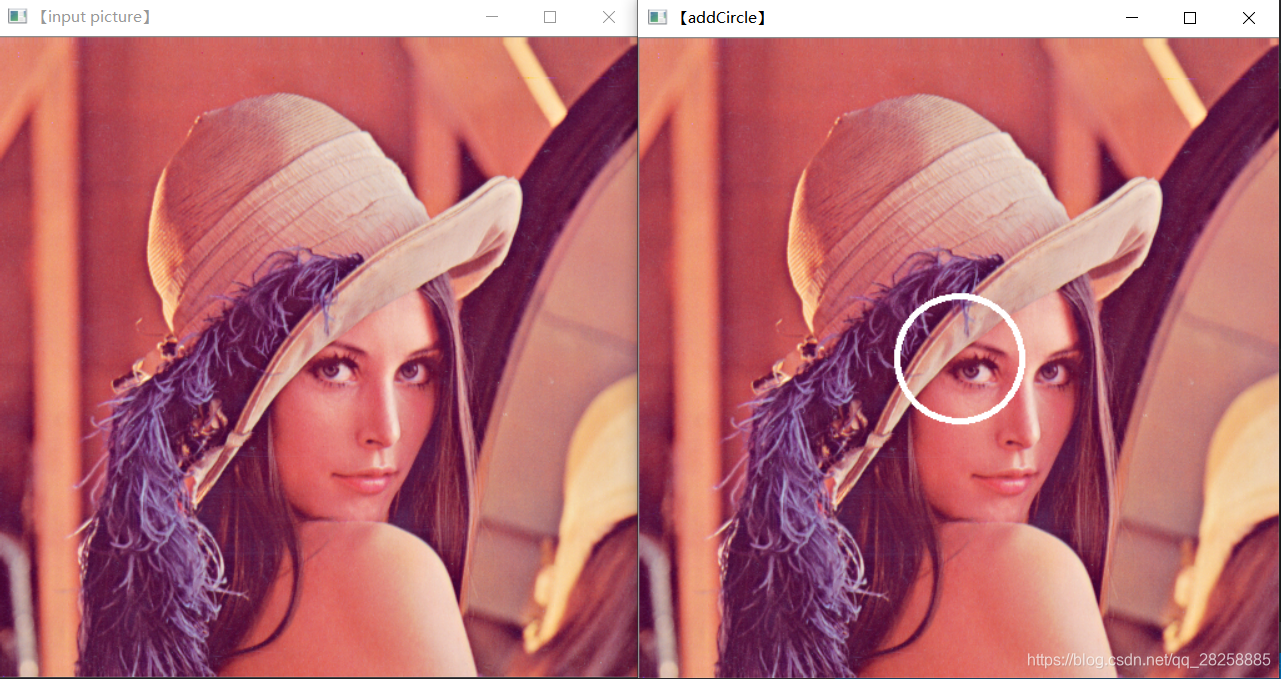
Mat src1 = imread("C:/Users/86176/Desktop/pics/lena(1).tiff");
void addCircle()
{
Point center = Point(src1.cols / 2, src1.rows / 2);
Scalar color = Scalar(255, 255, 255);
circle(src1, center, 50, color, 4, LINE_4);
imshow("【addCircle】", src1);
}
void main()
{
if (!src1.data)
{
printf("could not load image...\n");
return;
}
imshow("【input picture】", src1);
addCircle();
waitKey(0);
}
效果
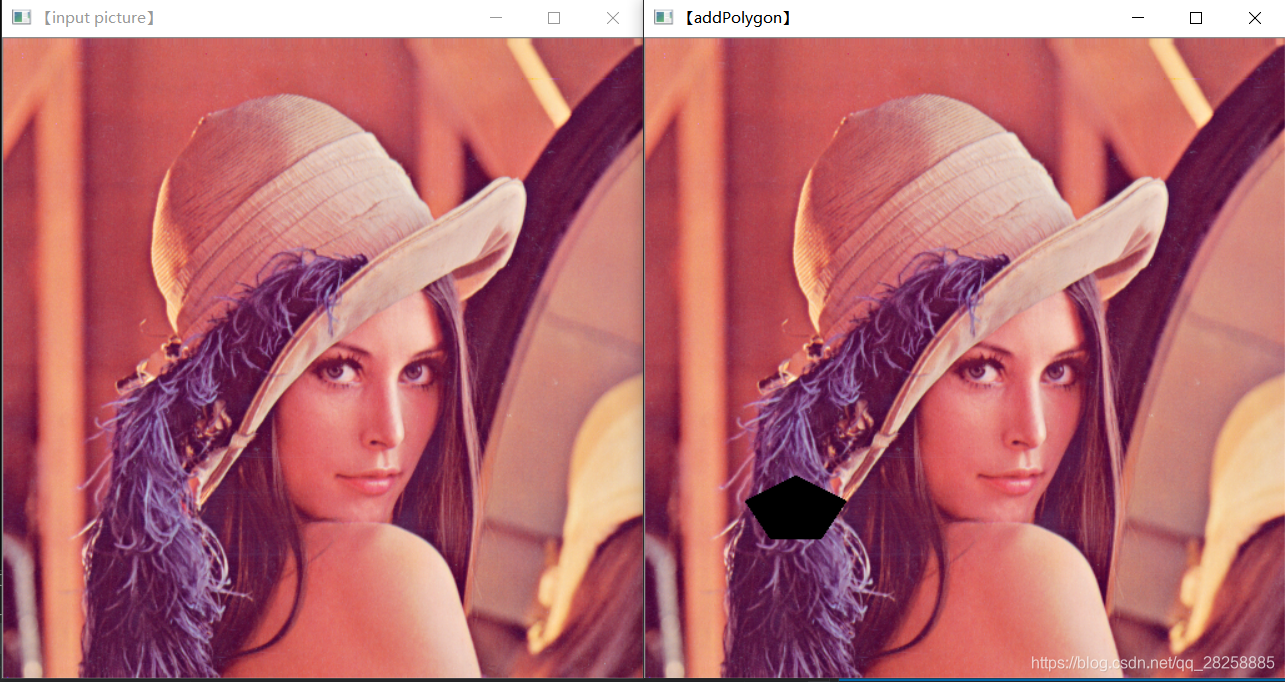
设置填充
API
void fillPoly(
        Mat & img,
        const Point** pts,
        const int* npts,
        int ncontours,
        const Scalar& color,
        int lineType = LINE_8,
        int shift = 0,
        Point offset = Point()
    );
@param img:输入图像。
@param pts :多边形顶点。
@param npts:顶点个数。
@param ncontours:边的个数。
@param color:填充的颜色。
@param lineType :直线类型,一共有三个:LINE_4,LINE_8,LINE_AA.其中LINE_AA是无锯齿直线。
@param shift:点坐标中的小数位数,一般用默认值。可以不设置
@param offset:轮廓所有点的可选偏移。可以不设置
代码
#include<opencv2/opencv.hpp>
#include<iostream>

using namespace std;
using namespace cv;
Mat src1 = imread("C:/Users/86176/Desktop/pics/lena(1).tiff");


void addPolygon()
{


	Point pst[1][6];
	pst[0][0] = Point(120, 350);
	pst[0][1] = Point(80, 370);
	pst[0][2] = Point(100, 400);
	pst[0][3] = Point(140, 400);
	pst[0][4] = Point(160, 370);
	pst[0][5] = Point(120, 350);
	const Point* ppst[] = {

     pst[0] };
	int npt[] = {

     6 };
	Scalar color = Scalar(0, 0, 0);
	fillPoly(src1, ppst, npt, 1, color, LINE_4);//图像填充
	imshow("【addPolygon】", src1);
}

void main()
{


	if (!src1.data)
	{


		printf("could not load image...\n");
		return;
	}
	imshow("【input picture】", src1);
	addPolygon();
	waitKey(0);
}
效果
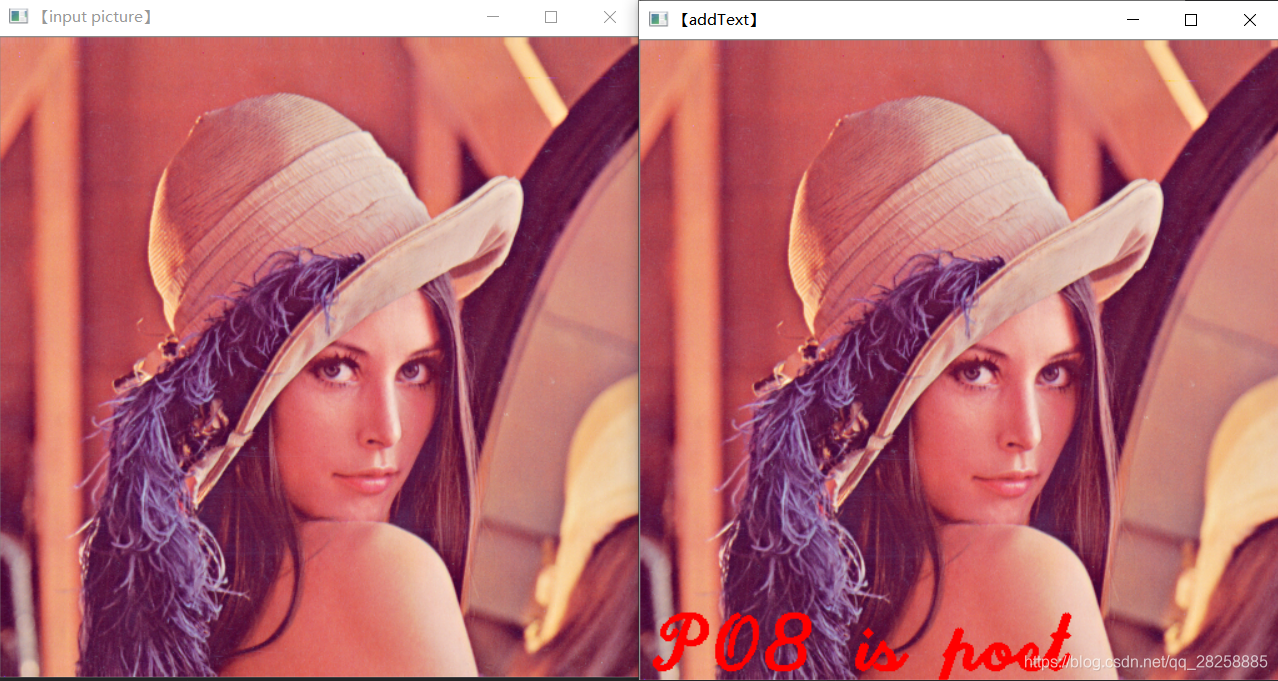
绘制文字
API
void putText(
        InputOutputArray img,
        const String& text,
        Point org,
        int fontFace,
        double fontScale,
        Scalar color,
        int thickness = 1,
        int lineType = LINE_8,
        bool bottomLeftOrigin = false
    );
@param img :输入图像。
@param text:添加的文字。
@param org:图像中文本字符串的左下角。
@param fontFace:文字的字体。
@param color :文字的颜色。
@param thickness :文字的粗细程度。
@param lineType:文字的类型,一共有三个:LINE_4,LINE_8,LINE_AA.其中LINE_AA是无锯齿直线。
@param bottomLeftOrigin:如果为真,则图像数据原点位于左下角。否则,它在左上角。
代码
#include<opencv2/opencv.hpp>
#include<iostream>

using namespace std;
using namespace cv;
Mat src1 = imread("C:/Users/86176/Desktop/pics/lena(1).tiff");


void addText() {


	Point location = Point(10, src1.rows - 10);
	string text = "PO8 is poet";
	putText(src1, text, location, CV_FONT_BLACK, 2, Scalar(0, 0, 255), 3, 8);
	imshow("【addText】", src1);
}

void main()
{


	if (!src1.data)
	{


		printf("could not load image...\n");
		return;
	}
	imshow("【input picture】", src1);
	addText();
	waitKey(0);
}
效果