Vue学习笔记
一、Vue核心
1、Vue的基本认识
1、官网
中文官网https://cn.vuejs.org/
英文官网https://vuejs.org
2、介绍
Vue (读音 /vjuː/,类似于 view) 是一套用于构建用户界面的渐进式框架。与其它大型框架不同的是,Vue 被设计为可以自底向上逐层应用。Vue 的核心库只关注视图层,不仅易于上手,还便于与第三方库或既有项目整合。另一方面,当与现代化的工具链以及各种支持类库结合使用时,Vue 也完全能够为复杂的单页应用提供驱动。
3、特点
1)遵循MVVM模式
2)编码简洁,体积小,运行效率高,适合移动/PC端开发
3)它本身只关注UI,可以轻松引入vue插件或其它第三方库开发项目
4、与其它前端 JS 框架的关联
- 借鉴 angular 的模板和数据绑定技术
- 借鉴 react 的组件化和虚拟DOM技术
5、vue扩展插件
1)vue-cli: vue 脚手架
2) vue-resource(axios): ajax 请求
3) vue-router: 路由
4)vuex:状态管理
5)vue-lazyload图片懒加载
6)vue-scroller页面滑动相关
7)mint-ui基于vue的ui组件库(移动端)
8)element-ui基于vue的ui组件库(PC端)
2、Vue的基本使用
html
<!DOCTYPE html>
<html lang="en">
<head>
<meta charset="UTF-8">
<title>01_HelloWorld</title>
</head>
<body>
<!--
1. 引入Vue.js
2. 创建Vue对象
el : 指定根element(选择器)
data : 初始化数据(页面可以访问)
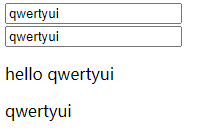
3. 双向数据绑定 : v-model
4. 显示数据 : {
{xxx}}
5. 理解vue的mvvm实现
-->
<!--模板-->
<div id="test">
<input type="text" v-model="msg"><br>
<!--指令-->
<input type="text" v-model="msg"> <!-- element.value = 'xxx' -->
<!--指令-->
<p>hello {
{msg}}</p>
<p v-text="msg"></p> <!-- element.textContent = 'xxx' -->
<!--大括号表达式-->
</div>
<script type="text/javascript" src="js/vue.js"></script>
<script type="text/javascript">
const vm = new Vue({
// 配置对象 options
// 配置选项(option)
el: '#test', // element: 指定用vue来管理页面中的哪个标签区域
data: {
msg: 'hahaahah'
}
})
vm.msg = 'qwertyui';
</script>
</body>
</html>
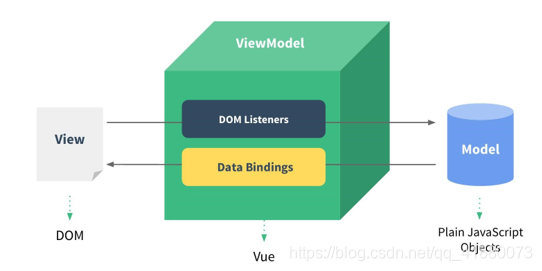
3、理解Vue的MVVM
model:模型,数据对象(data)
view: 视图,模板页面
viewModel: 视图模型(Vue的实例)
4、模板语法
<!DOCTYPE html>
<html lang="en">
<head>
<meta charset="UTF-8">
<meta name="viewport" content="width=device-width, initial-scale=1.0">
<title>Document</title>
</head>
<body>
<!--
1. 模板的理解:
动态的html页面
包含了一些JS语法代码
大括号表达式
指令(以v-开头的自定义标签属性)
2. 双大括号表达式
语法: {
{exp}} 或 {
{
{exp}}}
功能: 向页面输出数据
可以调用对象的方法
3. 指令一: 强制数据绑定
功能: 指定变化的属性值
完整写法:
v-bind:xxx='yyy' //yyy会作为表达式解析执行
简洁写法:
:xxx='yyy'
4. 指令二: 绑定事件监听
功能: 绑定指定事件名的回调函数
完整写法:
v-on:click='xxx'
简洁写法:
@click='xxx'
-->
<div id="app">
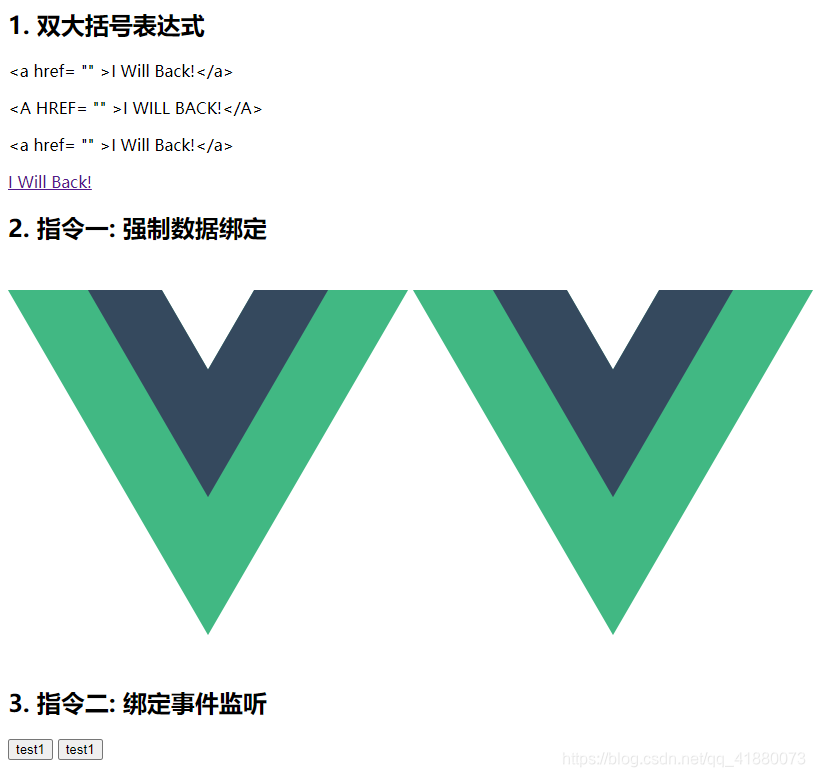
<h2>1. 双大括号表达式</h2>
<p>{
{msg}}</p> <!-- textContent -->
<p>{
{msg.toUpperCase()}}</p>
<p v-text="msg"></p> <!-- textContent -->
<p v-html="msg"></p> <!-- innerHTML -->
<h2>2. 指令一: 强制数据绑定</h2>
<img v-bind:src="imgUrl">
<img :src="imgUrl">
<h2>3. 指令二: 绑定事件监听</h2>
<button v-on:click="test">test1</button>
<button @click="test2('acs')">test1</button>
</div>
<script src="js/vue.js"></script>
<script>
new Vue({
el: '#app',
data: {
msg: '<a href= "" >I Will Back!</a>',
imgUrl: 'https://cn.vuejs.org/images/logo.png'
},
methods: {
test() {
alert("kasj")
},
test2(content) {
alert(content)
}
}
})
</script>
</body>
</html>
5、计算属性基本使用
<!DOCTYPE html>
<html lang="en">
<head>
<meta charset="UTF-8">
<title>03_计算属性和监视</title>
</head>
<body>
<!--
1. 计算属性
在computed属性对象中定义计算属性的方法
在页面中使用{
{方法名}}来显示计算的结果
2. 监视属性:
通过通过vm对象的$watch()或watch配置来监视指定的属性
当属性变化时, 回调函数自动调用, 在函数内部进行计算
3. 计算属性高级:
通过getter/setter实现对属性数据的显示和监视
计算属性存在缓存, 多次读取只执行一次getter计算
计算属性是基于它们的响应式依赖进行缓存的
如果你不希望有缓存,请用方法来替代
-->
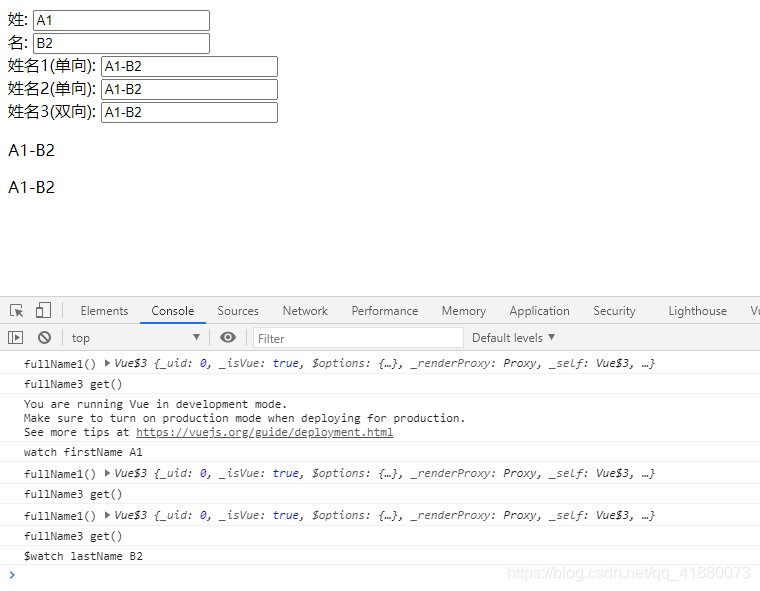
<div id="demo">
姓: <input type="text" placeholder="First Name" v-model="firstName"><br>
名: <input type="text" placeholder="Last Name" v-model="lastName"><br>
<!--fullName1是根据fistName和lastName计算产生-->
姓名1(单向): <input type="text" placeholder="Full Name1" v-model="fullName1"><br>
姓名2(单向): <input type="text" placeholder="Full Name2" v-model="fullName2"><br>
姓名3(双向): <input type="text" placeholder="Full Name3" v-model="fullName3"><br>
<p>{
{fullName1}}</p>
<p>{
{fullName1}}</p>
</div>
<script type="text/javascript" src="js/vue.js"></script>
<script type="text/javascript">
const vm = new Vue({
el: '#demo',
data: {
firstName: 'A',
lastName: 'B',
fullName2: 'A-B'
},
// 计算属性配置: 值为对象
computed: {
fullName1() {
// 属性的get()
console.log('fullName1()', this)
return this.firstName + '-' + this.lastName
},
fullName3: {
// 当获取当前属性值时自动调用, 将返回值(根据相关的其它属性数据)作为属性值
get() {
console.log('fullName3 get()')
return this.firstName + '-' + this.lastName
},
// 当属性值发生了改变时自动调用, 监视当前属性值变化, 同步更新相关的其它属性值
set(value) {
// fullName3的最新value值 A-B23
console.log('fullName3 set()', value)
// 更新firstName和lastName
const names = value.split('-')
this.firstName = names[0]
this.lastName = names[1]
}
}
},
watch: {
// 配置监视firstName
firstName: function(value) {
// 相当于属性的set
console.log('watch firstName', value)
// 更新fullName2
this.fullName2 = value + '-' + this.lastName
}
}
})
// 监视lastName
vm.$watch('lastName', function(value) {
console.log('$watch lastName', value)
// 更新fullName2
this.fullName2 = this.firstName + '-' + value
})
</script>
</body>
</html>
6、强制绑定class和style
<!DOCTYPE html>
<html lang="en">

<head>
    <meta charset="UTF-8">
    <title>04_class与style绑定</title>
    <style>
        .classA {


            color: red;
        }

        .classB {


            background: blue;
        }

        .classC {


            font-size: 20px;
        }
    </style>
</head>

<body>

    <!--
    1. 理解
      在应用界面中, 某个(些)元素的样式是变化的
      class/style绑定就是专门用来实现动态样式效果的技术
    2. class绑定: :class='xxx'
      xxx是字符串
      xxx是对象
      xxx是数组
    3. style绑定
      :style="{ color: activeColor, fontSize: fontSize + 'px' }"
      其中activeColor/fontSize是data属性
    -->

    <div id="demo">
        <h2>1. class绑定: :class='xxx'</h2>
        <p :class="myClass">xxx是字符串</p>
        <p :class="{classA: hasClassA, classB: hasClassB}">xxx是对象</p>
        <p :class="['classA', 'classB']">xxx是数组</p>

        <h2>2. style绑定</h2>
        <p :style="{

       color:activeColor, fontSize}">:style="{ color: activeColor, fontSize: fontSize + 'px' }"</p>

        <button @click="update">更新</button>

    </div>

    <script type="text/javascript" src="../js/vue.js"></script>
    <script type="text/javascript">
        new Vue({


            el: '#demo',
            data: {


                myClass: 'classA',
                hasClassA: true,
                hasClassB: false,
                activeColor: 'red',
                fontSize: '20px'
            },

            methods: {


                update() {


                    this.myClass = 'classB'
                    this.hasClassA = !this.hasClassA
                    this.hasClassB = !this.hasClassB
                    this.activeColor = 'yellow'
                    this.fontSize = '30px'
                }
            }
        })
    </script>
</body>

</html>
7、条件渲染
<!DOCTYPE html>
<html lang="en">

<head>
    <meta charset="UTF-8">
    <title>08_条件渲染</title>
</head>

<body>
    <!--
    1. 条件渲染指令
      v-if
      v-else
      v-show
    2. 比较v-if与v-show
      如果需要频繁切换 v-show 较好
      v-if 是“真正”的条件渲染,因为它会确保在切换过程中条件块内的事件监听器和子组件适当地被销毁和重建。
      v-if 也是惰性的:如果在初始渲染时条件为假,则什么也不做——直到条件第一次变为真时,才会开始渲染条件块。
      相比之下,v-show 就简单得多——不管初始条件是什么,元素总是会被渲染,并且只是简单地基于 CSS 进行切换。
      一般来说,v-if 有更高的切换开销,而 v-show 有更高的初始渲染开销。因此,如果需要非常频繁地切换,则使用 v-show 较好;如果在运行时条件很少改变,则使用 v-if 较好。
    -->

    <div id="demo">
        <p v-if="ok">表白成功</p>
        <p v-else>表白失败</p>

        <hr>
        <p v-show="ok">求婚成功</p>
        <p v-show="!ok">求婚失败</p>

        <button @click="ok=!ok">切换</button>
    </div>

    <script type="text/javascript" src="../js/vue.js"></script>
    <script type="text/javascript">
        new Vue({


            el: '#demo',
            data: {


                ok: true,
            }
        })
    </script>
</body>

</html>
8、列表渲染
<!DOCTYPE html>
<html lang="en">
<head>
<meta charset="UTF-8">
<title>06_列表渲染</title>
</head>
<body>
<!--
1. 列表显示
数组: v-for / index
对象: v-for / key
2. 列表的更新显示
删除item
替换item
-->
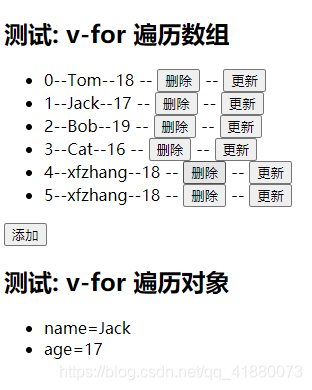
<div id="demo">
<h2>测试: v-for 遍历数组</h2>
<ul>
<li v-for="(p, index) in persons" :key="index">
{
{index}}--{
{p.name}}--{
{p.age}} --
<button @click="deleteP(index)">删除</button> --
<button @click="updateP(index, {name:'Cat', age: 16})">更新</button>
</li>
</ul>
<button @click="addP({name: 'xfzhang', age: 18})">添加</button>
<h2>测试: v-for 遍历对象</h2>
<ul>
<li v-for="(item, key) in persons[1]" :key="key">{
{key}}={
{item}}</li>
</ul>
</div>
<script type="text/javascript" src="js/vue.js"></script>
<script type="text/javascript">
new Vue({
el: '#demo',
data: {
persons: [{
name: 'Tom',
age: 18
}, {
name: 'Jack',
age: 17
}, {
name: 'Bob',
age: 19
}, {
name: 'Mary',
age: 16
}]
},
methods: {
deleteP(index) {
this.persons.splice(index, 1) // 调用了不是原生数组的splice(), 而是一个变异(重写)方法
// 1. 调用原生的数组的对应方法
// 2. 更新界面
},
updateP(index, newP) {
console.log('updateP', index, newP)
// this.persons[index] = newP // vue根本就不知道
this.persons.splice(index, 1, newP)
// this.persons = []
},
addP(newP) {
this.persons.push(newP)
}
}
})
</script>
</body>
</html>
维护状态
当 Vue 正在更新使用 v-for 渲染的元素列表时,它默认使用“就地更新”的策略。如果数据项的顺序被改变,Vue 将不会移动 DOM 元素来匹配数据项的顺序,而是就地更新每个元素,并且确保它们在每个索引位置正确渲染。这个类似 Vue 1.x 的 track-by="$index"。
这个默认的模式是高效的,但是只适用于不依赖子组件状态或临时 DOM 状态 (例如:表单输入值) 的列表渲染输出。
为了给 Vue 一个提示,以便它能跟踪每个节点的身份,从而重用和重新排序现有元素,你需要为每项提供一个唯一 key attribute:
<div v-for="item in items" v-bind:key="item.id">
  <!-- 内容 -->
</div>
建议尽可能在使用 v-for 时提供 key attribute,除非遍历输出的 DOM 内容非常简单,或者是刻意依赖默认行为以获取性能上的提升。
因为它是 Vue 识别节点的一个通用机制,key 并不仅与 v-for 特别关联。后面我们将在指南中看到,它还具有其它用途。
数组更新检测
1)变更方法
Vue 将被侦听的数组的变更方法进行了包裹,所以它们也将会触发视图更新。这些被包裹过的方法包括:
push()
pop()
shift()
unshift()
splice()
sort()
reverse()
你可以打开控制台,然后对前面例子的 items 数组尝试调用变更方法。比如 example1.items.push({ message: ‘Baz’ })。
2)替换数组
变更方法,顾名思义,会变更调用了这些方法的原始数组。相比之下,也有非变更方法,例如 filter()、concat() 和 slice()。它们不会变更原始数组,而总是返回一个新数组。当使用非变更方法时,可以用新数组替换旧数组:
example1.items = example1.items.filter(function (item) {


  return item.message.match(/Foo/)
})
你可能认为这将导致 Vue 丢弃现有 DOM 并重新渲染整个列表。幸运的是,事实并非如此。Vue 为了使得 DOM 元素得到最大范围的重用而实现了一些智能的启发式方法,所以用一个含有相同元素的数组去替换原来的数组是非常高效的操作。
9、列表的搜索与排序
<!DOCTYPE html>
<html lang="en">
<head>
<meta charset="UTF-8">
<meta name="viewport" content="width=device-width, initial-scale=1.0">
<title>Document</title>
</head>
<body>
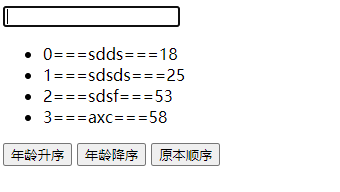
<div id="test">
<input type="text" v-model="searchName">
<ul>
<li v-for="( p , index) in filterPersons" :key="index">
{
{index}}==={
{p.name}}==={
{p.age}}
</li>
</ul>
<button @click="setOrderType(2)">年龄升序</button>
<button @click="setOrderType(1)">年龄降序</button>
<button @click="setOrderType(0)">原本顺序</button>
</div>
<script src="js/vue.js"></script>
<script>
new Vue({
el: "#test",
data: {
searchName: '',
orderType: 0, // 0代表不排序, 1代表降序, 2代表升序
persons: [{
name: 'sdds',
age: 18
},
{
name: 'sdsds',
age: 25
},
{
name: 'sdsf',
age: 53
},
{
name: 'axc',
age: 58
}
]
},
computed: {
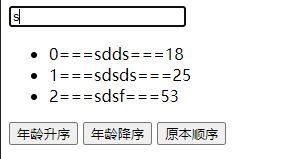
filterPersons() {
const {
searchName,
persons,
orderType
} = this;
let fPersons;
fPersons = persons.filter(p => p.name.indexOf(searchName) !== -1);
if (orderType !== 0) {
fPersons.sort(function (p1, p2) {
if (orderType === 1) {
return p2.age - p1.age;
} else {
return p1.age - p2.age;
}
})
}
return fPersons;
}
},
methods: {
setOrderType(orderType) {
this.orderType = orderType;
}
}
})
</script>
</body>
</html>
输入前:
输入后:
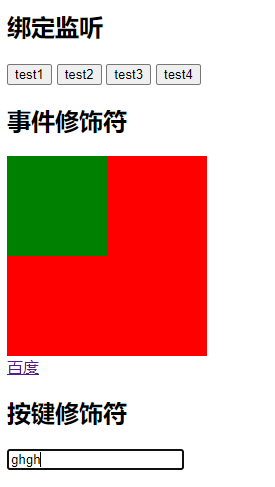
10、事件处理
<!DOCTYPE html>
<html lang="en">

<head>
    <meta charset="UTF-8">
    <meta name="viewport" content="width=device-width, initial-scale=1.0">
    <title>Document</title>
</head>

<body>
    <!--
1. 绑定监听:
  v-on:xxx="fun"
  @xxx="fun"
  @xxx="fun(参数)"
  默认事件形参: event
  隐含属性对象: $event
2. 事件修饰符:
  .prevent : 阻止事件的默认行为 event.preventDefault()
  .stop : 停止事件冒泡 event.stopPropagation()
3. 按键修饰符
  .keycode : 操作的是某个keycode值的健
  .enter : 操作的是enter键
-->
    <div id="example">
        <h2>绑定监听</h2>
        <button @click='test1'>test1</button>
        <button @click='test2("hahaha")'>test2</button>
        <button @click='test3'>test3</button>
        <button @click='test4(123,$event)'>test4</button>
        <h2>事件修饰符</h2>
        <div style="width: 200px; height: 200px; background-color: red;" @click='test5'>
            <div style="width: 100px; height: 100px; background-color: green;" @click.stop='test6'> </div>
        </div>
        <a href="http://www.baidu.com" @click.prevent="test7">百度</a>
        <h2>按键修饰符</h2>
        <input type="text" @keyup.enter='test8'>
    </div>
    <script src="js/vue.js"></script>
    <script>
        new Vue({


            el: '#example',
            data: {


                test1() {


                    alert('test1');
                },
                test2(msg) {


                    alert(msg);
                },
                test3(event) {


                    alert(event.target.innerHTML);
                },
                test4(number, event) {


                    alert(number + "---" + event.target.innerHTML);
                },
                test5() {


                    alert("out");
                },
                test6() {


                    alert("inner");
                },
                /* test7(event) {
                    event.preventDefault();
                    alert("点击了");
                } */
                test7() {


                    alert("点击了");
                },
                /* test8(event) {
                    if (event.keyCode === 13) {
                        alert(event.target.value);
                    }
                } */
                test8() {


                    alert(event.target.value);
                }
            }
        })
    </script>
</body>

</html>
事件修饰符
在事件处理程序中调用 event.preventDefault() 或 event.stopPropagation() 是非常常见的需求。尽管我们可以在方法中轻松实现这点,但更好的方式是:方法只有纯粹的数据逻辑,而不是去处理 DOM 事件细节。
为了解决这个问题,Vue.js 为 v-on 提供了事件修饰符。之前提过,修饰符是由点开头的指令后缀来表示的。
.stop
.prevent
.capture
.self
.once
.passive
<!-- 阻止单击事件继续传播 -->
<a v-on:click.stop="doThis"></a>

<!-- 提交事件不再重载页面 -->
<form v-on:submit.prevent="onSubmit"></form>

<!-- 修饰符可以串联 -->
<a v-on:click.stop.prevent="doThat"></a>

<!-- 只有修饰符 -->
<form v-on:submit.prevent></form>

<!-- 添加事件监听器时使用事件捕获模式 -->
<!-- 即内部元素触发的事件先在此处理,然后才交由内部元素进行处理 -->
<div v-on:click.capture="doThis">...</div>

<!-- 只当在 event.target 是当前元素自身时触发处理函数 -->
<!-- 即事件不是从内部元素触发的 -->
<div v-on:click.self="doThat">...</div>
使用修饰符时,顺序很重要;相应的代码会以同样的顺序产生。因此,用 v-on:click.prevent.self 会阻止所有的点击,而 v-on:click.self.prevent 只会阻止对元素自身的点击。
Vue 还对应 addEventListener 中的 passive 选项提供了 .passive 修饰符。
<!-- 滚动事件的默认行为 (即滚动行为) 将会立即触发 -->
<!-- 而不会等待 `onScroll` 完成  -->
<!-- 这其中包含 `event.preventDefault()` 的情况 -->
<div v-on:scroll.passive="onScroll">...</div>
这个 .passive 修饰符尤其能够提升移动端的性能。
不要把 .passive 和 .prevent 一起使用,因为 .prevent 将会被忽略,同时浏览器可能会向你展示一个警告。请记住,.passive 会告诉浏览器你不想阻止事件的默认行为。
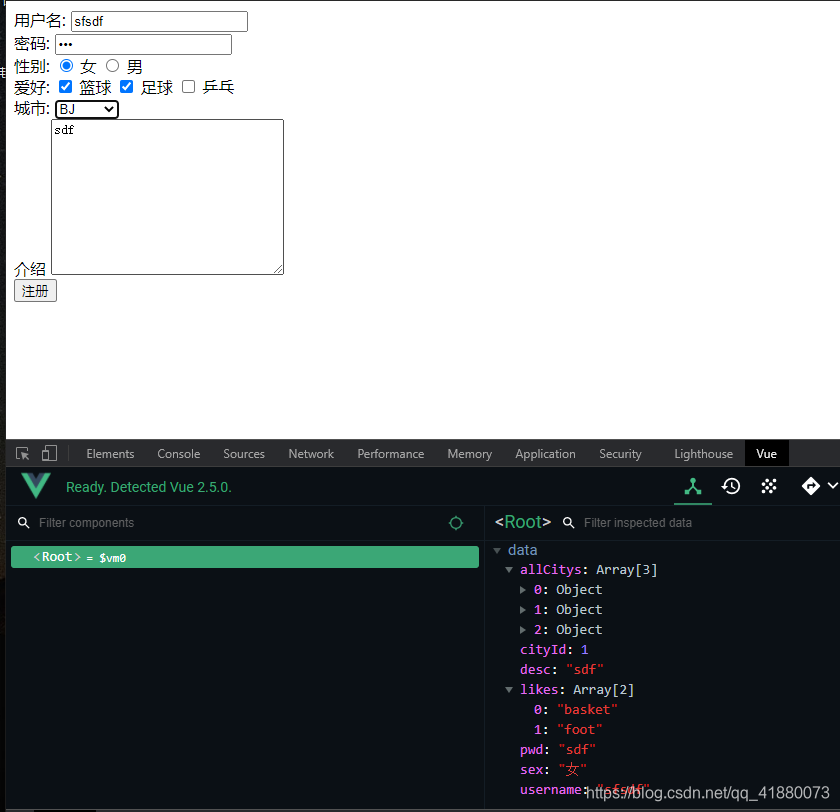
11、表单数据的自动收集
<!DOCTYPE html>
<html lang="en">

<head>
    <meta charset="UTF-8">
    <meta name="viewport" content="width=device-width, initial-scale=1.0">
    <title>Document</title>
</head>

<body>
    <!--
    1. 使用v-model(双向数据绑定)自动收集数据
    text/textarea
    checkbox
    radio
    select
    -->
    <div id="demo">
        <form action="/xxx" @submit.prevent="handSubmit">
            <span>用户名:</span>
            <input type="text" v-model="username"><br>

            <span>密码:</span>
            <input type="password" v-model="pwd"><br>

            <span>性别:</span>
            <input type="radio" id="female" value="女" v-model="sex">
            <label for="female">女</label>
            <input type="radio" id="male" value="男" v-model="sex">
            <label for="male">男</label><br>


            <span>爱好:</span>
            <input type="checkbox" id="basketball" value="basket" v-model="likes">
            <label for="basketball">篮球</label>
            <input type="checkbox" id="football" value="foot" v-model="likes">
            <label for="football">足球</label>
            <input type="checkbox" id="pingpang" value="pingpang" v-model="likes">
            <label for="pingpang">乒乓</label><br>

            <span>城市:</span>
            <select name="" id="" v-model="cityId">
                <option value="">未选择</option>
                <option :value="city.id" v-for="(city, index) in allCitys" :key="index">{

   {city.name}}</option>
            </select><br>

            <span>介绍</span>
            <textarea name="" id="" cols="30" rows="10" v-model="desc"></textarea><br>
            <input type="submit" value="注册">
        </form>
    </div>
    <script src="js/vue.js"></script>
    <script>
        new Vue({


            el: "#demo",
            data: {


                username: '',
                pwd: '',
                sex: '',
                likes: [],
                allCitys: [{


                    id: 1,
                    name: 'BJ'
                }, {


                    id: 2,
                    name: 'SH'
                }, {


                    id: 3,
                    name: 'GZ'
                }],
                cityId: '',
                desc: ''
            },
            methods: {


                handSubmit() {


                    console.log(this.username, this.pwd);
                }
            },
        })
    </script>
</body>

</html>
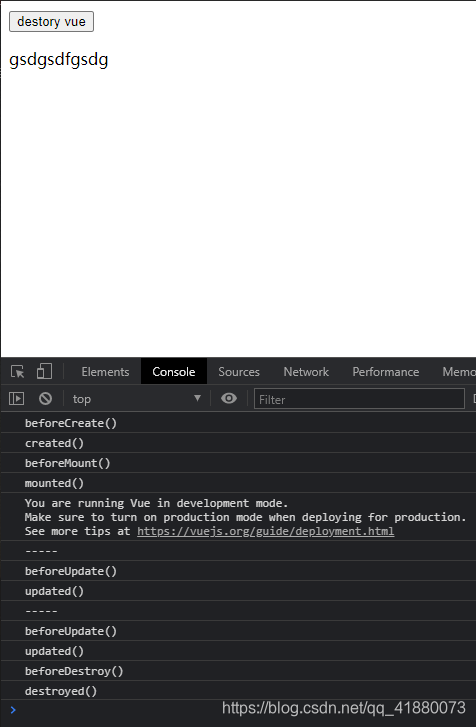
12、Vue生命周期
<!DOCTYPE html>
<html lang="en">
<head>
  <meta charset="UTF-8">
  <title>09_Vue实例_生命周期</title>
</head>
<body>
<!--
1. vue对象的生命周期
  1). 初始化显示
    * beforeCreate()
    * created()
    * beforeMount()
    * mounted()
  2). 更新状态  this.xxx = value
    * beforeUpdate()
    * updated()
  3). 销毁vue实例: vm.$destory()
    * beforeDestory()
    * destoryed()
2. 常用的生命周期方法
  created()/mounted(): 发送ajax请求, 启动定时器等异步任务
  beforeDestory(): 做收尾工作, 如: 清除定时器
-->

<div id="test">
  <button @click="destroyVue">destory vue</button>
  <p v-if="isShow">尚硅谷IT教育</p>
</div>

<script type="text/javascript" src="../js/vue.js"></script>
<script type="text/javascript">
  new Vue({


    el: '#test',
    data: {


      isShow: true
    },

    mounted () {


      // 执行异步任务
      this.intervalId = setInterval(() => {


        console.log('-----')
        this.isShow = !this.isShow
      }, 1000)
    },

    beforeDestroy() {


      console.log('beforeDestroy()')
      // 执行收尾的工作
      clearInterval(this.intervalId)
    },

    methods: {


      destroyVue () {


        this.$destroy()
      }
    }
  })


</script>
</body>
</html>
<!DOCTYPE html>
<html lang="en">

<head>
    <meta charset="UTF-8">
    <title>09_Vue实例_生命周期</title>
</head>
<body>
    <div id="test">
        <button @click="destroyVue">destory vue</button>
        <p v-if="isShow">gsdgsdfgsdg</p>
    </div>

    <script type="text/javascript" src="js/vue.js"></script>
    <script type="text/javascript">
        new Vue({


            el: '#test',
            data: {


                isShow: true
            },

            /* 1 初始化阶段 */
            beforeCreate() {


                console.log('beforeCreate()')
            },

            created() {


                console.log('created()')
            },

            beforeMount() {


                console.log('beforeMount()')
            },

            mounted() {


                console.log('mounted()')
                // 执行异步任务
                this.intervalId = setInterval(() => {


                    console.log('-----')
                    this.isShow = !this.isShow
                }, 1000)
            },

            /* 2 更新阶段 */
            beforeUpdate() {


                console.log('beforeUpdate()')
            },
            updated() {


                console.log('updated()')
            },

            /* 3 死亡阶段 */
            beforeDestroy() {


                console.log('beforeDestroy()')
                // 执行收尾的工作
                clearInterval(this.intervalId)
            },

            destroyed() {


                console.log('destroyed()')
            },

            methods: {


                destroyVue() {


                    this.$destroy()
                }
            }
        })
    </script>
</body>

</html>
生命周期图示

13、过渡和动画
1、css过渡
<!DOCTYPE html>
<html lang="en">
<head>
    <meta charset="UTF-8">
    <meta http-equiv="X-UA-Compatible" content="IE=edge">
    <meta name="viewport" content="width=device-width, initial-scale=1.0">
    <title>Document</title>
    <style>
        /*指定过渡样式*/
        .fade-enter-active,
        .fade-leave-active {


            transition: opacity 2s;
        }
        /*指定隐藏时的样式*/
        .fade-enter,
        .fade-leave-to {


            opacity: 0;
        }
        .move-enter-active {


            transition: all 1s;
        }
        .move-leave-active {


            transition: all 3s;
        }
        .move-enter,
        .move-leave-to {


            opacity: 0;
            transform: translateX(20px);
        }
    </style>
</head>
<body>
    <!--
        1. vue动画的理解
        操作css的trasition或animation
        vue会给目标元素添加/移除特定的class
        2. 基本过渡动画的编码
        1). 在目标元素外包裹<transition name="xxx">
        2). 定义class样式
            1>. 指定过渡样式: transition
            2>. 指定隐藏时的样式: opacity/其它
        3. 过渡的类名
        xxx-enter-active: 指定显示的transition
        xxx-leave-active: 指定隐藏的transition
        xxx-enter: 指定隐藏时的样式
        -->
    <div id="test">
        <button @click="isShow = !isShow">toggle</button>
        <transition name="fade">
            <p v-show="isShow">hello</p>
        </transition>

    </div>
    <div id="test2">
        <button @click="isShow = !isShow">toggle</button>
        <transition name="move">
            <p v-show="isShow">hello</p>
        </transition>

    </div>
    <script src="js/vue.js"></script>
    <script>
        new Vue({


            el: '#test',
            data: {


                isShow: true
            }
        })
        new Vue({


            el: '#test2',
            data: {


                isShow: true
            }
        })
    </script>
</body>
</html>

2、css动画
<!DOCTYPE html>
<html lang="en">
<head>
  <meta charset="UTF-8">
  <title>10_过渡&动画2</title>
  <style>
    .bounce-enter-active {


      animation: bounce-in 2s;
    }
    .bounce-leave-active {


      animation: bounce-in 2s reverse;
    }
    @keyframes bounce-in {


      0% {


        transform: scale(0);
      }
      50% {


        transform: scale(1.5);
      }
      100% {


        transform: scale(1);
      }
    }
  </style>
</head>
<body>

<div id="example-2">
  <button @click="show = !show">Toggle show</button>
  <br>
  <transition name="bounce">
    <p v-if="show" style="display: inline-block">Lorem</p>
  </transition>
</div>

<script type="text/javascript" src="js/vue.js"></script>
<script>
  new Vue({


    el: '#example-2',
    data: {


      show: true
    }
  })
</script>
</body>
</html>
3、自定义过渡的类名
我们可以通过以下 attribute 来自定义过渡类名:
enter-class
enter-active-class
enter-to-class (2.1.8+)
leave-class
leave-active-class
leave-to-class (2.1.8+)
他们的优先级高于普通的类名,这对于 Vue 的过渡系统和其他第三方 CSS 动画库,如 Animate.css 结合使用十分有用。
<!DOCTYPE html>
<html lang="en">
<head>
  <meta charset="UTF-8">
  <title>10_过渡&动画2</title>
  <link href="https://cdn.jsdelivr.net/npm/[email protected]" rel="stylesheet" type="text/css">

</head>
<body>

  <div id="example-3">
    <button @click="show = !show">
      Toggle render
    </button>
    <transition
      name="custom-classes-transition"
      enter-active-class="animated tada"
      leave-active-class="animated bounceOutRight"
    >
      <p v-if="show">hello</p>
    </transition>
  </div>

<script type="text/javascript" src="js/vue.js"></script>
<script>
  new Vue({


  el: '#example-3',
  data: {


    show: true
  }
})
</script>
</body>
</html>
4、JavaScript 钩子
可以在 attribute 中声明 JavaScript 钩子
<transition
  v-on:before-enter="beforeEnter"
  v-on:enter="enter"
  v-on:after-enter="afterEnter"
  v-on:enter-cancelled="enterCancelled"

  v-on:before-leave="beforeLeave"
  v-on:leave="leave"
  v-on:after-leave="afterLeave"
  v-on:leave-cancelled="leaveCancelled"
>
  <!-- ... -->
</transition>
// ...
methods: {


  // --------
  // 进入中
  // --------

  beforeEnter: function (el) {


    // ...
  },
  // 当与 CSS 结合使用时
  // 回调函数 done 是可选的
  enter: function (el, done) {


    // ...
    done()
  },
  afterEnter: function (el) {


    // ...
  },
  enterCancelled: function (el) {


    // ...
  },

  // --------
  // 离开时
  // --------

  beforeLeave: function (el) {


    // ...
  },
  // 当与 CSS 结合使用时
  // 回调函数 done 是可选的
  leave: function (el, done) {


    // ...
    done()
  },
  afterLeave: function (el) {


    // ...
  },
  // leaveCancelled 只用于 v-show 中
  leaveCancelled: function (el) {


    // ...
  }
}
这些钩子函数可以结合 CSS transitions/animations 使用,也可以单独使用。
当只用 JavaScript 过渡的时候,在 enter 和 leave 中必须使用 done 进行回调。否则,它们将被同步调用,过渡会立即完成。
推荐对于仅使用 JavaScript 过渡的元素添加 v-bind:css=“false”,Vue 会跳过 CSS 的检测。这也可以避免过渡过程中 CSS 的影响。
一个使用 Velocity.js 的简单例子:
<!DOCTYPE html>
<html lang="en">
<head>
  <meta charset="UTF-8">
  <title>10_过渡&动画2</title>
  <script src="https://cdnjs.cloudflare.com/ajax/libs/velocity/1.2.3/velocity.min.js"></script>

  <style>
    .bounce-enter-active {


      animation: bounce-in 2s;
    }
    .bounce-leave-active {


      animation: bounce-in 2s reverse;
    }
    @keyframes bounce-in {


      0% {


        transform: scale(0);
      }
      50% {


        transform: scale(1.5);
      }
      100% {


        transform: scale(1);
      }
    }
  </style>
</head>
<body>
  <div id="example-4">
    <button @click="show = !show">
      Toggle
    </button>
    <transition
      v-on:before-enter="beforeEnter"
      v-on:enter="enter"
      v-on:leave="leave"
      v-bind:css="false"
    >
      <p v-if="show">
        Demo
      </p>
    </transition>
  </div>
<script type="text/javascript" src="js/vue.js"></script>
<script>
  new Vue({


  el: '#example-4',
  data: {


    show: false
  },
  methods: {


    beforeEnter: function (el) {


      el.style.opacity = 0
      el.style.transformOrigin = 'left'
    },
    enter: function (el, done) {


      Velocity(el, {

      opacity: 1, fontSize: '1.4em' }, {

      duration: 300 })
      Velocity(el, {

      fontSize: '1em' }, {

      complete: done })
    },
    leave: function (el, done) {


      Velocity(el, {

      translateX: '15px', rotateZ: '50deg' }, {

      duration: 600 })
      Velocity(el, {

      rotateZ: '100deg' }, {

      loop: 2 })
      Velocity(el, {


        rotateZ: '45deg',
        translateY: '30px',
        translateX: '30px',
        opacity: 0
      }, {

      complete: done })
    }
  }
})
</script>
</body>
</html>
14、过滤器
Vue.js 允许你自定义过滤器,可被用于一些常见的文本格式化。过滤器可以用在两个地方:双花括号插值和 v-bind 表达式 (后者从 2.1.0+ 开始支持)。过滤器应该被添加在 JavaScript 表达式的尾部,由“管道”符号指示:
<!-- 在双花括号中 -->
{

   { message | capitalize }}

<!-- 在 `v-bind` 中 -->
<div v-bind:id="rawId | formatId"></div>
<!DOCTYPE html>
<html lang="en">
<head>
  <meta charset="UTF-8">
  <title>11_过滤器</title>
</head>
<body>
<!--
1. 理解过滤器
  功能: 对要显示的数据进行特定格式化后再显示
  注意: 并没有改变原本的数据, 可是产生新的对应的数据
2. 编码
  1). 定义过滤器
    Vue.filter(filterName, function(value[,arg1,arg2,...]){
      // 进行一定的数据处理
      return newValue
    })
  2). 使用过滤器
    <div>{

    {myData | filterName}}</div>
    <div>{

    {myData | filterName(arg)}}</div>
-->
<!--需求: 对当前时间进行指定格式显示-->
<div id="test">
  <h2>显示格式化的日期时间</h2>
  <p>{

   {time}}</p>
  <p>最完整的: {

   {time | dateString}}</p>
  <p>年月日: {

   {time | dateString('YYYY-MM-DD')}}</p>
</div>

<script type="text/javascript" src="../js/vue.js"></script>
<script type="text/javascript" src="https://cdn.bootcss.com/moment.js/2.22.1/moment.js"></script>
<script>
  // 定义过滤器,vue函数对象的filter方法
  Vue.filter('dateString', function (value, format='YYYY-MM-DD HH:mm:ss') {


    return moment(value).format(format);
  })


  new Vue({


    el: '#test',
    data: {


      time: new Date()
    },
    mounted () {


      setInterval(() => {


        this.time = new Date()
      }, 1000)
    }
  })
</script>
</body>
</html>
15、指令
常用内置指令
v:text : 更新元素的 textContent
v-html : 更新元素的 innerHTML
v-if : 如果为true, 当前标签才会输出到页面
v-else: 如果为false, 当前标签才会输出到页面
v-show : 通过控制display样式来控制显示/隐藏
v-for : 遍历数组/对象
v-on : 绑定事件监听, 一般简写为@
v-bind : 强制绑定解析表达式, 可以省略v-bind
v-model : 双向数据绑定
ref : 为某个元素注册一个唯一标识, vue对象通过$refs属性访问这个元素对象
v-cloak : 使用它防止闪现表达式, 与css配合: [v-cloak] { display: none }
<!DOCTYPE html>
<html lang="en">
<head>
    <meta charset="UTF-8">
    <meta http-equiv="X-UA-Compatible" content="IE=edge">
    <meta name="viewport" content="width=device-width, initial-scale=1.0">
    <title>Document</title>
    <style>
        [v-cloak] {


            display: none;
        }
    </style>
</head>
<body>
    <div id="example">
        <p ref="content">hahahahaha</p>
        <button @click="hint">提示</button>
        <p v-cloak>{

   {msg}}</p>
    </div>

    <script src="js/vue.js"></script>
    <script>
        new Vue({


            el: '#example',
            data: {


                msg: '哈哈哈'
            },
            methods: {


                hint: function() {


                    alert(this.$refs.content.textContent)
                }
            }
        })
    </script>
</body>
</html>
16、自定义指令
- 注册全局指令
Vue.directive(‘my-directive’, function(el, binding){
el.innerHTML = binding.value.toupperCase()
}) - 注册局部指令
directives : {
‘my-directive’ : {
bind (el, binding) {
el.innerHTML = binding.value.toupperCase()
}
}
} - 使用指令
v-my-directive=‘xxx’
<!DOCTYPE html>
<html lang="en">
<head>
    <meta charset="UTF-8">
    <meta http-equiv="X-UA-Compatible" content="IE=edge">
    <meta name="viewport" content="width=device-width, initial-scale=1.0">
    <title>Document</title>
</head>
<body>
    <!--
    需求: 自定义2个指令
    1. 功能类型于v-text, 但转换为全大写
    2. 功能类型于v-text, 但转换为全小写
    -->
    <div id="test1">
        <p v-upper-text="msg1"></p>
        <p v-lower-text="msg1"></p>
    </div>
    <div id="test2">
        <p v-upper-text="msg2"></p>
        <p v-lower-text="msg2"></p>
    </div>

    <script src="js/vue.js"></script>
    <script>
        // 注册一个全局指令
        // el: 指令所在的标签对象
        // binding: 包含指令相关数据的容器对象
        Vue.directive('upper-text',function(el,binding) {


            console.log(el , binding);
            el.textContent = binding.value.toUpperCase();
        })
        new Vue({


            el: '#test1',
            data: {


                msg1: "hahaHSJJhahha"
            }
        })

        new Vue({


            el: '#test2',
            data: {


                msg2: "eeeDFEeeeeee"
            },
            // 注册局部指令,只在当前vm管理范围有效
            directives: {


                'lower-text': function(el,binding){


                    el.textContent = binding.value.toLowerCase();
                }
            }
        })
    </script>
</body>
</html>
17、插件
<!DOCTYPE html>
<html lang="en">
<head>
<meta charset="UTF-8">
<meta http-equiv="X-UA-Compatible" content="IE=edge">
<meta name="viewport" content="width=device-width, initial-scale=1.0">
<title>Document</title>
</head>
<body>
<div id="test1">
<p v-my-directive="msg1"></p>
</div>
<script src="js/vue.js"></script>
<script src="js/vue-myPlugin.js"></script>
<script>
// 声明使用插件(安装插件: 调用插件的install())
Vue.use(MyPlugin); // 内部会调用插件对象的install()
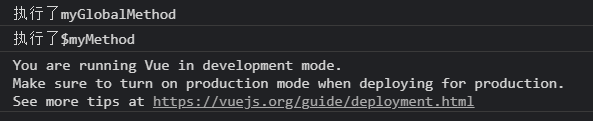
Vue.myGlobalMethod();
const vm = new Vue({
el: "#test1",
data: {
msg1: "hahahhaha"
}
})
vm.$myMethod();
</script>
</body>
</html>
(function() {


    //需要向外暴露的插件对象
    const MyPlugin = {

    };
    //插件对象必须有一个install()
    MyPlugin.install = function (Vue, options) {


        // 1. 添加全局方法或 property
        Vue.myGlobalMethod = function () {


          console.log("执行了myGlobalMethod")
        }

        // 2. 添加全局资源
        Vue.directive('my-directive', function(el,binding){


          el.textContent = binding.value.toUpperCase();
        })

        // 3. 添加实例方法
        Vue.prototype.$myMethod = function (methodOptions) {


          console.log('执行了$myMethod')
        }
      }
      //向外暴露
      window.MyPlugin = MyPlugin;
})()