Manim文档及源码笔记-3b1b角色pi酱01
这个系列研究角色,主要是3b1b中的pi酱~
可能涉及:
- 较深的源码分析或思路解析
- 追溯更多旧版本内容
准备基本环境
下载较早版本
https://github.com/3b1b/manim/releases/tag/v0.1.4
找到分析对象1
文件夹在~/manim/manimlib/files/
有3个.svg文件,名字分别为:
Bubbles_speech
Bubbles_thought
PiCreatures_plain
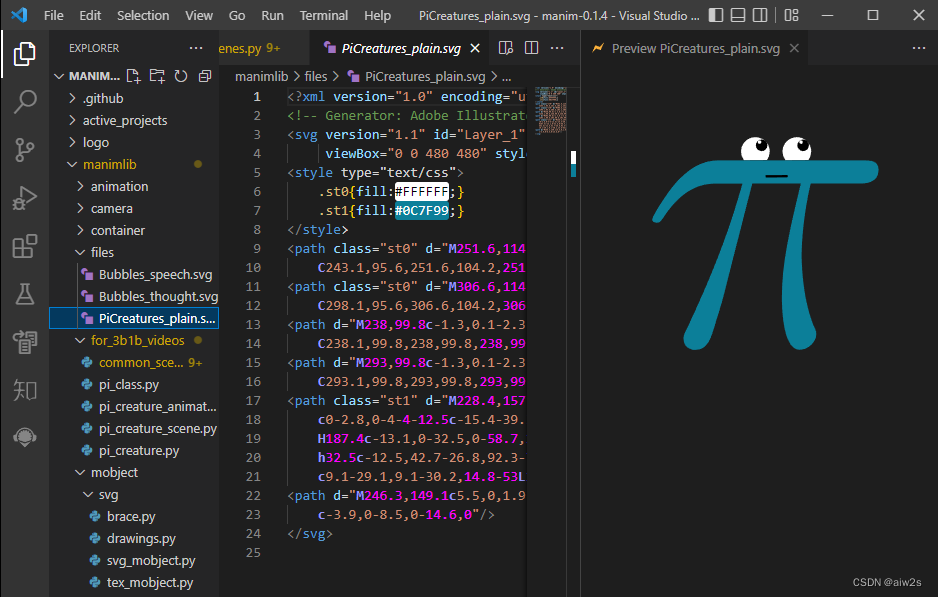
- 什么是:
SVG格式(百度百科) - 怎么看:
VSCode的SVG插件,Svg Preview可以自动识别并预览;(文尾有附图) - 动手做:
-
- 在线编辑工具
-
- 本地编辑工具
- 更好的:比svg更好用的…
找到分析对象2
相关.py文件,和pi有关的在:
~/manim/manimlib/for_3b1b_videos/
旧版中的源码分析
common_scenes.py
总览
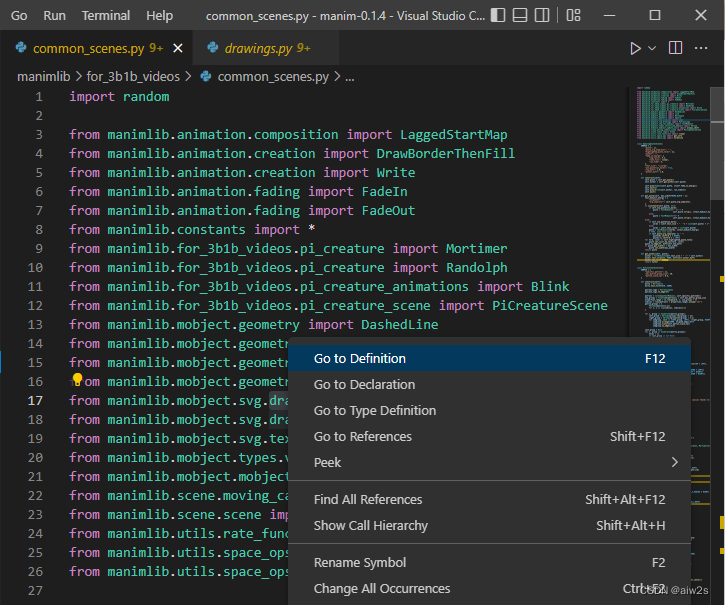
- logo的调用
from manimlib.mobject.svg.drawings import Logo
如图,右键Go to Definition找到对应文件:
~\manim-0.1.4\manimlib\mobject\svg\drawings.py
- drawings.py
这个文件较长,主要是用SVGMobject画各种基本图形元素/组块。
def create_pi_creatures(self):
第175行
    def create_pi_creatures(self):
        title = self.title = TextMobject("Clicky Stuffs")
        title.scale(1.5)
        title.to_edge(UP, buff=MED_SMALL_BUFF)

        randy, morty = self.pi_creatures = VGroup(Randolph(), Mortimer())
        for pi, vect in (randy, LEFT), (morty, RIGHT):
            pi.set_height(title.get_height())
            pi.change_mode("thinking")
            pi.look(DOWN)
            pi.next_to(title, vect, buff=MED_LARGE_BUFF)
        self.add_foreground_mobjects(title, randy, morty)
        return self.pi_creatures
- class TextMobject(TexMobject):
class TextMobject(TexMobject):
    CONFIG = {


        "template_tex_file_body": TEMPLATE_TEXT_FILE_BODY,
        "alignment": "\\centering",
    }
pi_class.py
这个文件极短,设置width、height分别为3和2,
然后各自用i、j遍历了一遍:
from manimlib.constants import *
from manimlib.for_3b1b_videos.pi_creature import PiCreature
from manimlib.mobject.types.vectorized_mobject import VGroup


class PiCreatureClass(VGroup):
    CONFIG = {


        "width": 3,
        "height": 2
    }

    def __init__(self, **kwargs):
        VGroup.__init__(self, **kwargs)
        for i in range(self.width):
            for j in range(self.height):
                pi = PiCreature().scale(0.3)
                pi.move_to(i * DOWN + j * RIGHT)
                self.add(pi)
pi_creature_animations.py
这个文件不是很长,我们继续在本文简要分析一下:
imports【略】
第1段
class Blink(ApplyMethod):
    CONFIG = {


        "rate_func": squish_rate_func(there_and_back)
    }

    def __init__(self, pi_creature, **kwargs):
        ApplyMethod.__init__(self, pi_creature.blink, **kwargs)
- there_and_back
定位到rate_functions.py文件第38行:
def there_and_back(t, inflection=10.0):
    new_t = 2 * t if t < 0.5 else 2 * (1 - t)
    return smooth(new_t, inflection)
实际是一种运动模式。
- pi_creature.blink
第2段
class PiCreatureBubbleIntroduction(AnimationGroup):
    CONFIG = {


        "target_mode": "speaking",
        "bubble_class": SpeechBubble,
        "change_mode_kwargs": {

    },
        "bubble_creation_class": ShowCreation,
        "bubble_creation_kwargs": {

    },
        "bubble_kwargs": {

    },
        "content_introduction_class": Write,
        "content_introduction_kwargs": {

    },
        "look_at_arg": None,
    }

    def __init__(self, pi_creature, *content, **kwargs):
        digest_config(self, kwargs)
        bubble = pi_creature.get_bubble(
            *content,
            bubble_class=self.bubble_class,
            **self.bubble_kwargs
        )
        Group(bubble, bubble.content).shift_onto_screen()

        pi_creature.generate_target()
        pi_creature.target.change_mode(self.target_mode)
        if self.look_at_arg is not None:
            pi_creature.target.look_at(self.look_at_arg)

        change_mode = MoveToTarget(pi_creature, **self.change_mode_kwargs)
        bubble_creation = self.bubble_creation_class(
            bubble, **self.bubble_creation_kwargs
        )
        content_introduction = self.content_introduction_class(
            bubble.content, **self.content_introduction_kwargs
        )
        AnimationGroup.__init__(
            self, change_mode, bubble_creation, content_introduction,
            **kwargs
        )
- 从类名可以看出,要创建话框(说话中的pi酱)
- digest_config(self, kwargs)
拿到话框/云泡的内容content,类别bubble_class; - 把话框及其内容组成组;
- shift_onto_screen()
定位到mobject.py文件,第433行:
    def shift_onto_screen(self, **kwargs):
        space_lengths = [FRAME_X_RADIUS, FRAME_Y_RADIUS]
        for vect in UP, DOWN, LEFT, RIGHT:
            dim = np.argmax(np.abs(vect))
            buff = kwargs.get("buff", DEFAULT_MOBJECT_TO_EDGE_BUFFER)
            max_val = space_lengths[dim] - buff
            edge_center = self.get_edge_center(vect)
            if np.dot(edge_center, vect) > max_val:
                self.to_edge(vect, **kwargs)
        return self
每每读源码,都会忍住自己要重头写一遍的想法;
不过分析完也是要重写的~
class PiCreatureSays(PiCreatureBubbleIntroduction):
    CONFIG = {


        "target_mode": "speaking",
        "bubble_class": SpeechBubble,
    }


class RemovePiCreatureBubble(AnimationGroup):
    CONFIG = {


        "target_mode": "plain",
        "look_at_arg": None,
        "remover": True,
    }

    def __init__(self, pi_creature, **kwargs):
        assert hasattr(pi_creature, "bubble")
        digest_config(self, kwargs, locals())

        pi_creature.generate_target()
        pi_creature.target.change_mode(self.target_mode)
        if self.look_at_arg is not None:
            pi_creature.target.look_at(self.look_at_arg)

        AnimationGroup.__init__(
            self,
            MoveToTarget(pi_creature),
            FadeOut(pi_creature.bubble),
            FadeOut(pi_creature.bubble.content),
        )

    def clean_up_from_scene(self, scene=None):
        AnimationGroup.clean_up_from_scene(self, scene)
        self.pi_creature.bubble = None
        if scene is not None:
            scene.add(self.pi_creature)


class FlashThroughClass(Animation):
    CONFIG = {


        "highlight_color": GREEN,
    }

    def __init__(self, mobject, mode="linear", **kwargs):
        if not isinstance(mobject, PiCreatureClass):
            raise Exception("FlashThroughClass mobject must be a PiCreatureClass")
        digest_config(self, kwargs)
        self.indices = list(range(mobject.height * mobject.width))
        if mode == "random":
            np.random.shuffle(self.indices)
        Animation.__init__(self, mobject, **kwargs)

    def interpolate_mobject(self, alpha):
        index = int(np.floor(alpha * self.mobject.height * self.mobject.width))
        for pi in self.mobject:
            pi.set_color(BLUE_E)
        if index < self.mobject.height * self.mobject.width:
            self.mobject[self.indices[index]].set_color(self.highlight_color)
看来今日份源码分析精力已耗尽,篇幅关系,先暂告段落~
下文提示:
在CE版的尝试
VSCode中的Jupyter 交互模式
【建设中】
附图:VSCode中Svg Preview插件的样子