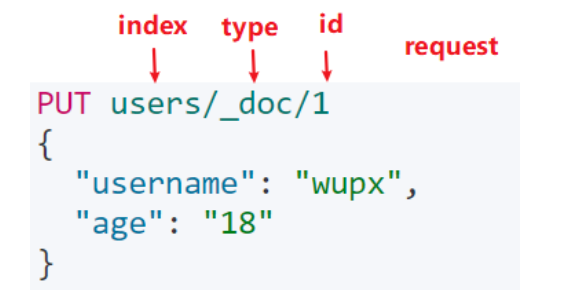
目录
一、什么是Elasticsearch
Elasticsearch 是一个实时的分布式存储、搜索、分析的引擎。
二、倒排索引和Lucene
1、倒排索引
数据存储时,经行分词建立term索引库。见画图。
倒排索引源于实际应用中需要根据属性的值来查找记录。这种索引表中的每一项都包括一个属性值和具有该属性值的各记录的地址。由于不是由记录来确定属性值,而是由属性值来确定记录的位置,因而称为倒排索引(inverted index)。带有倒排索引的文件我们称为倒排索引文件open in new window,简称倒排文件open in new window(inverted file)。
2、Lucene
就是一个jar包,里面封装了全文检索的引擎、搜索的算法代码。开发时,引入lucene的jar包,通过api开发搜索相关业务。底层会在磁盘建立索引库。
三、Elasticsearch的功能
- 分布式的搜索引擎和数据分析引擎
搜索:互联网搜索、电商网站站内搜索、OA系统查询
数据分析:电商网站查询近一周哪些品类的图书销售前十;新闻网站,最近3天阅读量最高的十个关键词,舆情分析。
- 全文检索,结构化检索,数据分析
全文检索:搜索商品名称包含java的图书select * from books where book_name like "%java%"。
结构化检索:搜索商品分类为spring的图书都有哪些,select * from books where category_id='spring'
数据分析:分析每一个分类下有多少种图书,select category_id,count(*) from books group by category_id
- 对海量数据进行近实时的处理
分布式:ES自动可以将海量数据分散到多台服务器上去存储和检索,经行并行查询,提高搜索效率。相对的,Lucene是单机应用。
近实时:数据库上亿条数据查询,搜索一次耗时几个小时,是批处理(batch-processing)。而es只需秒级即可查询海量数据,所以叫近实时。秒级。
四、Elasticsearch的使用场景
国外:
-
维基百科,类似百度百科,“网络七层协议”的维基百科,全文检索,高亮,搜索推荐
-
Stack Overflow(国外的程序讨论论坛),相当于程序员的贴吧。遇到it问题去上面发帖,热心网友下面回帖解答。
-
GitHub(开源代码管理),搜索上千亿行代码。
-
电商网站,检索商品
-
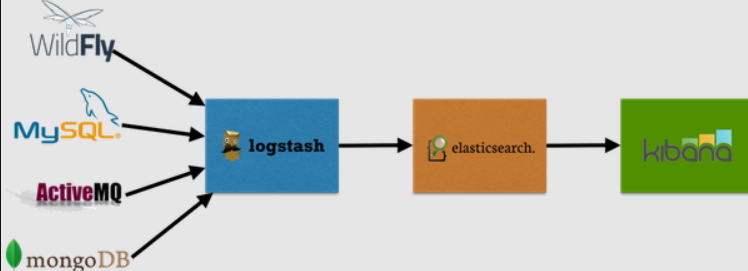
日志数据分析,logstash采集日志,ES进行复杂的数据分析(ELK技术,elasticsearch+logstash+kibana)
-
商品价格监控网站,用户设定某商品的价格阈值,当低于该阈值的时候,发送通知消息给用户,比如说订阅《java编程思想》的监控,如果价格低于27块钱,就通知我,我就去买。
-
BI系统,商业智能(Business Intelligence)。大型连锁超市,分析全国网点传回的数据,分析各个商品在什么季节的销售量最好、利润最高。成本管理,店面租金、员工工资、负债等信息进行分析。从而部署下一个阶段的战略目标。
国内:
-
百度搜索,第一次查询,使用es。
-
OA、ERP系统站内搜索。
同时可参照下面的这段话
MongoDB是通用功能的非RESTful风格的 NoSQL 数据库. 文档以 BSON 格式存储,主要用于存储数据。
Elasticsearch 是分布式全文检索引擎,可以提供实时Restful风格API处理海量面向文档的数据。文档使用JSON格式,主要用于基于文本的数据搜索。
以及此图参上
五、Elasticsearch的特点
-
可拓展性:大型分布式集群(数百台服务器)技术,处理PB级数据,大公司可以使用。小公司数据量小,也可以部署在单机。大数据领域使用广泛。
-
技术整合:将全文检索、数据分析、分布式相关技术整合在一起:lucene(全文检索),商用的数据分析软件(BI软件),分布式数据库(mycat)
-
部署简单:开箱即用,很多默认配置不需关心,解压完成直接运行即可。拓展时,只需多部署几个实例即可,负载均衡、分片迁移集群内部自己实施。
-
接口简单:使用restful api经行交互,跨语言。
-
功能强大:Elasticsearch作为传统数据库的一个补充,提供了数据库所不不能提供的很多功能,如全文检索,同义词处理,相关度排名。
六、elasticsearch的核心概念
(1)NRT(Near Realtime):近实时
两方面:
-
写入数据时,过1秒才会被搜索到,因为内部在分词、录入索引。
-
es搜索时:搜索和分析数据需要秒级出结果。
(2)Cluster:集群
包含一个或多个启动着es实例的机器群。通常一台机器起一个es实例。同一网络下,集群名一样的多个es实例自动组成集群,自动均衡分片等行为。默认集群名为“elasticsearch”。
(3)Node:节点
每个es实例称为一个节点。节点名自动分配,也可以手动配置。
(4)Index:索引
包含一堆有相似结构的文档数据。
索引创建规则:
-
仅限小写字母
-
不能包含\、/、 *、?、"、<、>、|、#以及空格符等特殊符号
-
从7.0版本开始不再包含冒号
-
不能以-、_或+开头
-
不能超过255个字节(注意它是字节,因此多字节字符将计入255个限制)
(5)Document:文档
es中的最小数据单元。一个document就像数据库中的一条记录。通常以json格式显示。多个document存储于一个索引(Index)中。
book document

{
  "book_id": "1",
  "book_name": "java编程思想",
  "book_desc": "从Java的基础语法到最高级特性(深入的[面向对象](https://baike.baidu.com/item/面向对象)概念、多线程、自动项目构建、单元测试和调试等),本书都能逐步指导你轻松掌握。",
  "category_id": "2",
  "category_name": "java"
}
(6)Field:字段
就像数据库中的列(Columns),定义每个document应该有的字段。
(7)Type:类型
每个索引里都可以有一个或多个type,type是index中的一个逻辑数据分类,一个type下的document,都有相同的field。
注意:6.0之前的版本有type(类型)概念,type相当于关系数据库的表,ES官方将在ES9.0版本中彻底删除type。本教程typy都为_doc。
(8)shard:分片
index数据过大时,将index里面的数据,分为多个shard,分布式的存储在各个服务器上面。可以支持海量数据和高并发,提升性能和吞吐量,充分利用多台机器的cpu。
(9)replica:副本
在分布式环境下,任何一台机器都会随时宕机,如果宕机,index的一个分片没有,导致此index不能搜索。所以,为了保证数据的安全,我们会将每个index的分片经行备份,存储在另外的机器上。保证少数机器宕机es集群仍可以搜索。
能正常提供查询和插入的分片我们叫做主分片(primary shard),其余的我们就管他们叫做备份的分片(replica shard)。
es6默认新建索引时,5分片,2副本,也就是一主一备,共10个分片。所以,es集群最小规模为两台。

七、ES的安装
参照此片文章
(1条消息) win下安装 Elasticsearch与Elasticsearch可视化工具_桂亭亭的博客-CSDN博客
安装文件夹介绍
bin:脚本目录,包括:启动、停止等可执行脚本
config:配置文件目录
data:索引目录,存放索引文件的地方
logs:日志目录
modules:模块目录,包括了es的功能模块
plugins :插件目录,es支持插件机制
八、SpringBoot中使用ES
1 新建SpringBoot项目
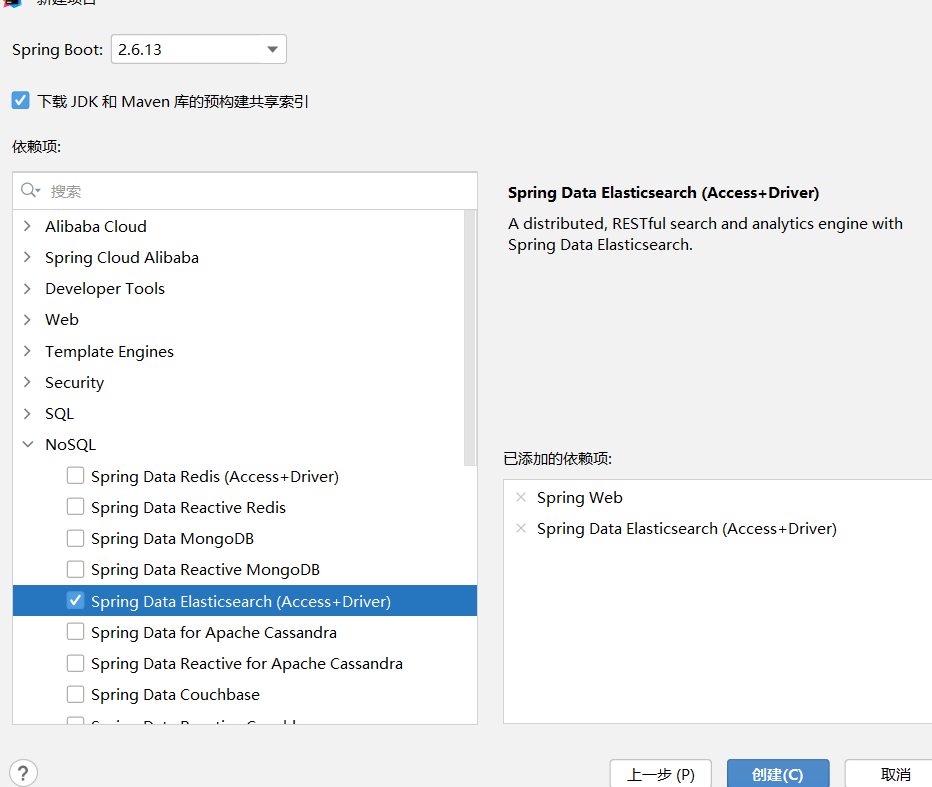
2 配置pom.xml文件
注意这里需要先查看你本地的ES的版本
比如我的是
![]()
那么下面的Xml中的配置文件也要改为对应的版本,可高点,不可低的原则
        <dependency>
            <groupId>org.elasticsearch.client</groupId>
            <artifactId>elasticsearch-rest-high-level-client</artifactId>
            <version>7.10.1</version>
            <exclusions>
                <exclusion>
                    <groupId>org.elasticsearch</groupId>
                    <artifactId>elasticsearch</artifactId>
                </exclusion>
            </exclusions>
        </dependency>
        <dependency>
            <groupId>org.elasticsearch</groupId>
            <artifactId>elasticsearch</artifactId>
            <version>7.10.1</version>
        </dependency>
3 大致代码的步骤
1 获取连接客户端
2构建请求
3执行
4获取结果
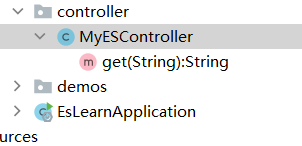
新建控制器
@RestController
@RequestMapping("")
public class MyESController {
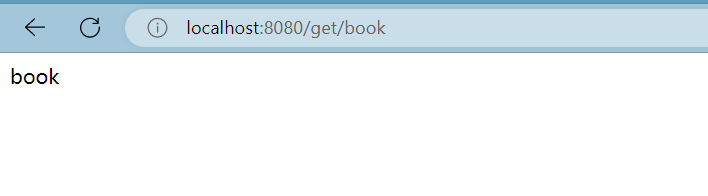
@GetMapping("/get/{name}")
public String get(@PathVariable String name)
{
System.out.println(name);
return name;
}
}先启动以下项目看是否正常
4 建立索引
修改控制器中的内容,新增方法
    //1 创建客户端链接
    RestHighLevelClient client = new RestHighLevelClient(
            RestClient.builder(
                    new HttpHost("localhost", 9200, "http")));

    @GetMapping("/put/{name}")
    public String addIndex(@PathVariable String name) throws IOException {

        //2 构建索引的配置参数,name就是索引的名字,相当于数据库名
        CreateIndexRequest createIndexRequest = new CreateIndexRequest(name);
        createIndexRequest.settings(Settings.builder()
                .put("index.number_of_shards", 1)
                .put("index.number_of_replicas", 0)
        );

        //3 构建索引中的Mapping,相当于构建数据库中的表
        createIndexRequest.mapping("{\n" +
                "  \"properties\": {\n" +
                "    \"city\": {\n" +
                "      \"type\": \"keyword\"\n" +
                "    },\n" +
                "    \"sex\": {\n" +
                "      \"type\": \"keyword\"\n" +
                "    },\n" +
                "    \"name\": {\n" +
                "      \"type\": \"keyword\"\n" +
                "    },\n" +
                "    \"id\": {\n" +
                "      \"type\": \"keyword\"\n" +
                "    },\n" +
                "    \"age\": {\n" +
                "      \"type\": \"integer\"\n" +
                "    }\n" +
                "  }\n" +
                "}", XContentType.JSON);
        //4 发送构建命令
        client.indices().create(createIndexRequest, RequestOptions.DEFAULT);
        return name;
    }
启动springboot,浏览器访问链接
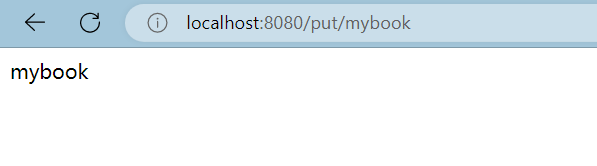
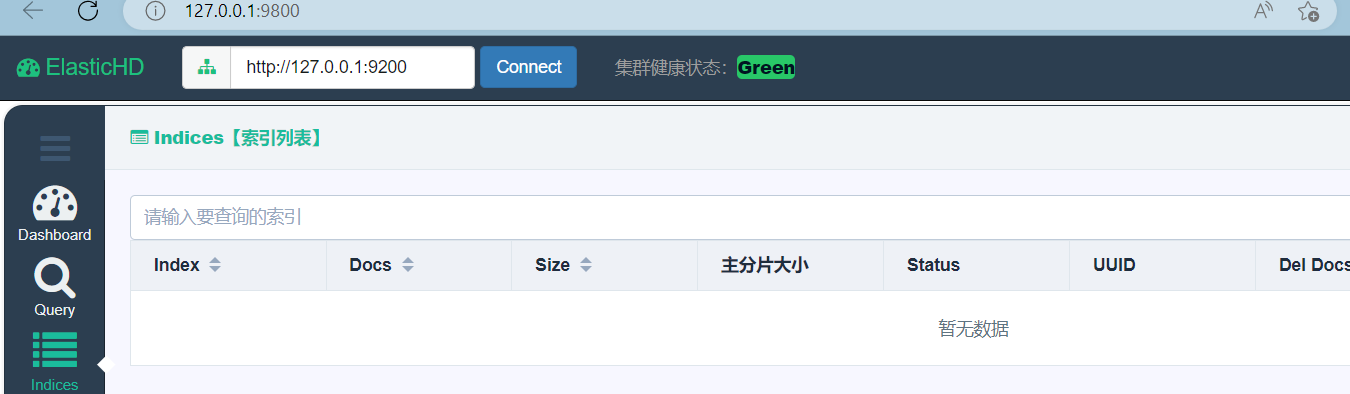
OK 这样就建立了一个简单是索引,接着我们打开可视化工具查看,新建的索引

发现已经有了。
5 删除索引
接着是索引的删除操作
    @GetMapping("/deleteIndex/{name}")
    private String delete(@PathVariable("name")String name){
        //2 创建删除请求
        DeleteIndexRequest deleteIndexRequest = new DeleteIndexRequest(name);
        AcknowledgedResponse deleteIndexResponse = null;
        try {
            //3 执行删除
            deleteIndexResponse = client.indices().delete(deleteIndexRequest, RequestOptions.DEFAULT);
        } catch (IOException e) {
            throw new RuntimeException(e);
        }
        //获取返回值
        System.out.println(deleteIndexResponse.isAcknowledged());
        return name;
    }
打开可视化工具发现已经没有了
6 创建实体类
接着我们创建实体类,用于对索引中的数据进行CRUD操作。
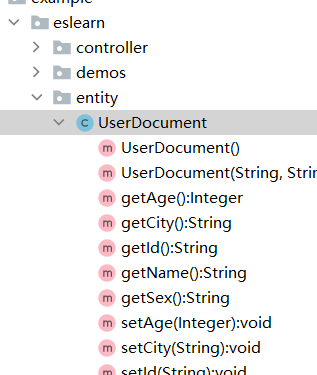
代码如下所示
public class UserDocument {
private String id;
private String name;
private String sex;
private Integer age;
private String city;
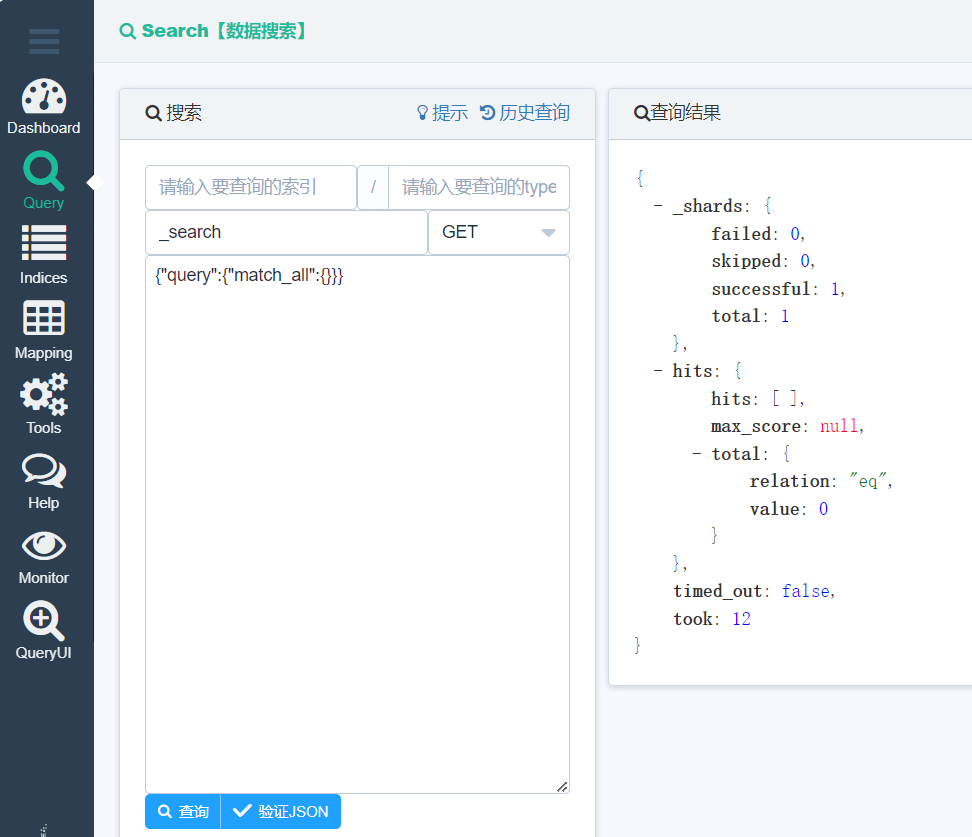
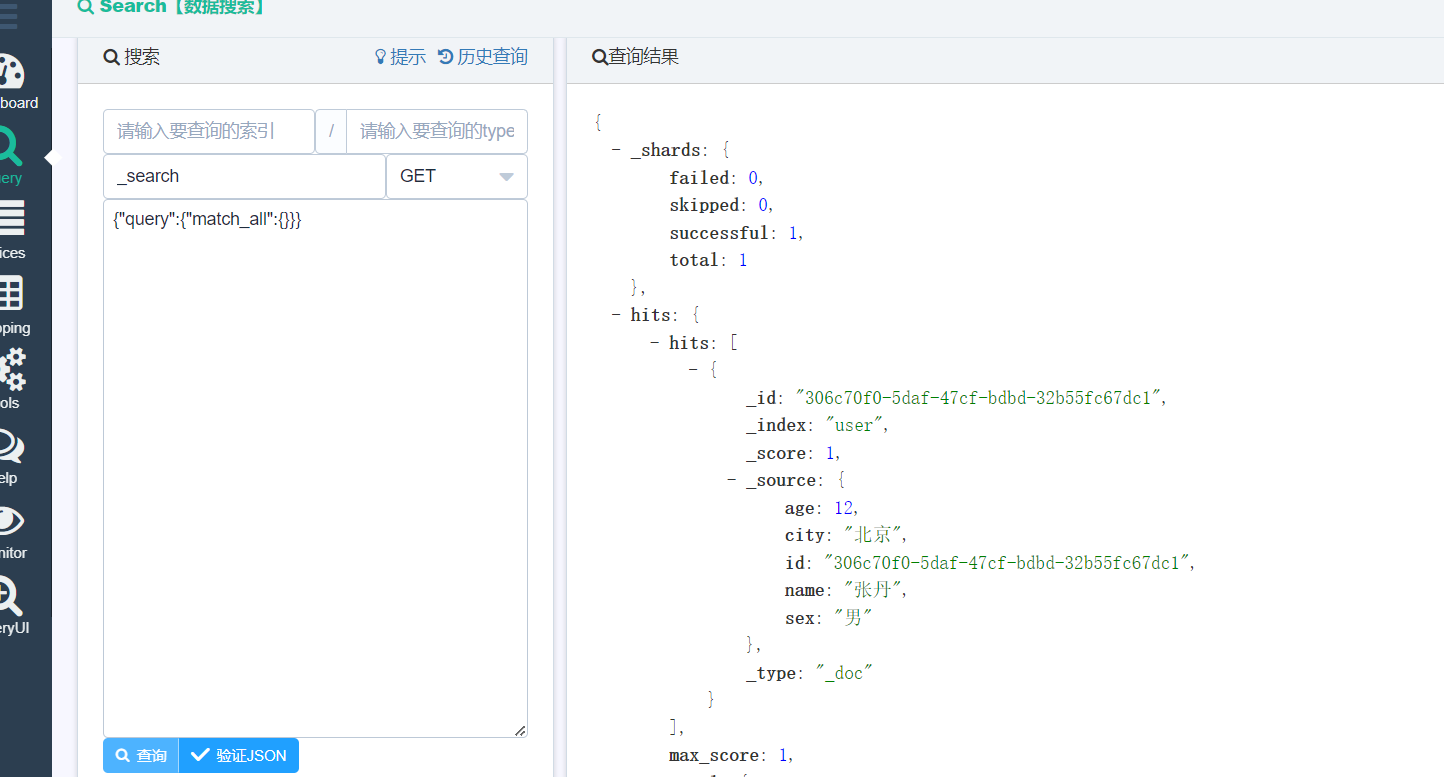
}我们先建立一个user的索引,还是刚刚的那个API我们这次填入这个地址


点击这里的查询,会得到右边的数据
7 使用FastJSON
我们需要用到对象转换为JSON字符串所以需要使用到FASTJSON,
我们在pom.xml中引入依赖
<dependency>
    <groupId>com.alibaba</groupId>
    <artifactId>fastjson</artifactId>
    <version>2.0.20</version>
</dependency>
接着我们进行CRUD操作了,在哪之前我们还需要建立service层,直观方便调用CRUD方法

8 新增文档
创建文档的时候需要在 IndexRequest 中指定索引名称,
id 如果不传的话会由 ES 自动生成,然后传入 source(注意必须是字符串,不然汇报错)
代码如下
    //1 创建客户端链接
    RestHighLevelClient client = new RestHighLevelClient(
            RestClient.builder(
                    new HttpHost("localhost", 9200, "http")));


    public String addDocument(String indexName,UserDocument ud){
        //2 生成UUID作为文档的id
        UUID uuid = UUID.randomUUID();
        ud.setId(uuid.toString());
        //转换为json
        String jsonString=JSON.toJSONString(ud);
        System.out.println(jsonString);
        //3 构建新增文档的请求
        IndexRequest indexRequest = new IndexRequest(indexName)
                .id(ud.getId())
                .source(jsonString,XContentType.JSON);
        IndexResponse indexResponse = null;
        try {
            //4 执行新增的操作
            indexResponse = client.index(indexRequest, RequestOptions.DEFAULT);
        } catch (IOException e) {
            throw new RuntimeException(e);
        }
        //返回结果
        return indexResponse.status().toString();
} 
回到我们的可视化工具,点击查询可以看到已经有新增的数据了
回到代码,我们修改控制器的代码,多增加几条数据怎么办那?
9 批量新增数据文档
在一个 REST 请求中,重新建立网络开销是十分损耗性能的,因此 ES 提供 Bulk API,支持在一次 API 调用中,对不同的索引进行操作,从而减少网络传输开销,提升写入速率。
下面方法是批量创建文档,一个 BulkRequest 里可以添加多个 Request
这是service的代码
// 批量创建文档
    public String batchAddDocument(String indexName, List<UserDocument> ud){
        //2 批量请求容器
        BulkRequest bulkRequest = new BulkRequest();
        for (UserDocument us:ud) {
            //3 构建单个indexrequest
            UUID uuid = UUID.randomUUID();
            us.setId(uuid.toString());
            IndexRequest indexRequest = new IndexRequest(indexName)
                    .id(us.getId())
                    .source(JSON.toJSONString(us),XContentType.JSON);
            bulkRequest.add(indexRequest);
        }
        BulkResponse bres = null;
        try {
            //4 执行批量新增的操作
            bres = client.bulk(bulkRequest, RequestOptions.DEFAULT);
        } catch (IOException e) {
            throw new RuntimeException(e);
        }
        //返回结果
        return bres.status().toString();
    }
控制器代码
@GetMapping("/addbatch")
public String addbatch()
{
//构建多个UserDocument对象
List<UserDocument> ls=new ArrayList<>();
UserDocument user = new UserDocument();
user.setAge(13);
user.setName("狗熊");
user.setSex("男");
user.setCity("上海");
ls.add(user);
user.setName("王五");
user.setAge(22);
ls.add(user);
user.setName("妲己");
user.setAge(32);
user.setSex("女");
ls.add(user);
service.batchAddDocument("user",ls);
//传入索引名和userdocument对象
return "OK";
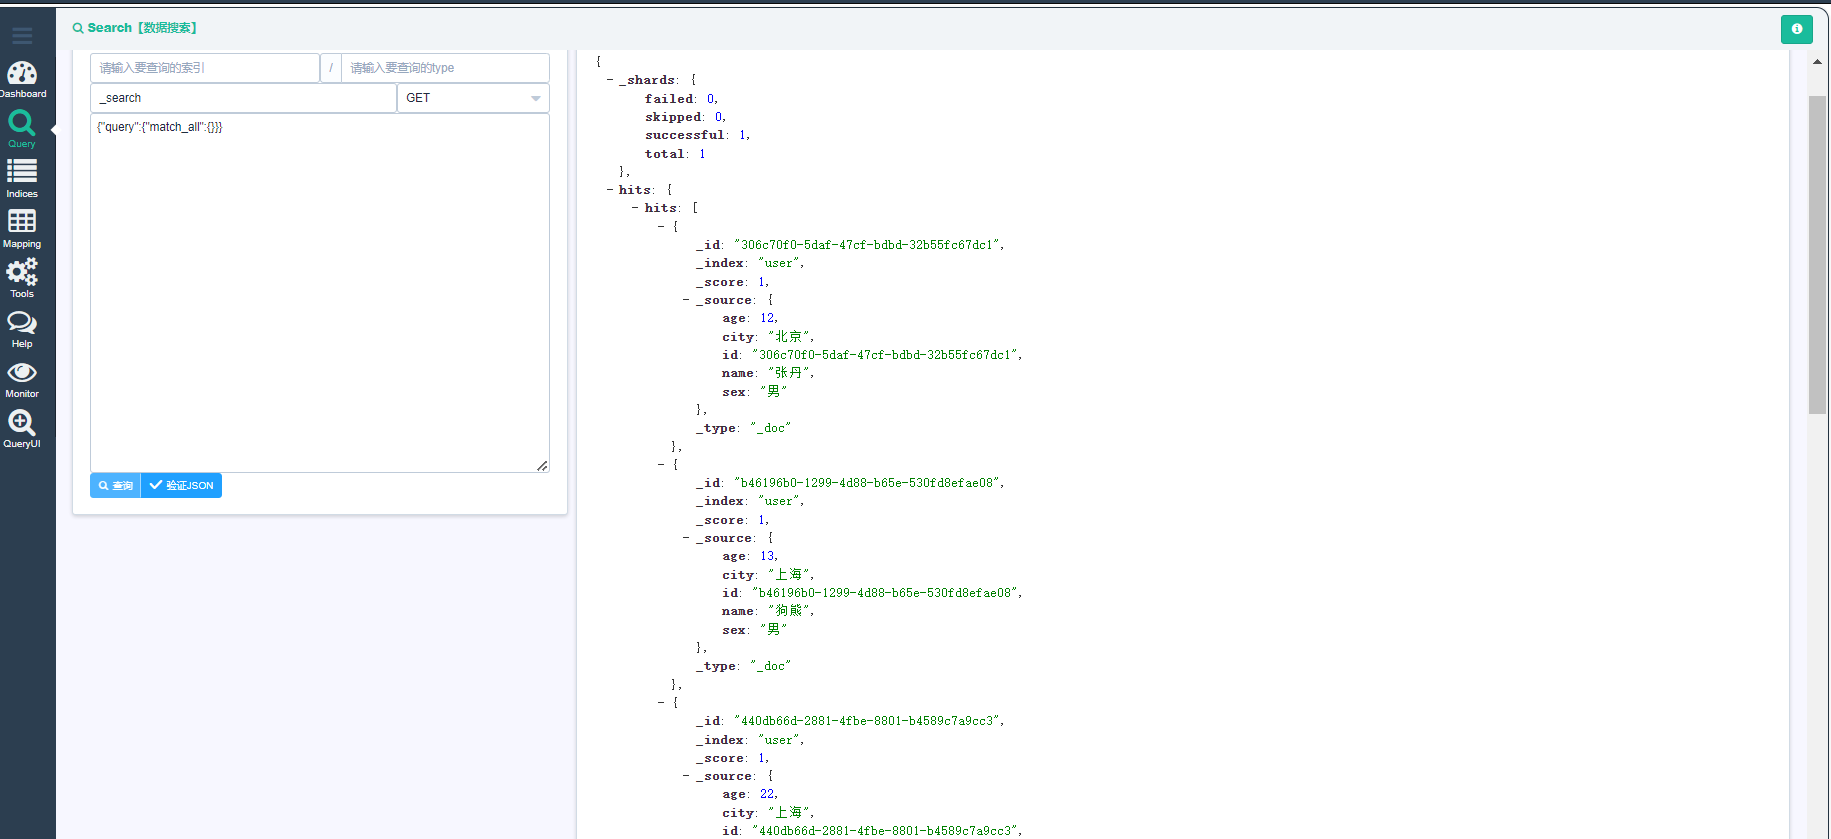
}再次访问,我们可以访问两次多搞点数据,嘻嘻嘻

查看新增的数据
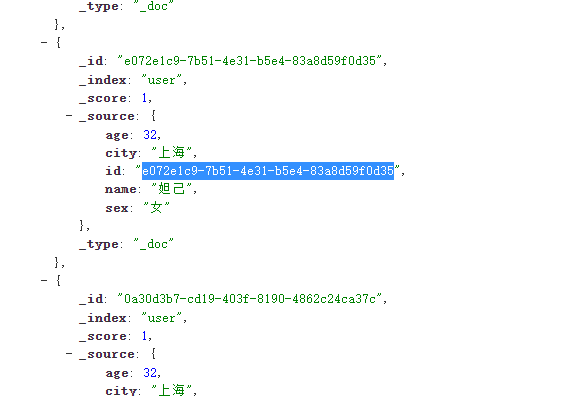
10 查看文档
先回到可视化这里复制一个用户的id信息
然后新增代码
服务层
 //查询根据id
    public String getUserDocument(String indexName,String id){
        // 2 构建请求
        GetRequest getRequest = new GetRequest(indexName, id);
        GetResponse getResponse = null;
        try {
            //3 执行查询
            getResponse = client.get(getRequest, RequestOptions.DEFAULT);
        } catch (IOException e) {
            throw new RuntimeException(e);
        }
        String sourceAsString;
        //4 获取结果
        if (getResponse.isExists()) {
            sourceAsString= getResponse.getSourceAsString();
        } else {
            sourceAsString="没有找到该 id 的文档";
        }
        return sourceAsString;
    }
控制器层
    @GetMapping("/getUser")
    public String getUser() throws IOException {
        String userId="e072e1c9-7b51-4e31-b5e4-83a8d59f0d35";
       return service.getUserDocument("user",userId);
    }
还是访问地址得到

同时你可以写更多的查询方法,比如通过名字查询等等
11 更新文档
更新文档则是先给 UpdateRequest 传入索引名称和文档 id,然后通过传入新的 doc 来进行更新
服务层
    //更新文档
    public String updateDocument(String indexName,UserDocument ud){
        //2 构建update请求
        UpdateRequest getRequest = new UpdateRequest(indexName, ud.getId())
                .doc(JSON.toJSONString(ud),XContentType.JSON);
        UpdateResponse updateResponse;
        try {
            //4 执行新增的操作
             updateResponse= client.update(getRequest, RequestOptions.DEFAULT);
        } catch (IOException e) {
            throw new RuntimeException(e);
        }
        //返回结果
        return updateResponse.status().toString();
    }
控制器层
    @GetMapping("/updateUser")
    public String updateUser() throws IOException {
        UserDocument user = new UserDocument();
        user.setAge(23);
        user.setName("妲己大吉OK");
        user.setSex("女");
        user.setCity("上海");
        user.setId("e072e1c9-7b51-4e31-b5e4-83a8d59f0d35");
        return service.updateDocument("user",user);
    }
返回原来的查看API,发现数据已经改变了

12 删除文档
删除文档只需要在 DeleteRequest 中传入索引名称和文档 id,然后执行 delete 方法就可以完成文档的删除
服务层
    // 删除文档
    public String deleteDocument(String indexName,String userId) {
        DeleteRequest deleteRequest = new DeleteRequest(indexName,userId);
        DeleteResponse response = null;
        try {
            response = client.delete(deleteRequest, RequestOptions.DEFAULT);
        } catch (IOException e) {
            throw new RuntimeException(e);
        }
        return response.getResult().name();
    }
控制层
    @GetMapping("/deleteUser")
    public String deleteUser() throws IOException {
        //还是咱刚刚复制的uid
        String userId="e072e1c9-7b51-4e31-b5e4-83a8d59f0d35";
        return service.deleteDocument("user",userId);
    }

OK 简单的CRUD就完毕,接下来改学习高级搜索了,等我出教程奥!