
作者简介:一名云计算网络运维人员、每天分享网络与运维的技术与干货。
座右铭:低头赶路,敬事如仪
个人主页:网络豆的主页
前言
本章将会讲解网络基础项目——全网互通实验。
一.实验项目图
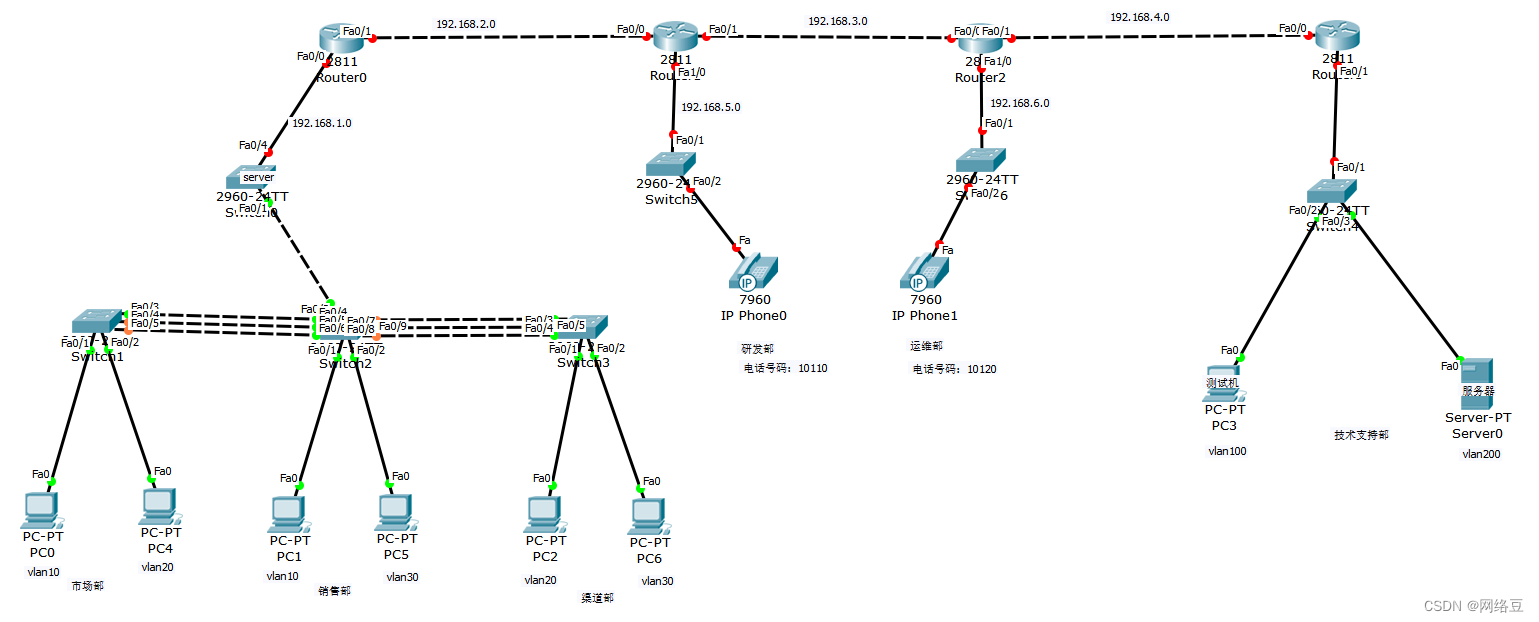
二.实验要求
- 1.全网互通,所有PC机能访问服务器(ping)
- 2.路由器设置密码,需要破解
- 3.设置以太网通道
- 4.配置默认与静态路由
- 5.设置永不超时与信息同步
- 6.设置DHCP
三.实验步骤
1.实验步骤
分为四部进行讲解,分别为 ①以太网通道部分,②左边单臂,③中间电话,④右边单臂
(1)以太网通道部分

①所用技术
1)vtp技术 2)以太网通道 3)access链路 4)trunk链路
配置命令
Switch 2
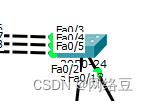
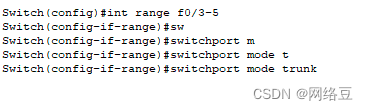
设置接口3-5为trunk链路

设置以太网通道组号为2
Switch 2


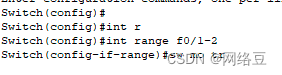
配置3-8口为trunk链路

进入6-8口配置以太网通道组号为2

进入3-5口配置以太网通道组号为1
Switch 0


配置3-5口为trunk链路


配置3-5口为以太网通道组号为1
vtp 配置
将会为左边部分的交换机配置

Switch 6
将1-2口进行trunk
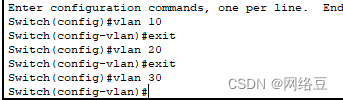
加vlan
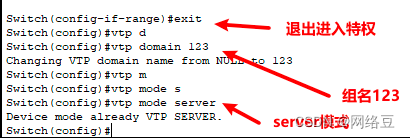
配置Switch 6 VTP 为server模式
Switch 1

配置 Switch 1 VTP 为 client模式
Switch 0

配置 Switch 0 VTP 为 client模式
Switch 2

配置 Switch 2 VTP 为 client模式
接口封装VLAN

Switch 0
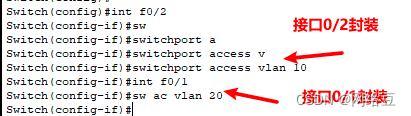
Switch 0 接口0/2封装vlan 10 接口0/1封装vlan 20
switch 1

Switch 1 接口0/2封装vlan 10 接口0/1封装vlan 30
switch 2

Switch 2 接口0/2封装vlan 20 接口0/1封装vlan 30
第一部分完成
(2)左边单臂

①所用技术
1)单臂技术 2)trunk链路 3)DHCP 4) 默认路由
命令配置

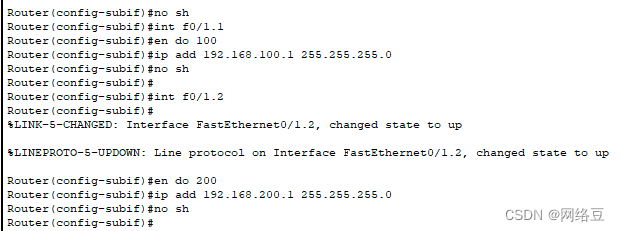
(1)配置接口地址与子接口


开启接口,配置子接口
(2)设置DHCP自动分配

(3)配置默认路由
![]()
0.0.0.0 0.0.0.0表示匹配任何目的网络。后面地址表示下一跳 IP 地址或出接口。
第二部分完成
(3)右边单臂

①所用技术
1)单臂技术 2)trunk链路 3)DHCP 4) 默认路由
命令配置
(1)配置接口地址


(2)配置默认路由
![]()
(3)配置DHCP


(4)交换机


交换机f0/1接口trunk

第三部分配置完成
(4)中间电话

(1)破解路由器密码
路由器关机再开机
开机后一直不断按Ctrl+Break键一直到进入romm模式
ctrl+scrLk
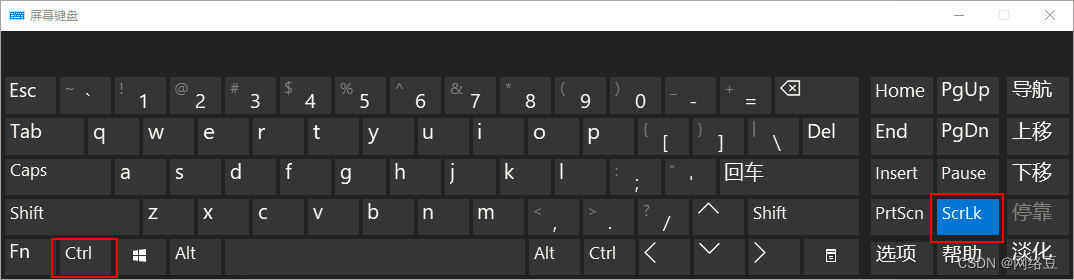


破解成功
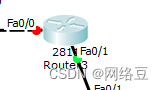
(2)router 2
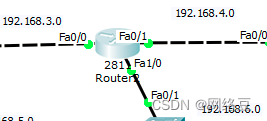
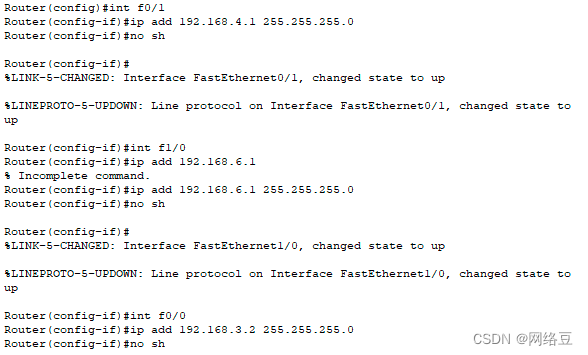
配置接口地址f0/1 f0/0 f1/0
在两台交换机上配置连接电话的接口 voice 两台交换机配置相同
Switch(config)#int f0/3
Switch(config-if)#sw voice vlan 1
用两台电脑测试dhcp 电话 接上电
在两台路由器上配置电话服务
router 2
Router(config)#telephony-service
Router(config-telephony)#max-ephones 10
Router(config-telephony)#max-dn 10
Router(config-telephony)#ip source-address 10.0.0.1 port 2000
Router(config-telephony)#exit
Router(config)#ephone-dn 1
Router(config-ephone-dn)#number 1101
Router(config-ephone-dn)#exit
Router(config)#ephone 1
Router(config-ephone)#type 7960
Router(config-ephone)#button 1:1
Router(config-ephone)#exit
router 3
Router(config)#telephony-service
Router(config-telephony)#max-ephones 10
Router(config-telephony)#max-dn 10
Router(config-telephony)#ip source-address 20.0.0.1 port 2000
Router(config-telephony)#exit
Router(config)#ephone-dn 1
Router(config-ephone-dn)#number 2101
Router(config-ephone-dn)#exit
Router(config)#ephone 1
Router(config-ephone)#type 7960
Router(config-ephone)#button 1:1
Router(config-ephone)#
最后在rip 上面 添加 电话信息
router 2
Router(config)#dial-peer voice 1 voip
Router(config-dial-peer)#destination-pattern 2101
Router(config-dial-peer)#session target ipv4:20.0.0.1
router 3
Router(config)#dial-peer voice 1 voip
Router(config-dial-peer)#destination-pattern 1101
Router(config-dial-peer)#session target ipv4:10.0.0.1
实验完成
第四部分完成