教程效果演示

最近摩尔庄园这个游戏很火啊,在里面种种菜,开开荒还是不错的。
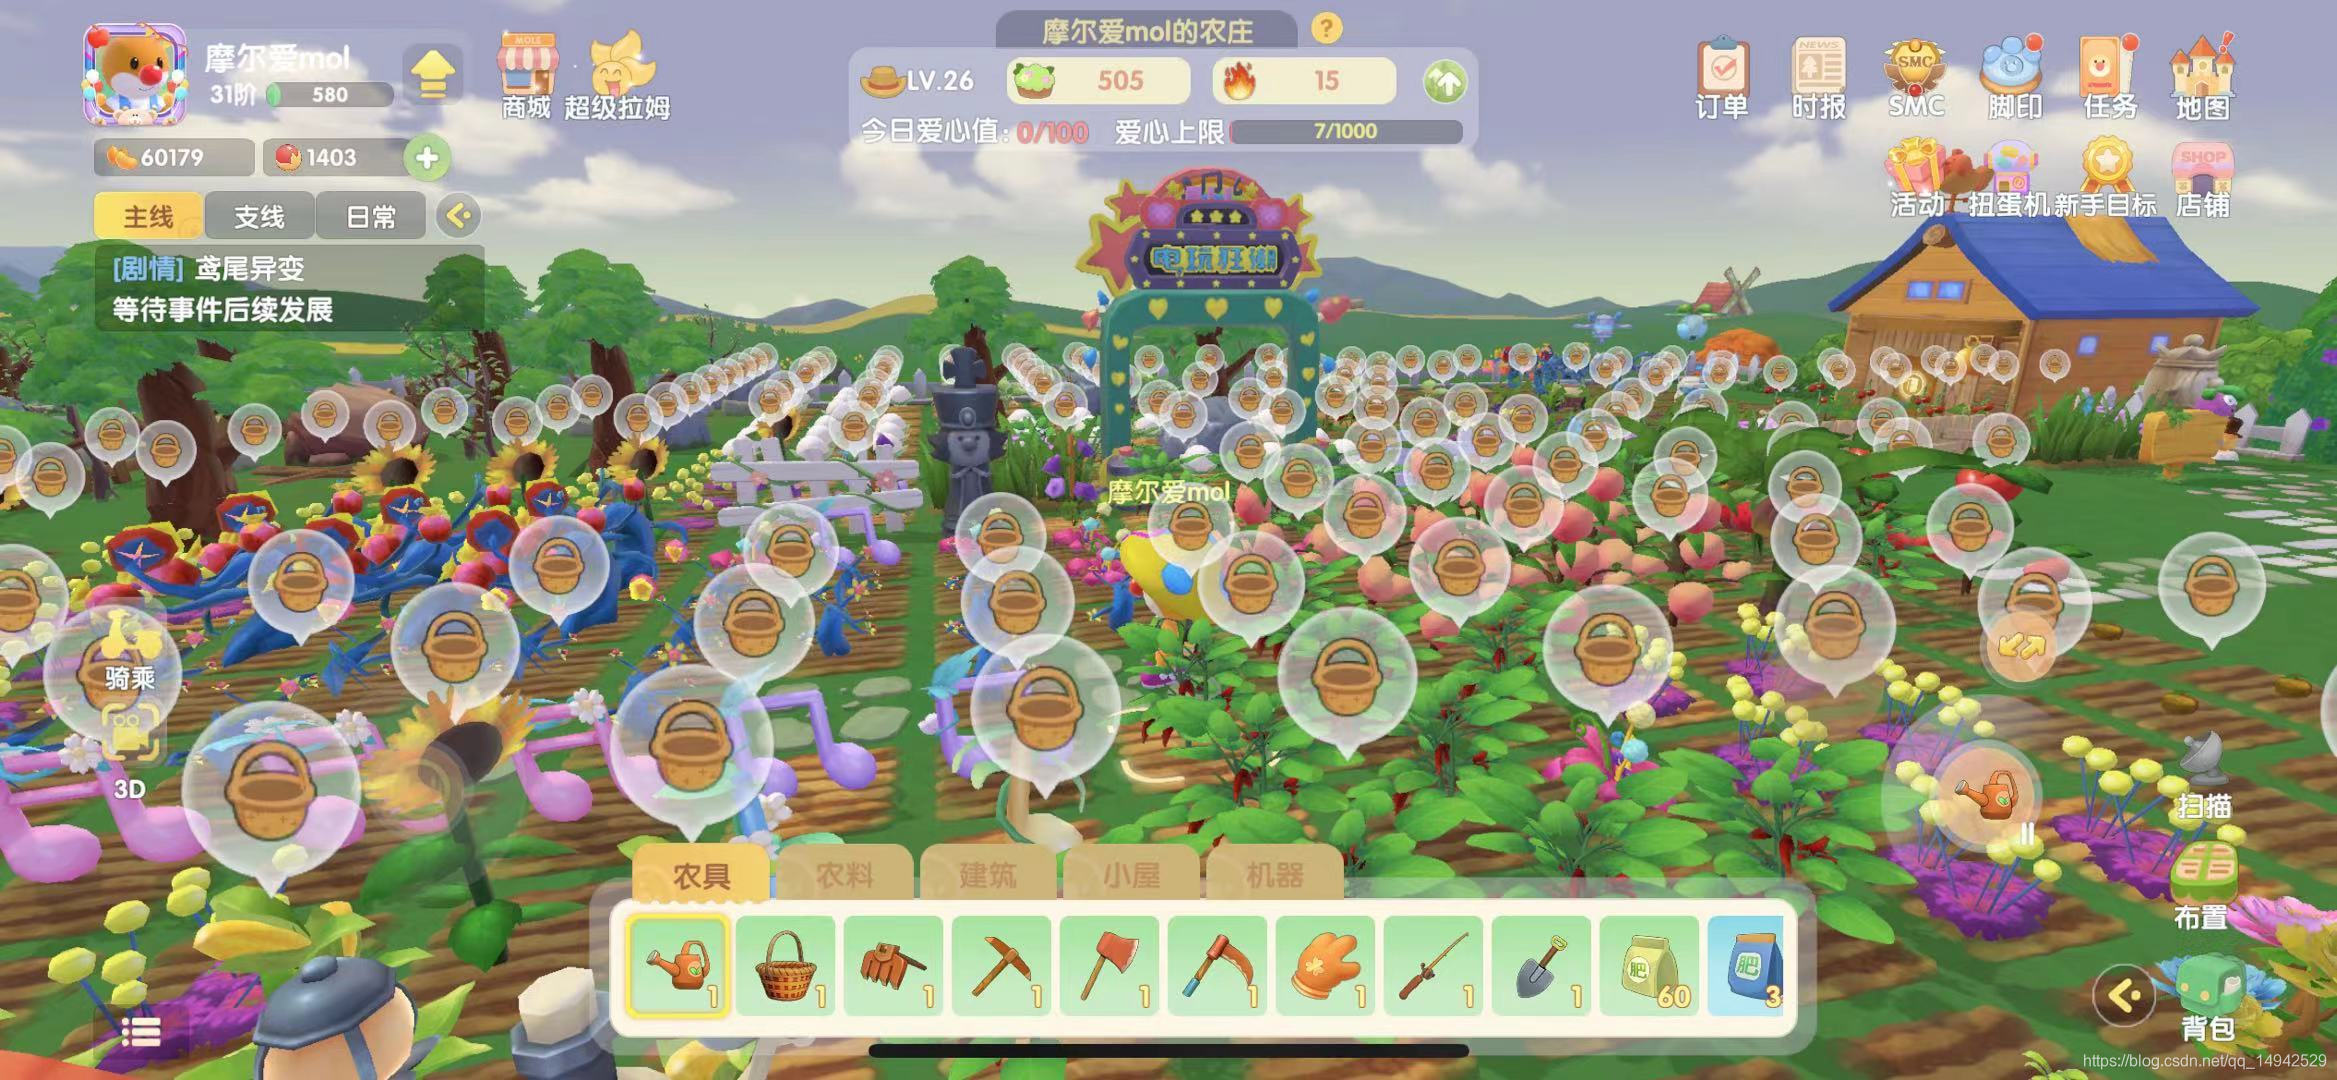

不过种田虽爽,也还会思考如果是要你实现这些功能,你会怎么做呢?稍微思考了一下,其实里面的功能也没那么复杂,今天就以开垦、播种、洒水和收获这四个功能为目标,进行一些简单的实现。
首先新建一个unity项目,随便写一个名字

我们先看一下摩尔庄园里面的按钮布局,下方是工具或者物品选项栏,右边是选项操作按钮,选中某一个工具或物品,再点击按钮就可以使用该工具。

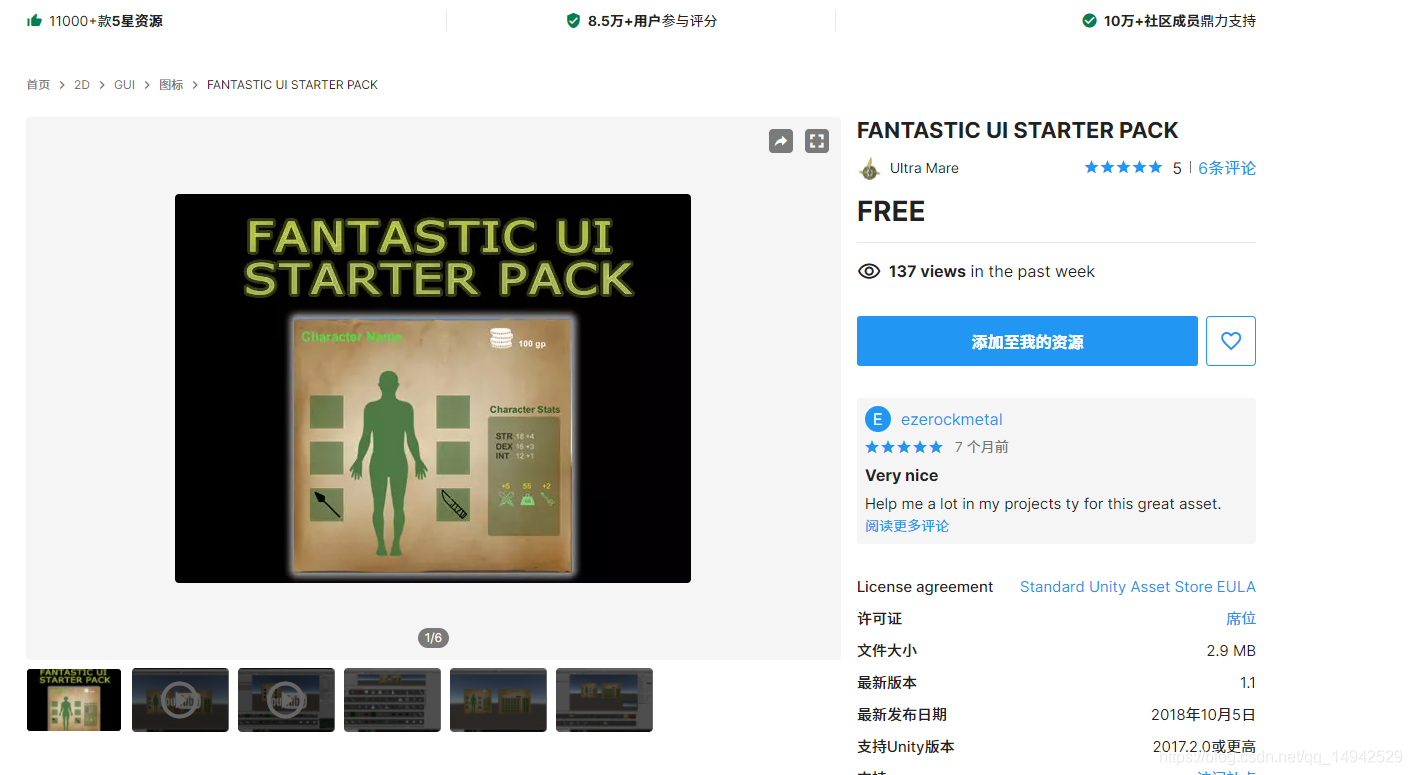
在此之前我们先导入四个unity免费资源包,在商店可以找到


在unity里面新建一个场景,创建一个Plane地面,更改名字为GroundPlane,删除原有的Mesh Collider,添加Box Collider。

找到导入的MaleFreeSimpleMovement1预制体,拖入场景中,作为我们要控制的人物,此时运行,可以控制人物移动,但是摄像机不会跟着动,所以我们还需要对摄像机进行设计跟随

新建一个脚本CameraFollow,挂在摄像机上

脚本代码如下吗(注意脚本挂上去之后,要添加MaleFreeSimpleMovement1为FollowTarget):
using System.Collections;
using System.Collections.Generic;
using UnityEngine;

public class CamFollow : MonoBehaviour
{


    //要跟随的目标
    public Transform FollowTarget;
    //相对位置
    private Vector3 relPos;
    void Start()
    {


        //初始化相对位置
        if (FollowTarget != null)
        {


            relPos = transform.position - FollowTarget.position;
        }
    }
    // Update is called once per frame
    void Update()
    {


        //根据相对位置赋值
        if (FollowTarget != null)
        {


            transform.position = relPos + FollowTarget.position;
        }
    }
}
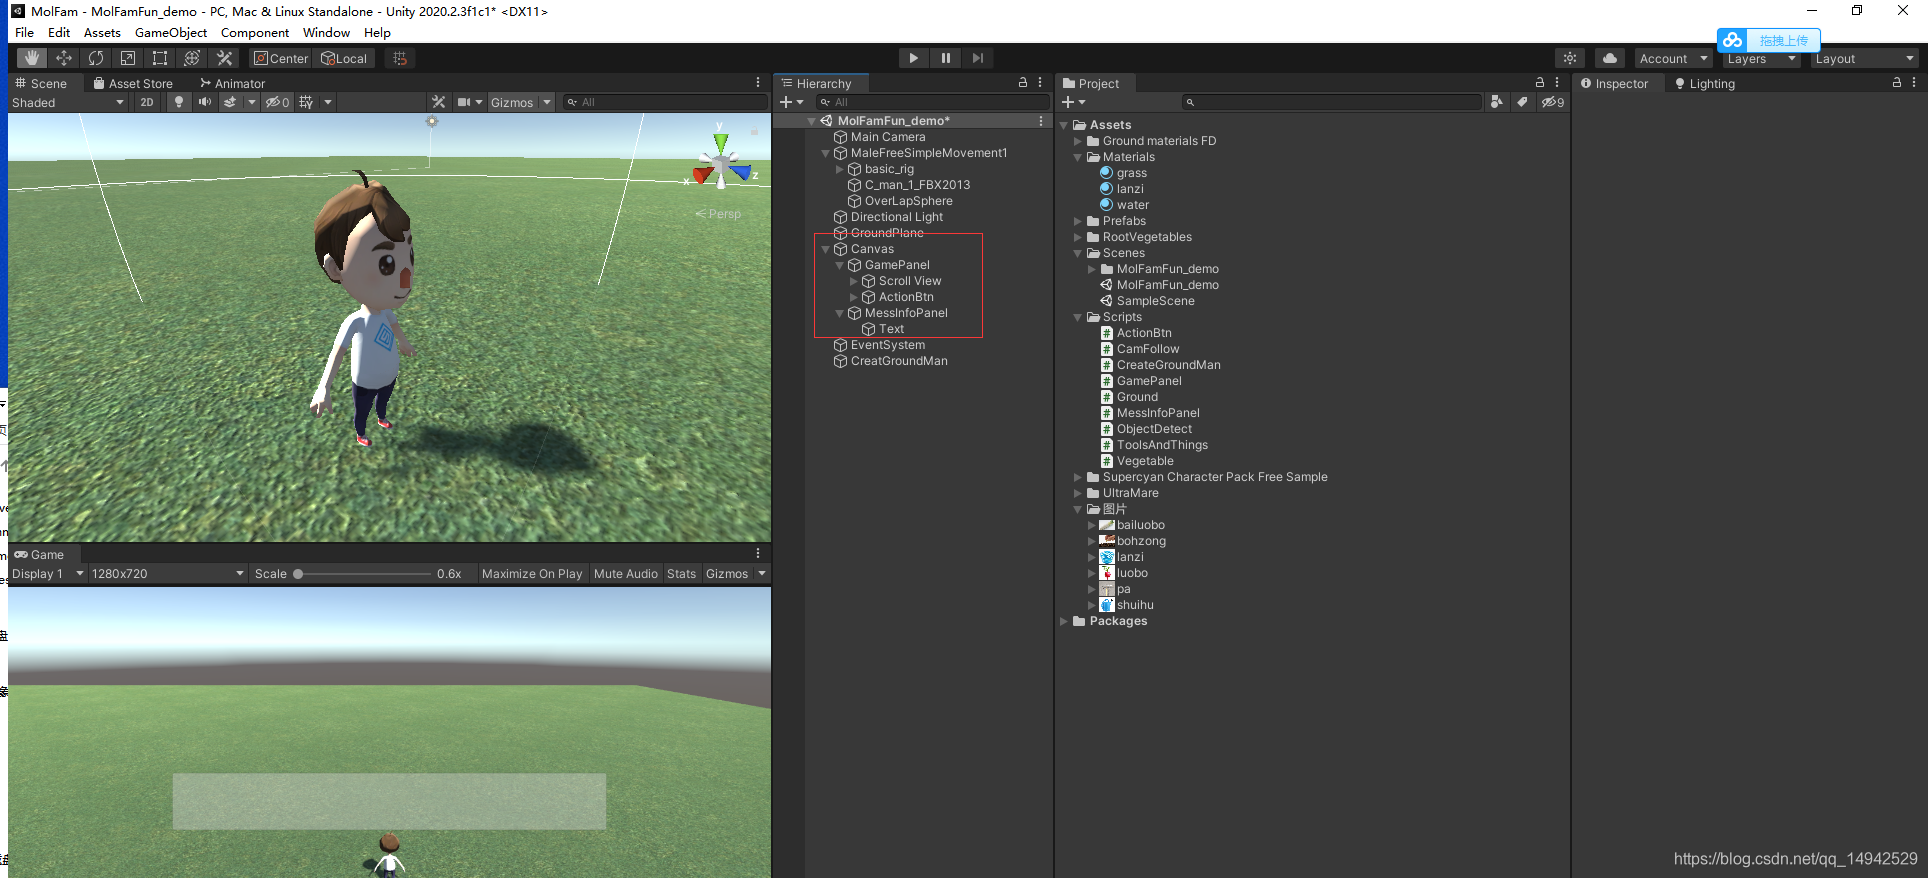
做完上面这一步,我们开始设计界面的UI,如下图所示是我已经设计好的整体,GamePanel是一个Panel面板,里面有两个组件,一个是Scroll View,一个是ActionBtn。ScrollView主要负责下方的各种工具和物品呈现,ActionBtn是Button组件,负责处理物品或者工具的点击事件。而MessInfoPanel主要是打印一些操作信息。
打开ScrollView,将ScrollView的锚点设置在下方

给Content添加Horizontal Layout Group和Toggle Group组件,主要是控制里面物品的布局,设置如下

接下来就开始设计Content下面的物体,这里面的物体主要是使用Toggle来实现点击切换,如下图所示为具体的结构,新建一个Toggle然后去修改,在Background下面新建一个Image,改名为toolsprite,toolsprite的图片设置为工具或者物品的图片。

修改Background的图片,作为物品背景框

修改Checkmark的颜色和透明度

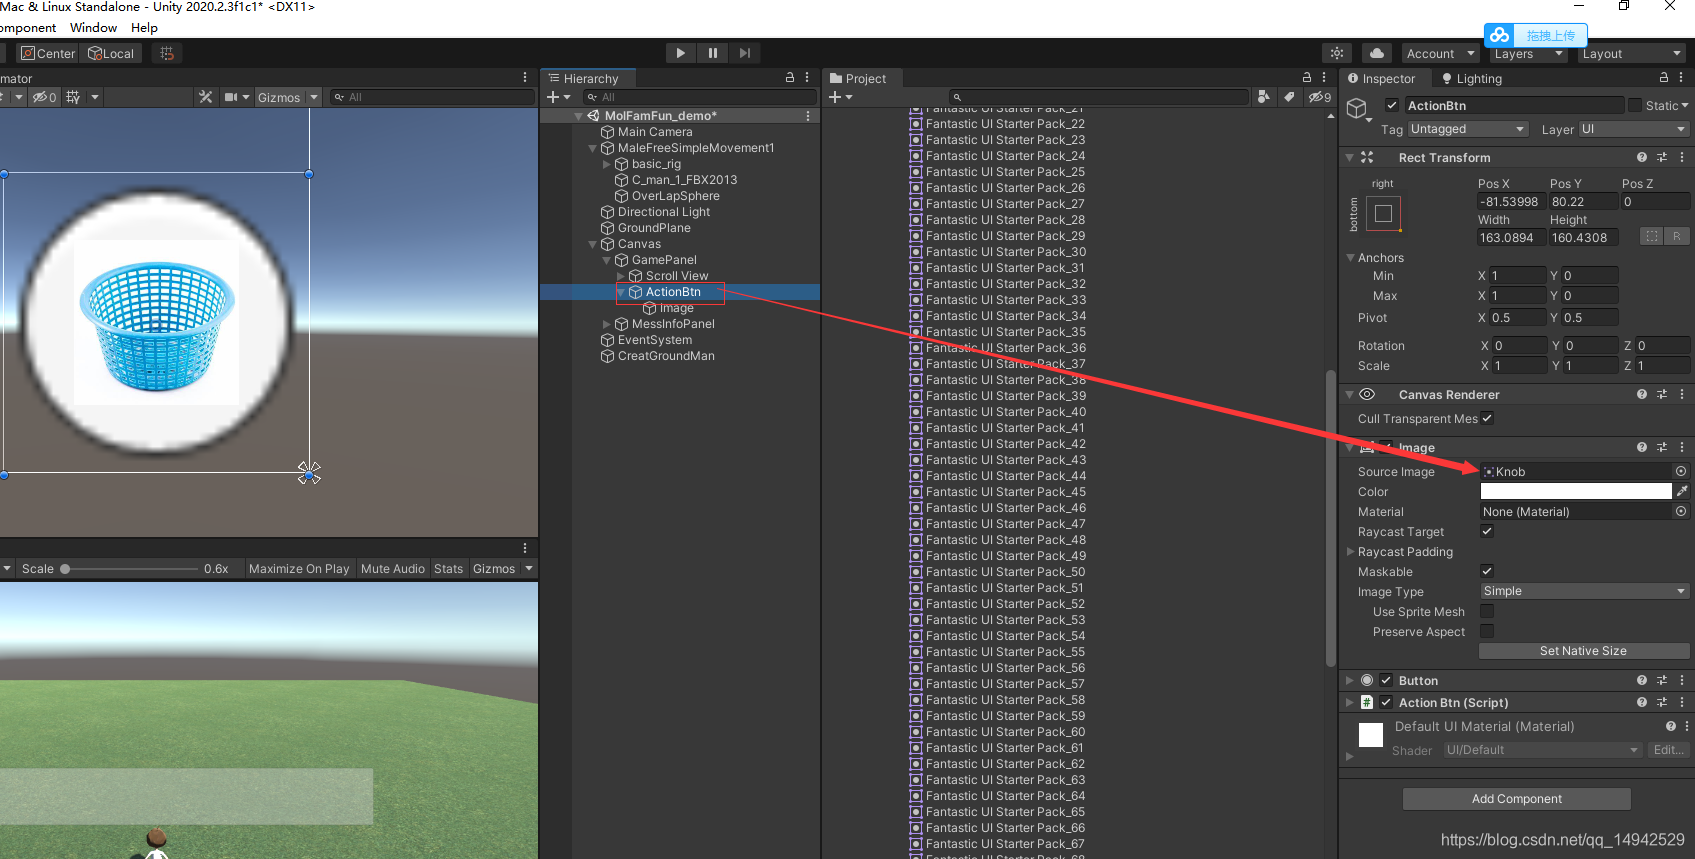
完成一个修改之后,就可以进行Ctrl+D复制了,千万不要一个一个制作。ActionBtn只要进行图片样式修改就可以,改成颜色为白色的圆形图案,并且把Text删掉,新建一个Image在下面,Image设置图片为工具,这里可以随便先放一张图片。就是一个是背景,一个是工具图。
接下来,我们开始进行功能的实现,首先为了实现一块一块开荒的功能,我们需要预先初始化土地块,开荒的时候只要点击了开荒,土地块就出现,所以就需要生成一大片的土地块。新建一个box,调整y轴的缩放,添加一个黄色土地的材质球,起名为Ground。为其添加一个脚本Ground,然后拖回Assets文件夹作为预制体。

Ground脚本里面的代码:
using System.Collections;
using System.Collections.Generic;
using UnityEngine;
public enum FamVege
{


    None,
    白菜,
    胡萝卜
}
public class Ground : MonoBehaviour
{


    /// <summary>
    /// 是否已经开垦
    /// </summary>
    public bool HasOpened;
    /// <summary>
    /// 是否种植了作物
    /// </summary>
    public bool HasFamed;
    /// <summary>
    /// 当前这块地种植的作物
    /// </summary>
    public ToolAndThingsType CurrentFamVege;
    void Start()
    {


    }
    void Update()
    {


    }
    /// <summary>
    /// 开垦土地
    /// </summary>
    public void OpenGround()
    {


        GetComponent<MeshRenderer>().enabled = true;
        HasOpened = true;
    }
    /// <summary>
    /// 种植作物
    /// </summary>
    public void PlantVege(ToolAndThingsType toolAndThings)
    {


        CurrentFamVege = toolAndThings;
        HasFamed = true;
    }
}
场景中新建一个空物体,起名为CreatGroundMan,新建一个CreatGroundMan脚本添加上去,脚本代码如下:
using System.Collections;
using System.Collections.Generic;
using UnityEngine;

public class CreateGroundMan : MonoBehaviour
{


    public GameObject groundPrefab;
    public Transform groundplane;

    public List<Ground> grounds = new List<Ground>();
    void Start()
    {


        InitGround();
    }
    // Update is called once per frame
    void Update()
    {


    }
    /// <summary>
    /// 初始化土地
    /// </summary>
    private void InitGround()
    {


        //计算生成的高度,贴合地面即可
        float heightY = groundPrefab.transform.localScale.y / 2+groundplane.position.y;
        for (float i =0; i < 50; i+=1.2f)
        {


            for (float j = 0; j < 50; j+=1.2f)
            {


                Vector3 pos = new Vector3(i, heightY, j);
                GameObject groundObj = Instantiate(groundPrefab, pos, Quaternion.identity);
                groundObj.transform.SetParent(transform);
                grounds.Add(groundObj.GetComponent<Ground>());
            }
        }
    }
}
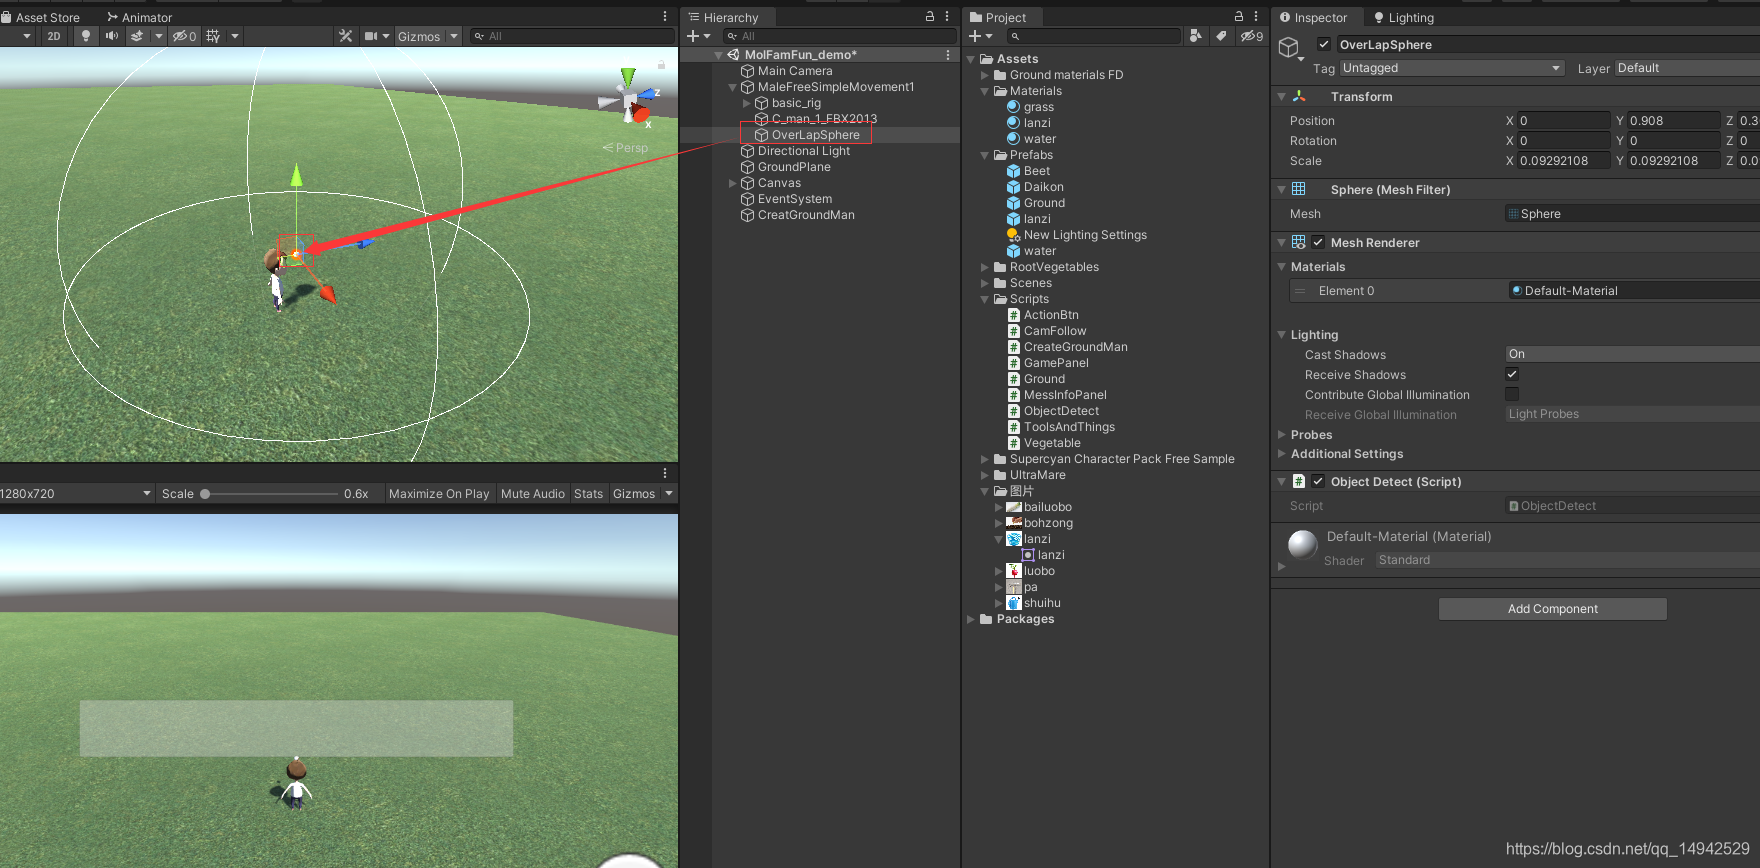
生成完成了,下一步是实现侦测附近土地块的功能,实现起来主要会使用到Physics.OverlapSphere这个unity的API,即球形射线检测功能,以个位置为中心点,某一个半径为大小检测碰到的物体,返回一个Collider数组。在MaleFreeSimpleMovement1下方新建一个球体,缩小调整位置,删除Sphere Collider组件,修改名字为OverLapSphere,新建一个脚本名为ObjectDetect为其添加,脚本完整内容如下:
using System.Collections;
using System.Collections.Generic;
using UnityEngine;

public class ObjectDetect : MonoBehaviour
{


    public static ObjectDetect _instance;
    private void Awake()
    {


        _instance = this;
    }
    void Start()
    {


    }

    // Update is called once per frame
    void Update()
    {


    }
    /// <summary>
    /// 获取到附近未开垦土地
    /// </summary>
    /// <returns></returns>
    public Ground GetNearByUnOpenGround()
    {


    //第一个参数是中心点,第二个参数是半径,第三个参数是层级
        Collider[] cols = Physics.OverlapSphere(transform.position, 3f, 1 << LayerMask.NameToLayer("ground"));
        if (cols.Length > 0)
        {


            foreach (Collider col in cols)
            {


                Ground g = col.transform.GetComponent<Ground>();
                if (g != null)
                {


                    if (!g.HasOpened)
                    {


                        MessInfoPanel._instance.ShowMess("获取到土地信息");
                        Debug.Log(col);
                        return g;
                    }
                }

            }
        }
        return null;
    }

    /// <summary>
    /// 获取到已开垦,但是未种植的土地信息
    /// </summary>
    /// <returns></returns>
    public Ground GetNearByUnPlantGround()
    {


        Collider[] cols = Physics.OverlapSphere(transform.position, 3f, 1 << LayerMask.NameToLayer("ground"));
        if (cols.Length > 0)
        {


            foreach (Collider col in cols)
            {


                Ground g = col.transform.GetComponent<Ground>();
                if (g != null)
                {


                    if (g.HasOpened&&(!g.HasFamed))
                    {


                        MessInfoPanel._instance.ShowMess("获取到土地信息");
                        Debug.Log(col);
                        return g;
                    }
                }

            }
        }
        return null;
    }

    /// <summary>
    /// 获取到需要浇水的作物
    /// </summary>
    /// <returns></returns>
    public Vegetable GetNearByNeedWaterVege()
    {


        Collider[] cols = Physics.OverlapSphere(transform.position, 3f, 1 << LayerMask.NameToLayer("vege"));
        if (cols.Length > 0)
        {


            foreach (Collider col in cols)
            {


                Vegetable g = col.transform.GetComponent<Vegetable>();
                if (g != null)
                {


                    if (g.needWater)
                    {


                        //MessInfoPanel._instance.ShowMess("获取到土地信息");
                        Debug.Log(col);
                        return g;
                    }
                }

            }
        }
        return null;
    }

    /// <summary>
    /// 获取到可以采摘的蔬菜信息
    /// </summary>
    /// <returns></returns>
    public Vegetable GetNearByMatureVege()
    {


        Collider[] cols = Physics.OverlapSphere(transform.position, 3f, 1 << LayerMask.NameToLayer("vege"));
        if (cols.Length > 0)
        {


            foreach (Collider col in cols)
            {


                Vegetable g = col.transform.GetComponent<Vegetable>();
                if (g != null)
                {


                    if (g.IsMatured)
                    {


                        Debug.Log(col);
                        return g;
                    }
                }

            }
        }
        return null;
    }
    private void OnDrawGizmos()
    {


        Gizmos.DrawWireSphere(this.transform.position, 3);
    }
}
在上一步中,我们会用到两个层级,所以需要在Layers里面添加两个层级

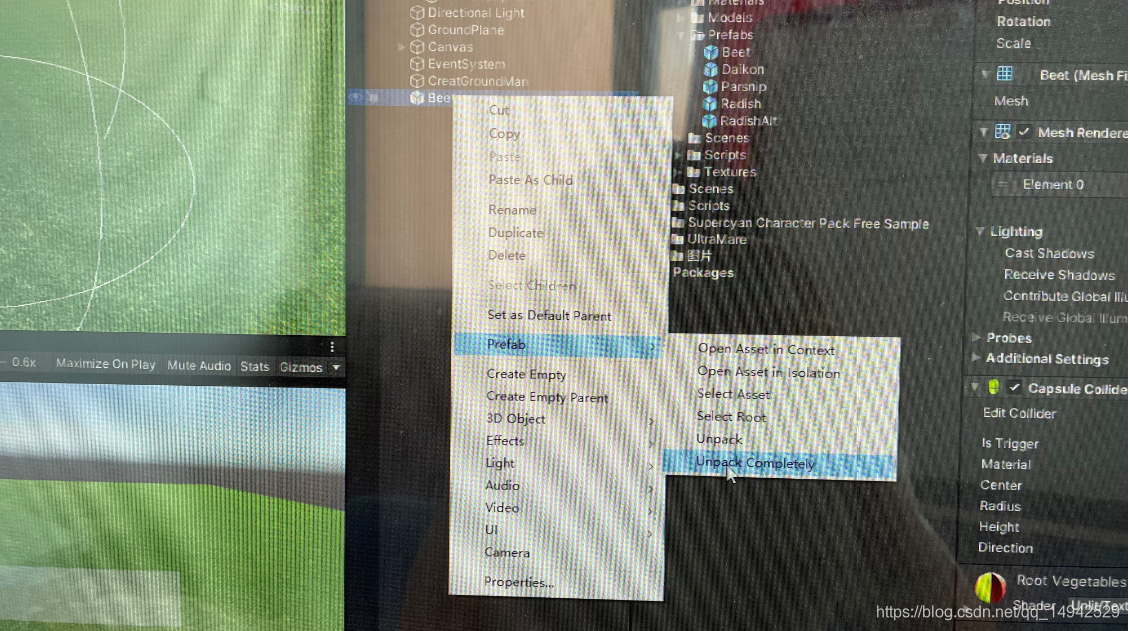
下一步我们制作农作物的预制体,如下图所示找到两种萝卜已做好的预制体,拖入场景中取消预制体连接。然后拖入我们自己的存放预制体的文件夹。

新建一个脚本为Vegetable,添加给上一步的农作物预制体,完成代码如下:
using System.Collections;
using System.Collections.Generic;
using UnityEngine;

public class Vegetable : MonoBehaviour
{


    /// <summary>
    /// 是否需要洒水
    /// </summary>
    public bool needWater;
    /// <summary>
    /// 是否成熟
    /// </summary>
    public bool IsMatured;

    /// <summary>
    /// 需要的成熟时间
    /// </summary>
    public float NeedMatureTime;

    public GameObject waterPrefab;
    public GameObject lanziPrefab;


    private GameObject c_water;
    private GameObject c_lanzi;
    void Start()
    {


        ///随机一个成熟时间
        NeedMatureTime = Random.Range(10, 20);
        needWater = true;
        ///初始化水滴和篮子
        Vector3 pos = new Vector3(transform.position.x, transform.position.y + 0.9f, transform.position.z);
        c_water = GameObject.Instantiate(waterPrefab, pos, Quaternion.identity);
        c_lanzi = GameObject.Instantiate(lanziPrefab, pos, Quaternion.identity);
        c_water.transform.SetParent(transform);
        c_lanzi.transform.SetParent(transform);
    }
    /// <summary>
    /// 成熟的函数
    /// </summary>
    public void MatureEvent()
    {


        if (!needWater)
        {


            if (!IsMatured)
            {


                NeedMatureTime -= Time.deltaTime;
                if (NeedMatureTime <= 0)
                {


                    IsMatured = true;
                }
            }

        }
        if (needWater)
        {


            c_water.SetActive(true);
        }
        else
        {


            c_water.SetActive(false);
        }

        if (IsMatured)
        {


            c_lanzi.SetActive(true);
        }
        else
        {


            c_lanzi.SetActive(false);
        }

    }
    void Update()
    {


        MatureEvent();
    }

    /// <summary>
    /// 进行浇水
    /// </summary>
    public void WaterV()
    {


        needWater = false;
        MessInfoPanel._instance.ShowMess("浇水成功!!!");
    }

    public void PickVege()
    {


        MessInfoPanel._instance.ShowMess("采摘成功!!!");
      Ground g=transform.parent.GetComponent<Ground>();
        if (g != null)
        {


            g.HasFamed = false;
        }
        Destroy(gameObject, 1.0f);
    }
}
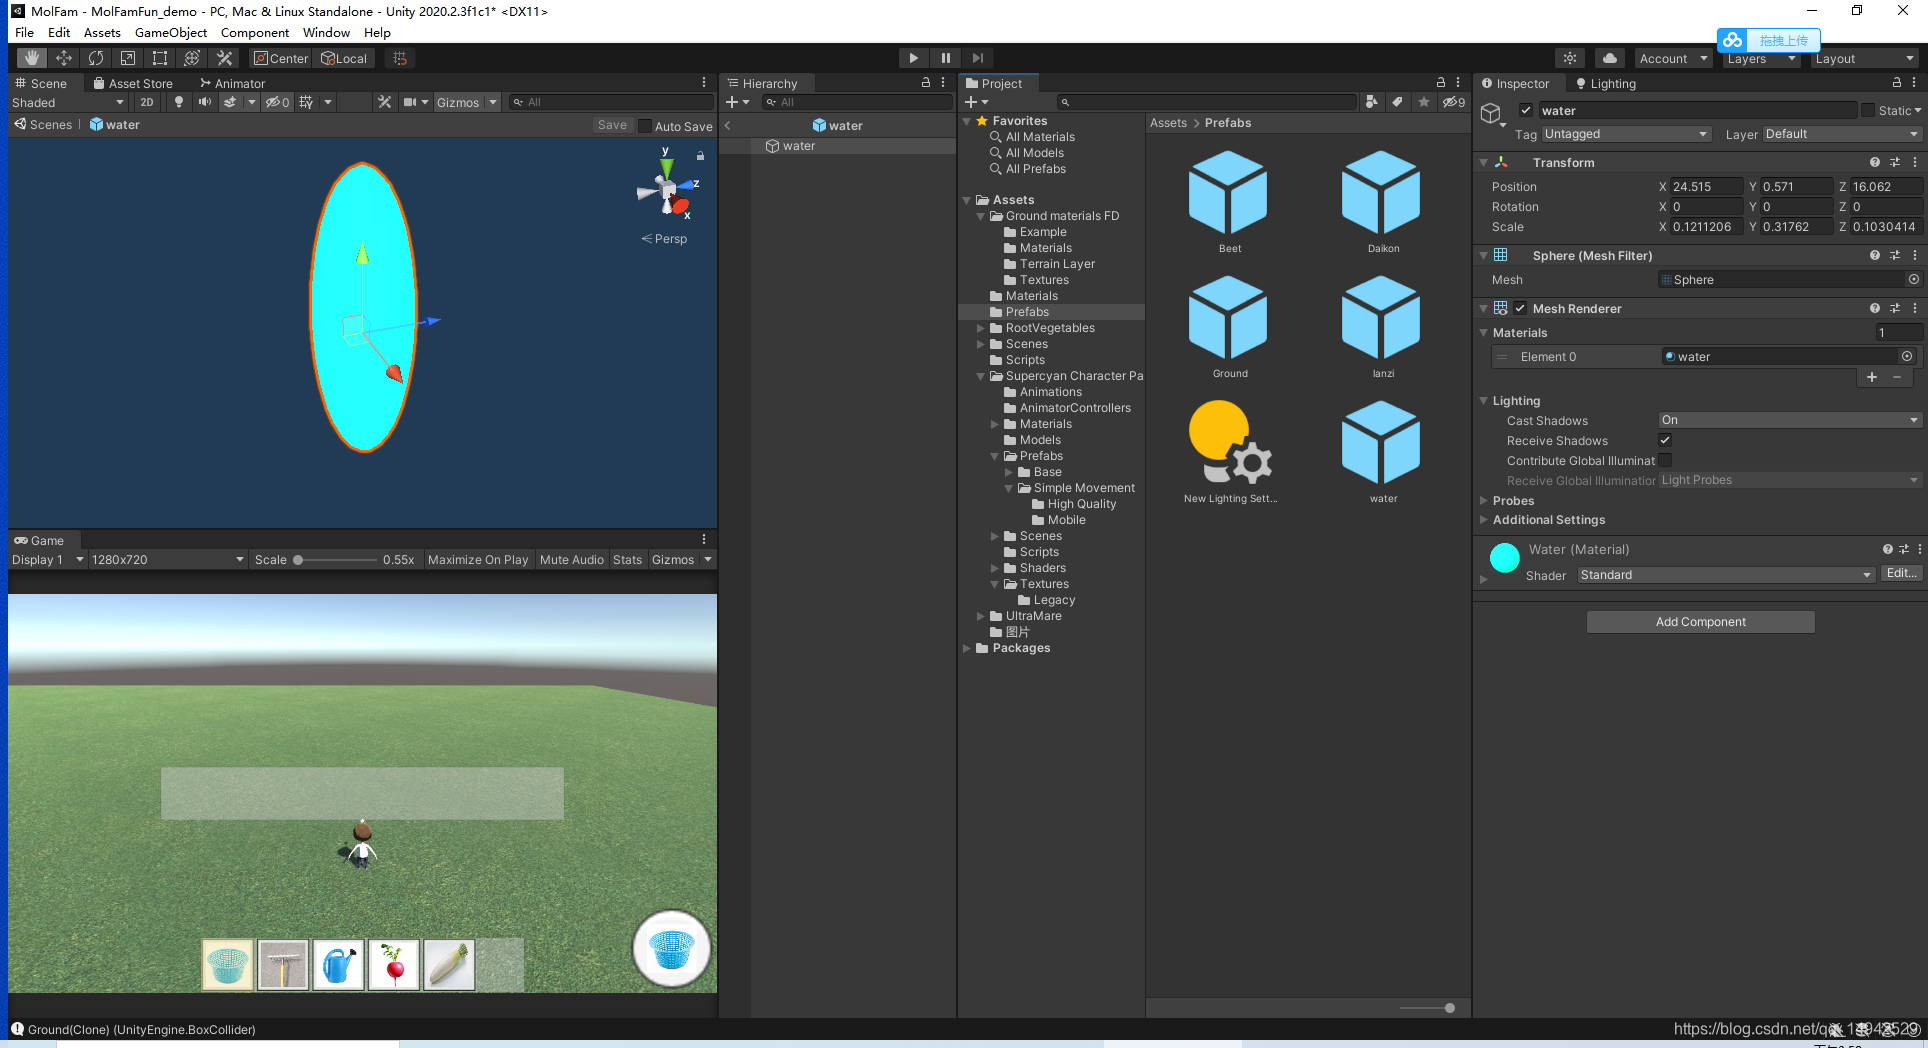
农作物身上的脚本Vegetable主要负责控制作物的成熟、洒水和收获的功能。在摩尔庄园手游里面我们看到当需要洒水的时候,农作物上方会有一个水滴,当成熟了要采摘的时候,农作物上方会有一个篮子或者是其他标志,所以我们在脚本里面定义了waterPrefab和lanziPrefab两个预制体,这两个预制体也需要进行预先设计,然后放入蔬菜预制体的Vegetable参数里面。
水滴预制体:
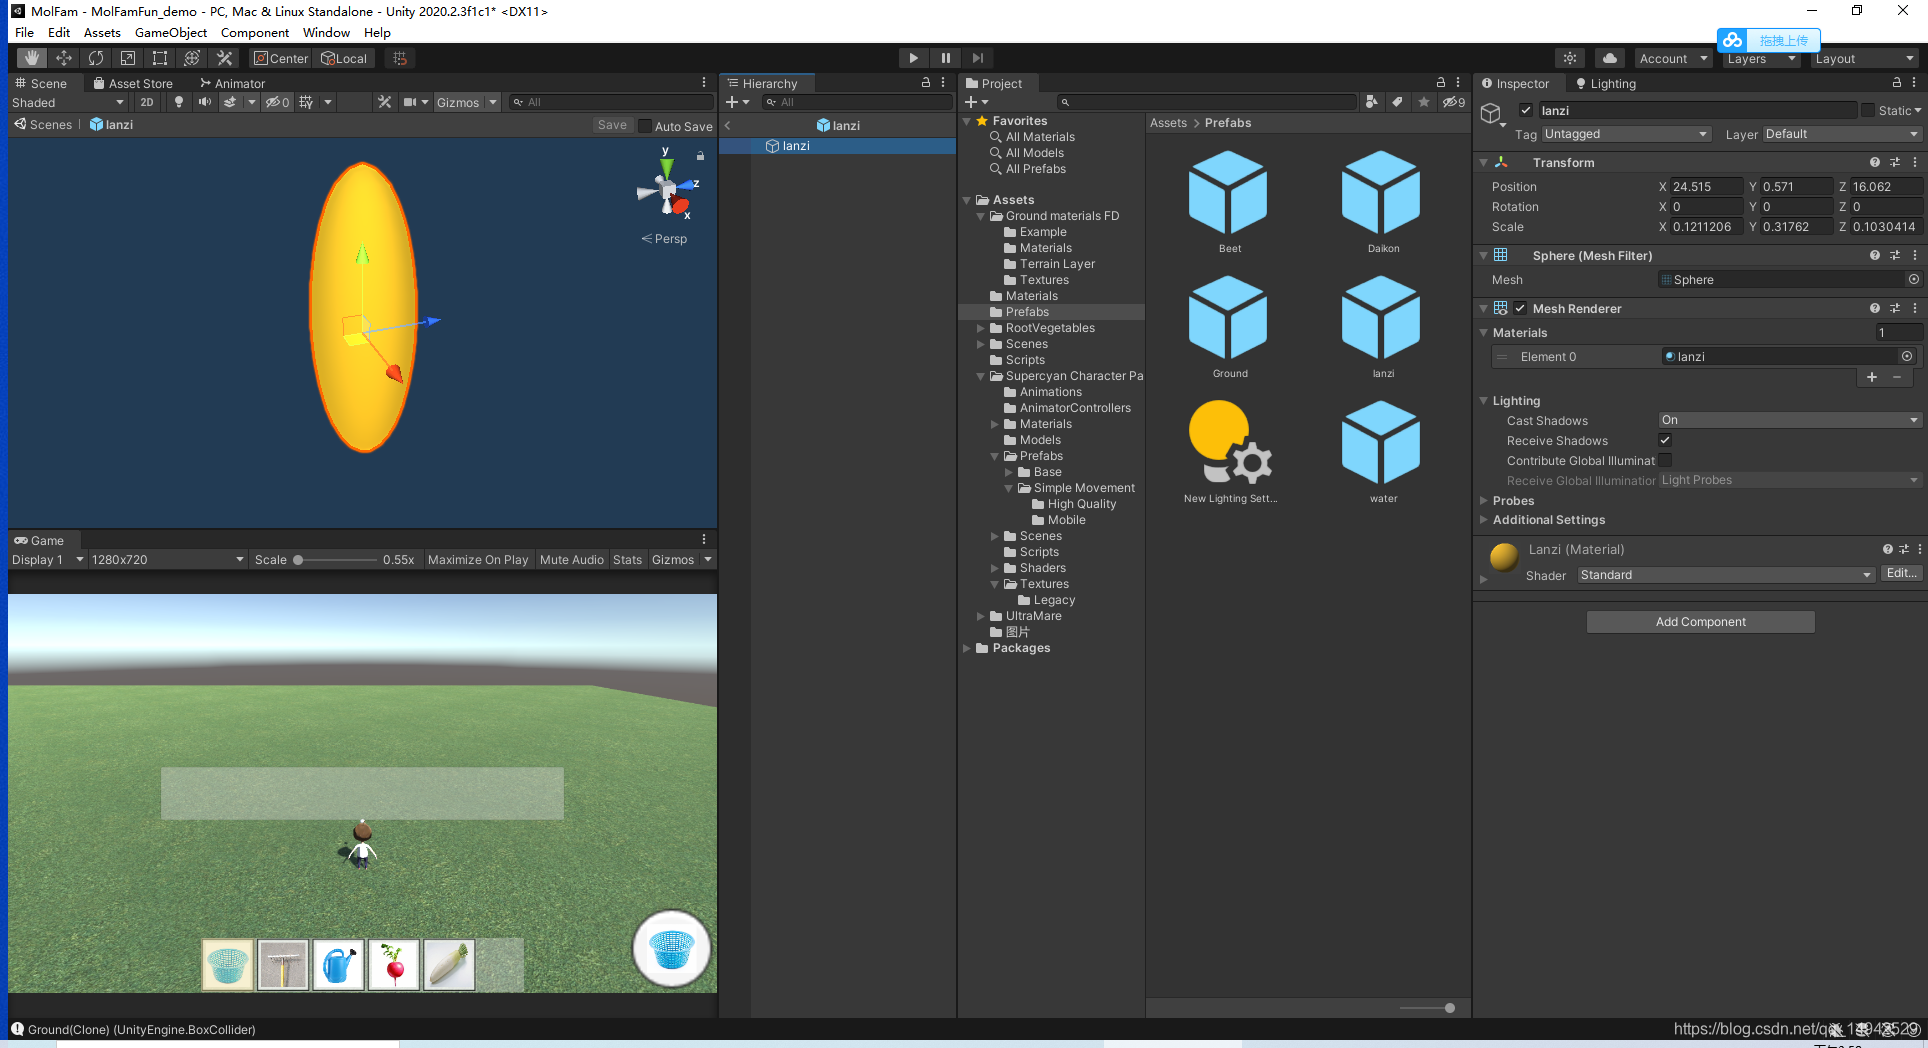
篮子预制体(随便做的椭圆代替):
设置蔬菜预制体参数:

新建一个脚本GamePanel,作为存储数据和部分UI控制的功能,以下是完整代码:
using System.Collections;
using System.Collections.Generic;
using UnityEngine;
using UnityEngine.UI;
//工具物品类型枚举
public enum ToolAndThingsType
{


    None,
    PA,
    SHUIHU,
    LANZI,
    白萝卜,
    小萝卜

}

/// <summary>
/// 工具枚举类型对应的图片
/// </summary>
[System.Serializable]
public class ToolThingTexture
{


    public Sprite sprite;
    public ToolAndThingsType type;

}
public class GamePanel : MonoBehaviour
{


    /// <summary>
    /// 当前选中的是哪个
    /// </summary>
    public ToolAndThingsType currenttoolandthings;

    /// <summary>
    /// 按钮
    /// </summary>
    public ActionBtn actionBtn;

    /// <summary>
    /// 预先要设置的链表
    /// </summary>
    public List<ToolThingTexture> toolThingTextures = new List<ToolThingTexture>();
    /// <summary>
    /// 初始化成字典
    /// </summary>
    public Dictionary<ToolAndThingsType, Sprite> toolthingsSprite = new Dictionary<ToolAndThingsType, Sprite>();
    /// <summary>
    /// 单例模式
    /// </summary>
    public static GamePanel _instance;
    private void Awake()
    {


        _instance=this;
    }
    void Start()
    {


        InitGameData();
    }

    // Update is called once per frame
    void Update()
    {


    }
    /// <summary>
    /// 初始化参数
    /// </summary>
    public void InitGameData()
    {


        foreach (var ttt in toolThingTextures)
        {


            toolthingsSprite.Add(ttt.type, ttt.sprite);
        }
    }

    /// <summary>
    /// 根据选择的工具或者物品,更新操作按钮的行为
    /// </summary>
    public void UpdateActionBtn(ToolAndThingsType toolAndThingsType)
    {


        currenttoolandthings = toolAndThingsType;
        actionBtn.CurrenttoolthingsType = currenttoolandthings;
        transform.Find("ActionBtn/Image").GetComponent<Image>().sprite = toolthingsSprite[currenttoolandthings];

    }


}
在完成上面代码之后,记得要进行参数的设置,特别是类型对应图片的设置

新建一个名为ToolsAndThings的脚本,放置在以下物品中,用来区分你当前选择的工具或者物品是什么。
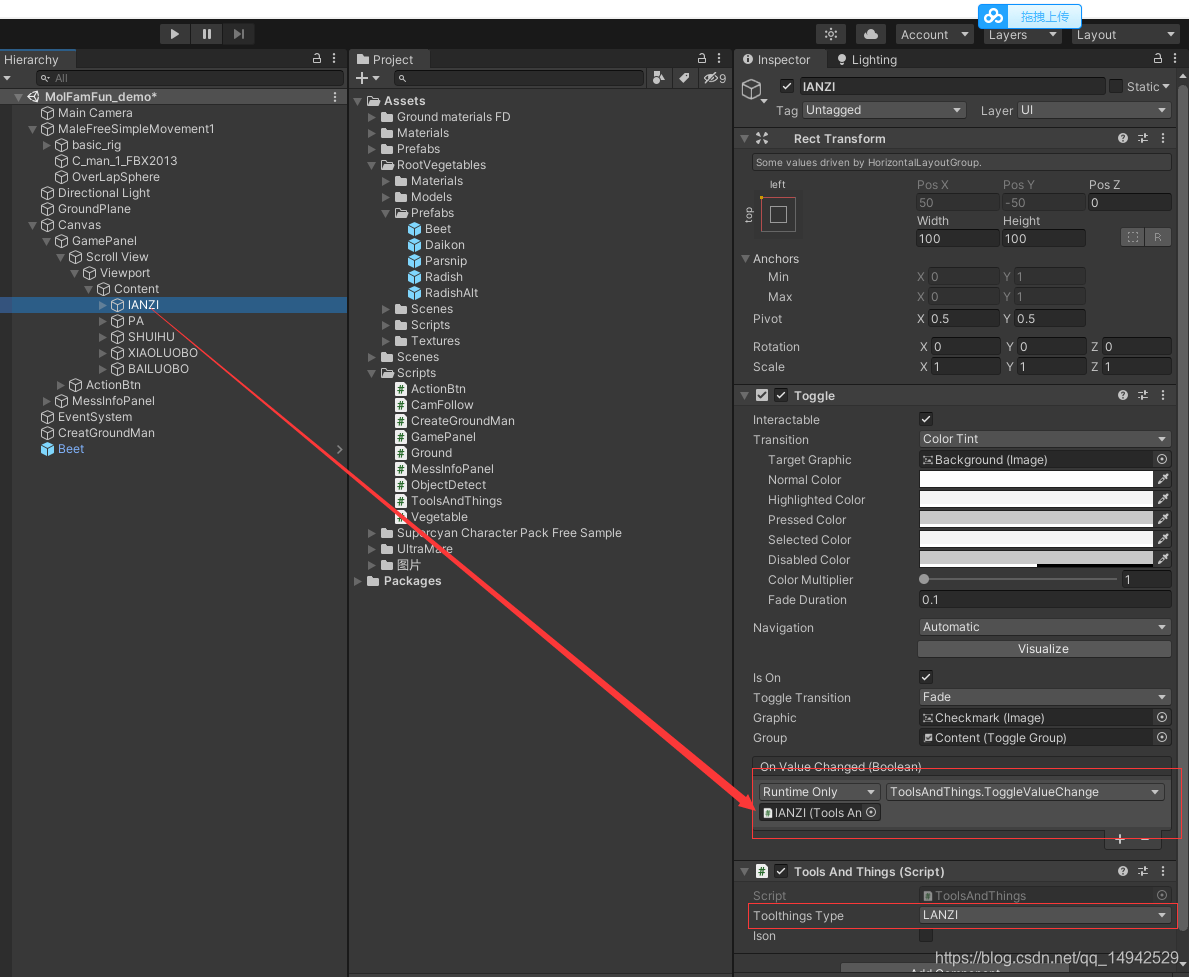
其他几个同理设置,完整的代码如下:
using System.Collections;
using System.Collections.Generic;
using UnityEngine;

public class ToolsAndThings : MonoBehaviour
{


    /// <summary>
    /// 当前的类型
    /// </summary>
    public ToolAndThingsType toolthingsType;
    /// <summary>
    /// 是否开启
    /// </summary>
    public bool Ison;
    void Start()
    {


    }

    // Update is called once per frame
    void Update()
    {


    }

    /// <summary>
    /// 绑定的动态函数
    /// </summary>
    /// <param name="ison"></param>
    public void ToggleValueChange(bool ison)
    {


        Ison = ison;
        GamePanel._instance.UpdateActionBtn(toolthingsType);
    }
}
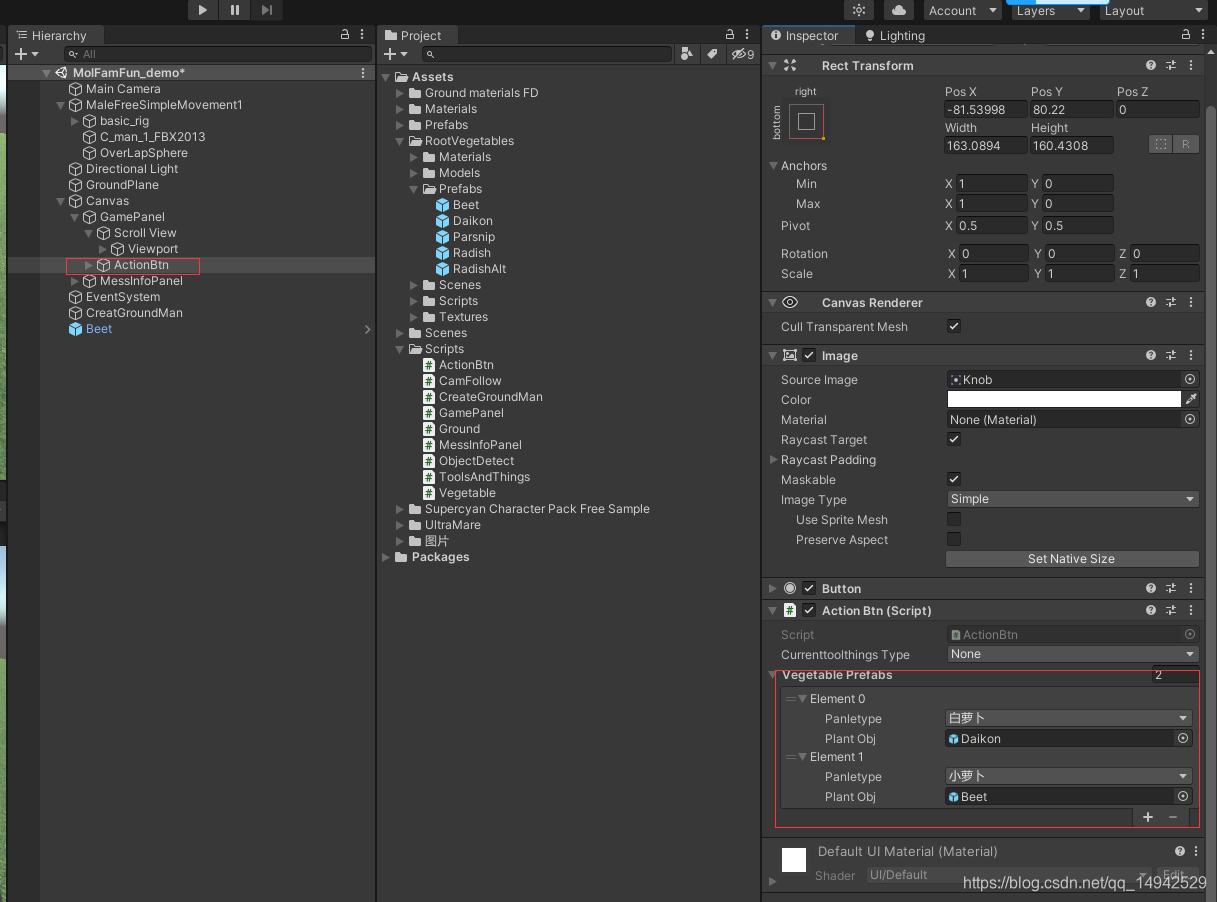
然后回到ActionBtn,为其添加一个脚本,起名为ActionBtn,主要负责处理事件,完整代码如下:
using System.Collections;
using System.Collections.Generic;
using UnityEngine;
using UnityEngine.UI;

[System.Serializable]
/// <summary>
/// 蔬菜类型对应的游戏物体
/// </summary>
public struct VegetablePrefab
{


    public ToolAndThingsType panletype;
    public GameObject plantObj;
}

public class ActionBtn : MonoBehaviour
{


    /// <summary>
    /// 当前的工具或者选择类型
    /// </summary>
    public ToolAndThingsType CurrenttoolthingsType;
    public List<VegetablePrefab> vegetablePrefabs = new List<VegetablePrefab>();
    public Dictionary<ToolAndThingsType, GameObject> toolandObjects = new Dictionary<ToolAndThingsType, GameObject>();

    private Button actionBtn;
    void Start()
    {


        actionBtn = GetComponent<Button>();
        actionBtn.onClick.AddListener(ActionButtonClick);

        foreach (var vp in vegetablePrefabs)
        {


            toolandObjects.Add(vp.panletype, vp.plantObj);
        }

    }

    // Update is called once per frame
    void Update()
    {


    }


    /// <summary>
    /// 按钮事件
    /// </summary>
    private void ActionButtonClick()
    {


        switch (CurrenttoolthingsType)
        {


            case ToolAndThingsType.None:
                break;
            case ToolAndThingsType.PA:
                PA_ToolEvent();
                break;
            case ToolAndThingsType.SHUIHU:
                SHUIHU_ToolEvent();
                break;
            case ToolAndThingsType.LANZI:
                LANZI_ToolEvent();
                break;
            case ToolAndThingsType.小萝卜:
                XIAOLUOBO_PlantEvent();
                break;
            case ToolAndThingsType.白萝卜:
                BAILUOBO_PlantEvent();

                break;
            default:
                break;
        }
    }
    /// <summary>
    /// 篮子工具
    /// </summary>
    public void LANZI_ToolEvent()
    {


        Vegetable v = ObjectDetect._instance.GetNearByMatureVege();
        if (v != null)
        {


            v.PickVege();
        }
    }

    /// <summary>
    /// 水壶工具
    /// </summary>
   public void SHUIHU_ToolEvent()
    {


        Vegetable v = ObjectDetect._instance.GetNearByNeedWaterVege();
        if (v != null)
        {


            v.WaterV();
        }
    }

    /// <summary>
    /// 杷工具使用
    /// </summary>
    public void PA_ToolEvent()
    {


        Ground g =ObjectDetect._instance.GetNearByUnOpenGround();
        if (g != null)
        {


            g.OpenGround();
        }
    }
    /// <summary>
    /// 小萝卜种植
    /// </summary>
    public void XIAOLUOBO_PlantEvent()
    {


        Ground g = ObjectDetect._instance.GetNearByUnPlantGround();
        if (g != null)
        {


            ///设置基本信息
            Vector3 pos = g.transform.position;
            GameObject obj = Instantiate(toolandObjects[CurrenttoolthingsType], pos, Quaternion.identity);
            obj.transform.SetParent(g.transform);
            g.PlantVege(CurrenttoolthingsType);
            MessInfoPanel._instance.ShowMess("种植"+CurrenttoolthingsType+"成功");
        }
    }

    /// <summary>
    /// 白萝卜种植
    /// </summary>
    public void BAILUOBO_PlantEvent()
    {


        Ground g = ObjectDetect._instance.GetNearByUnPlantGround();
        if (g != null)
        {


            Vector3 pos = g.transform.position;
            GameObject obj = Instantiate(toolandObjects[CurrenttoolthingsType], pos, Quaternion.identity);
            obj.transform.SetParent(g.transform);
            g.PlantVege(CurrenttoolthingsType);
            MessInfoPanel._instance.ShowMess("种植" + CurrenttoolthingsType + "成功");
        }
    }


}
最后还是要回到unity中设置相应的参数
最后,就是为MessInfoPanel这个游戏物品添加一个脚本,起名为MessInfoPanel,主要是显示一些信息:
using System.Collections;
using System.Collections.Generic;
using UnityEngine;
using UnityEngine.UI;
public class MessInfoPanel : MonoBehaviour
{


    public static MessInfoPanel _instance;
    private void Awake()
    {


        _instance = this;
    }
    public Text messText;
    void Start()
    {


        messText = GetComponentInChildren<Text>();
        GetComponent<Image>().CrossFadeAlpha(0, 1,true);
        messText.gameObject.SetActive(false);
    }

    // Update is called once per frame
    void Update()
    {


    }

    IEnumerator showMessIE(string info)
    {


        GetComponent<Image>().CrossFadeAlpha(1, 1, true);
        messText.gameObject.SetActive(true);
        messText.text = info;
        yield return new WaitForSeconds(1f);
        GetComponent<Image>().CrossFadeAlpha(0, 1, true);
        messText.gameObject.SetActive(false);
    }
    public void ShowMess(string info)
    {


        StartCoroutine(showMessIE(info));
    }
}
以上,就是本教程的基本所有内容了。