React Navigation官方文档:https://reactnavigation.org/docs/getting-started/
安装react-navigation:
npm install @react-navigation/native
或
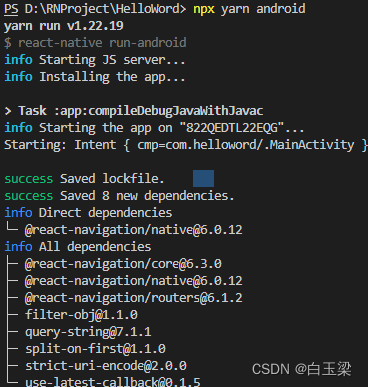
npx yarn add @react-navigation/native
安装react-native-screens和react-native-safe-area-context:
npm install react-native-screens react-native-safe-area-context
或
npx yarn add react-native-screens react-native-safe-area-context

安装native stack:
npx yarn add @react-navigation/native-stack
使用方法:
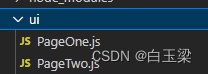
创建ui文件夹,并创建两个页面PageOne和PageTwo以测试跳转:
修改APP.js:
import React from 'react';
import {

     NavigationContainer } from '@react-navigation/native';
import {

     createNativeStackNavigator } from '@react-navigation/native-stack';

import PageOne from './ui/PageOne';
import PageTwo from './ui/PageTwo';

const Stack = createNativeStackNavigator();

const App = () => {


  return (
    <NavigationContainer>
      <Stack.Navigator>
        <Stack.Screen name="PageOne" component={

    PageOne} />
        <Stack.Screen name="PageTwo" component={

    PageTwo} />
      </Stack.Navigator>
    </NavigationContainer>
  );
}

export default App;
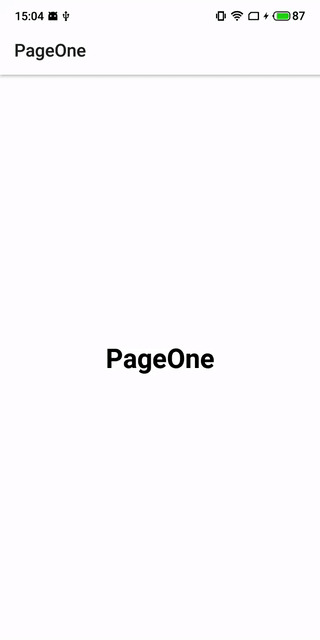
PageOne.js:
import React from "react";
import {


    SafeAreaView,
    StatusBar,
    StyleSheet,
    Text,
    View,
} from 'react-native';

export default class PageOne extends React.Component {


    constructor(props) {


        super(props);
    }

    toPageTwo() {


        this.props.navigation.navigate('PageTwo');
    }

    render() {


        return (
            <SafeAreaView>
                <StatusBar barStyle='dark-content' backgroundColor='#fff' />
                <View style={

    styles.container}>
                    <Text style={

    {

     color: '#000', fontSize: 30, fontWeight: 'bold' }} onPress={

    () => this.toPageTwo()}>PageOne</Text>
                </View>
            </SafeAreaView>
        );
    }
}

const styles = StyleSheet.create({


    container: {


        flexDirection: 'column',
        alignItems: 'center',
        justifyContent: 'center',
        backgroundColor: '#fff',
        height: '100%',
        width: '100%'
    }
});
PageTwo.js:
import React from "react";
import {


    SafeAreaView,
    StatusBar,
    StyleSheet,
    Text,
    View,
} from 'react-native';

export default class PageTwo extends React.Component {


    constructor(props) {


        super(props);
    }

    render() {


        return (
            <SafeAreaView>
                <StatusBar barStyle='dark-content' backgroundColor='#fff' />
                <View style={

    styles.container}>
                    <Text style={

    {

     color: '#000', fontSize: 30, fontWeight: 'bold' }}>PageTwo</Text>
                </View>
            </SafeAreaView>
        );
    }
}

const styles = StyleSheet.create({


    container: {


        flexDirection: 'column',
        alignItems: 'center',
        justifyContent: 'center',
        backgroundColor: '#fff',
        height: '100%',
        width: '100%'
    }
});
跳转主要方法:
this.props.navigation.navigate('PageTwo');
‘PageTwo’ 即你在App.js中的Stack.Screen中定义的name!
传参:
 this.props.navigation.navigate('PageTwo',{

    'data':'test'});
目标页面通过props.route.params接收:
    constructor(props) {


        super(props);
        console.log("props>>" + JSON.stringify(props));
        console.log("data>>" + props.route.params.data);
    }

考虑到你可能要自定义导航栏,希望隐藏默认导航栏,这当然可以实现,只需要隐藏导航栏即可:
<Stack.Screen name="PageOne" component={

    PageOne} options={

    {

     headerShown: false }} />
<Stack.Screen name="PageTwo" component={

    PageTwo} options={

    {

     headerShown: false }} />
如果你需要底部bottomTab,你可以安装 @react-navigation/bottom-tabs:
const Tab = createBottomTabNavigator();

export default function App() {


  return (
    <NavigationContainer>
      <Tab.Navigator>
        <Tab.Screen name="Home" component={

    HomeScreen} />
        <Tab.Screen name="Settings" component={

    SettingsScreen} />
      </Tab.Navigator>
    </NavigationContainer>
  );
}
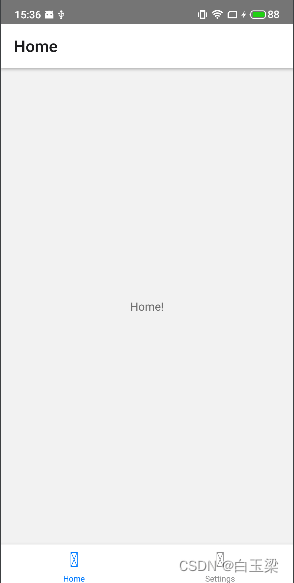
当然,它是支持图标自定义的,包括使用bottomTab时页面路由配置,官方文档上都是非常详细的了:
https://reactnavigation.org/docs/tab-based-navigation