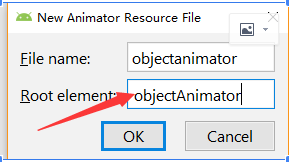
要想做静态的创建首先需要xml文件我们需要在RES资源下创建Animator文件夹
<?xml version="1.0" encoding="utf-8"?>
<objectAnimator xmlns:android="http://schemas.android.com/apk/res/android"
    android:propertyName="rotationX"
    android:duration="3000"
    android:repeatCount="0"
    android:repeatMode="reverse"
    android:startOffset="0"
    android:valueFrom="360.0">

</objectAnimator>
    <!--注意:在xml定义动画类的属性,浮点型小数,直接写小数即可,不用再带f.
    提示:控件位移的参照单位在xml文件里有所不同,不过更简单,不用再特意去定义参照物属性了,直接是根据值,区分两种方式:
        一种是以整个屏幕为参照物,在xml文件属性定义值是int%p;   一种以控件自身大小为参照物,在xml文件属性定义值是int-->
在MainActivity直接调用即可完成静态创建
 //此处用的是xml的形式.引用在Xml里的属性动画资源. AnimatorInflater.loadAnimator(上下文,R.animator..)
        Animator animator = AnimatorInflater.loadAnimator(this, R.animator.objectanimator);
        //把要做动画控件对象放进去.Animator.setTarget(View对象);
        animator.setTarget(imageView);
        //开启动画
        animator.start();
主要的布局:
<?xml version="1.0" encoding="utf-8"?>
<LinearLayout xmlns:android="http://schemas.android.com/apk/res/android"
    xmlns:app="http://schemas.android.com/apk/res-auto"
    xmlns:tools="http://schemas.android.com/tools"
    android:layout_width="match_parent"
    android:layout_height="match_parent"
    tools:context=".MainActivity"
    android:orientation="vertical">

    <Button
        android:id="@+id/alpha_bt"
        android:layout_width="wrap_content"
        android:layout_height="wrap_content"
        android:text="alpha"/>

    <Button
        android:id="@+id/translationY_bt"
        android:layout_width="wrap_content"
        android:layout_height="wrap_content"
        android:text="translationY"/>

    <Button
        android:id="@+id/scaleX_bt"
        android:layout_width="wrap_content"
        android:layout_height="wrap_content"
        android:text="scaleX"/>

    <Button
        android:id="@+id/rotationY_bt"
        android:layout_width="wrap_content"
        android:layout_height="wrap_content"
        android:text="rotationY"/>

    <Button
        android:id="@+id/AnimatorSet_bt"
        android:layout_width="wrap_content"
        android:layout_height="wrap_content"
        android:text="AnimatorSet"/>

    <Button
        android:id="@+id/bjdh"
        android:layout_width="wrap_content"
        android:layout_height="wrap_content"
        android:text="补间动画的平移"/>

    <!--    注意background的属性置为null -->
    <ImageButton
        android:onClick="yyyy"
        android:id="@+id/animation_iv"
        android:layout_width="400dp"
        android:layout_height="400dp"
        android:layout_gravity="center"
        android:src="@mipmap/a"
        android:background="@null"/>

</LinearLayout>
MainActivity代码
/*
属性动画的特点:动画效果会改变控件的位置.且开启动画的是动画对象,而不是控件对象.
        只有旋转的属性动画是经常用的,注意参数.
        注意:这些方法都是安卓在3.0以后出现的新特性,所以要把AndroidManifest.xml里的android:minSdkVersion值修改为11以上
*/

public class MainActivity extends AppCompatActivity implements View.OnClickListener {

    private ImageView imageView;

    @Override
    protected void onCreate(Bundle savedInstanceState) {
        super.onCreate(savedInstanceState);
        setContentView(R.layout.activity_main);

        //初始化控件
        initView();

        //此处用的是xml的形式.引用在Xml里的属性动画资源. AnimatorInflater.loadAnimator(上下文,R.animator..)
        Animator animator = AnimatorInflater.loadAnimator(this, R.animator.objectanimator);
        //把要做动画控件对象放进去.Animator.setTarget(View对象);
        animator.setTarget(imageView);
        //开启动画
        animator.start();
    }

    private void initView() {
        Button alpha_bt = findViewById(R.id.alpha_bt);
        Button translationY_bt = findViewById(R.id.translationY_bt);
        Button scaleX_bt = findViewById(R.id.scaleX_bt);
        Button rotationY_bt = findViewById(R.id.rotationY_bt);
        Button AnimatorSet_bt = findViewById(R.id.AnimatorSet_bt);
        Button bjdh = findViewById(R.id.bjdh);
        imageView = findViewById(R.id.animation_iv);

        alpha_bt.setOnClickListener(this);
        translationY_bt.setOnClickListener(this);
        scaleX_bt.setOnClickListener(this);
        rotationY_bt.setOnClickListener(this);
        AnimatorSet_bt.setOnClickListener(this);
        bjdh.setOnClickListener(this);
    }

    public void yyyy(View view) {

        Toast.makeText(this, "点击了我", Toast.LENGTH_SHORT).show();

    }

    @Override
    public void onClick(View v) {
        switch (v.getId()){
            case R.id.alpha_bt://渐变,动态创建
                //做透明动画,参数1:View,代表你要修改那个控件的属性. 参数2:propertyName代表实现什么样子的动画:"alpha",String类型.
                //参数3:float... values,控件修改的参数
                ObjectAnimator alpha = ObjectAnimator.ofFloat(imageView, "alpha", new float[]{0.0f, 0.2f, 0.4f, 0.6f, 0.8f, 1.0f});
                //设置动画执行的时间
                alpha.setDuration(3000);
                //设置动画执行的模式参数用ObjectAnimator引用
                alpha.setRepeatMode(ObjectAnimator.RESTART);
                //设置动画执行的次数
                alpha.setRepeatCount(1);
                alpha.start();
                break;
            case R.id.translationY_bt://平移
                ObjectAnimator translationY = ObjectAnimator.ofFloat(imageView, "translationY", new float[]{10f, 20f, 40f, 60f, 80f});
                //设置动画执行的时间
                translationY.setDuration(3000);
                //设置动画执行的模式参数用ObjectAnimator引用
                translationY.setRepeatMode(ObjectAnimator.RESTART);
                //设置动画执行的次数
                translationY.setRepeatCount(1);
                translationY.start();
                break;
            case R.id.scaleX_bt://缩放
                ObjectAnimator scaleX = ObjectAnimator.ofFloat(imageView, "scaleX", new float[]{1f, 2f, 3f, 4f, 5f});
                //设置动画执行的时间
                scaleX.setDuration(3000);
                //设置动画执行的模式参数用ObjectAnimator引用
                scaleX.setRepeatMode(ObjectAnimator.RESTART);
                //设置动画执行的次数
                scaleX.setRepeatCount(1);
                scaleX.start();
                break;
            case R.id.rotationY_bt://旋转动画
                ObjectAnimator rotationY = ObjectAnimator.ofFloat(imageView, "rotationY", new float[]{90f, 180f, 270f, 360f});
                //设置动画执行的时间
                rotationY.setDuration(3000);
                //设置动画执行的模式参数用ObjectAnimator引用
                rotationY.setRepeatMode(ObjectAnimator.RESTART);
                //设置动画执行的次数
                rotationY.setRepeatCount(0);
                rotationY.start();
                break;
            case R.id.AnimatorSet_bt:
                //做动画集合AnimatorSet,分别创建两个动画对象.注意
                // playTogether(动画对象...)和playSequentially的区别.最后开启动画.start
                AnimatorSet set = new AnimatorSet();
                ObjectAnimator alpha1 = ObjectAnimator.ofFloat(imageView, "alpha", new float[]{0.0f, 0.2f, 0.4f, 0.6f, 0.8f, 1.0f});
                //设置动画执行的时间
                alpha1.setDuration(3000);
                ObjectAnimator rotationY1 = ObjectAnimator.ofFloat(imageView, "rotationY", new float[]{90f, 180f, 270f, 360f});
                //设置动画执行的时间
                rotationY1.setDuration(3000);
                //一起执行
                //set.playTogether(alpha1,rotationY1);
                //不一起执行
                set.playSequentially(alpha1,rotationY1);
                set.start();
                break;
            case R.id.bjdh://补间动画的平移用来和属性动画的平移对比有个重要的结论
                TranslateAnimation translateAnimation = new TranslateAnimation(0,60,0,0);
                translateAnimation.setDuration(3000);
                imageView.startAnimation(translateAnimation);
                break;
        }
    }
}