demo地址: https://github.com/Lkkkkkkg/webpack-demo
上次配置HtmlWebpackPlugin: https://blog.csdn.net/qq593249106/article/details/84901089
继上次配置完HtmlWebpackPlugin之后, 现在开始解决追踪警告和错误代码的原始位置问题, 先看一下当前目录结构:
|- /dist //用于放打包后文件的文件夹
  |- app.bundle.js //出口文件
  |- print.bundle.js //出口文件
  |- index.html //模板文件
|- /node_modules
|- /src //用于放源文件的文件夹
  |- index.js //入口文件
  |- print.js //入口文件
|- package.json
|- webpack.config.js //webpack配置文件
比如在源文件 print.js 出现了一个错误, 打包之后它只会跟踪到 bundle.js 上出现了错误, 对于我们找错误来源没有帮助, 使用 JavaScript 自带的 source map 功能就可以帮助追踪错误的位置
配置webpack.config.js
webpack.config.js
const path = require('path');
const HtmlWebpackPlugin = require('html-webpack-plugin');
const CleanWebpackPlugin = require('clean-webpack-plugin');


module.exports = {
    entry: {
        app: './src/index.js', //多个入口文件
        print: './src/print.js'
    },
    devtool: 'inline-source-map', // 不同选项适用于不同环境
    plugins: [ //webpack 通过 plugins 实现各种功能, 比如 html-webpack-plugin 使用模版生成 html 文件
        new CleanWebpackPlugin(['dist']), //设置清除的目录
        new HtmlWebpackPlugin({
            filename: 'index.html', //设置生成的HTML文件的名称, 支持指定子目录,如:assets/admin.html
        })
    ],
    output: {
        filename: '[name].bundle.js', //根据入口文件输出不同出口文件
        path: path.resolve(__dirname, 'dist')
    }
};
故意生成一个错误
print.js
export default function printMe() {
    console.error('I get called from print.js!');
}
重新构建
终端输入 npm run build , 打开 index.html :
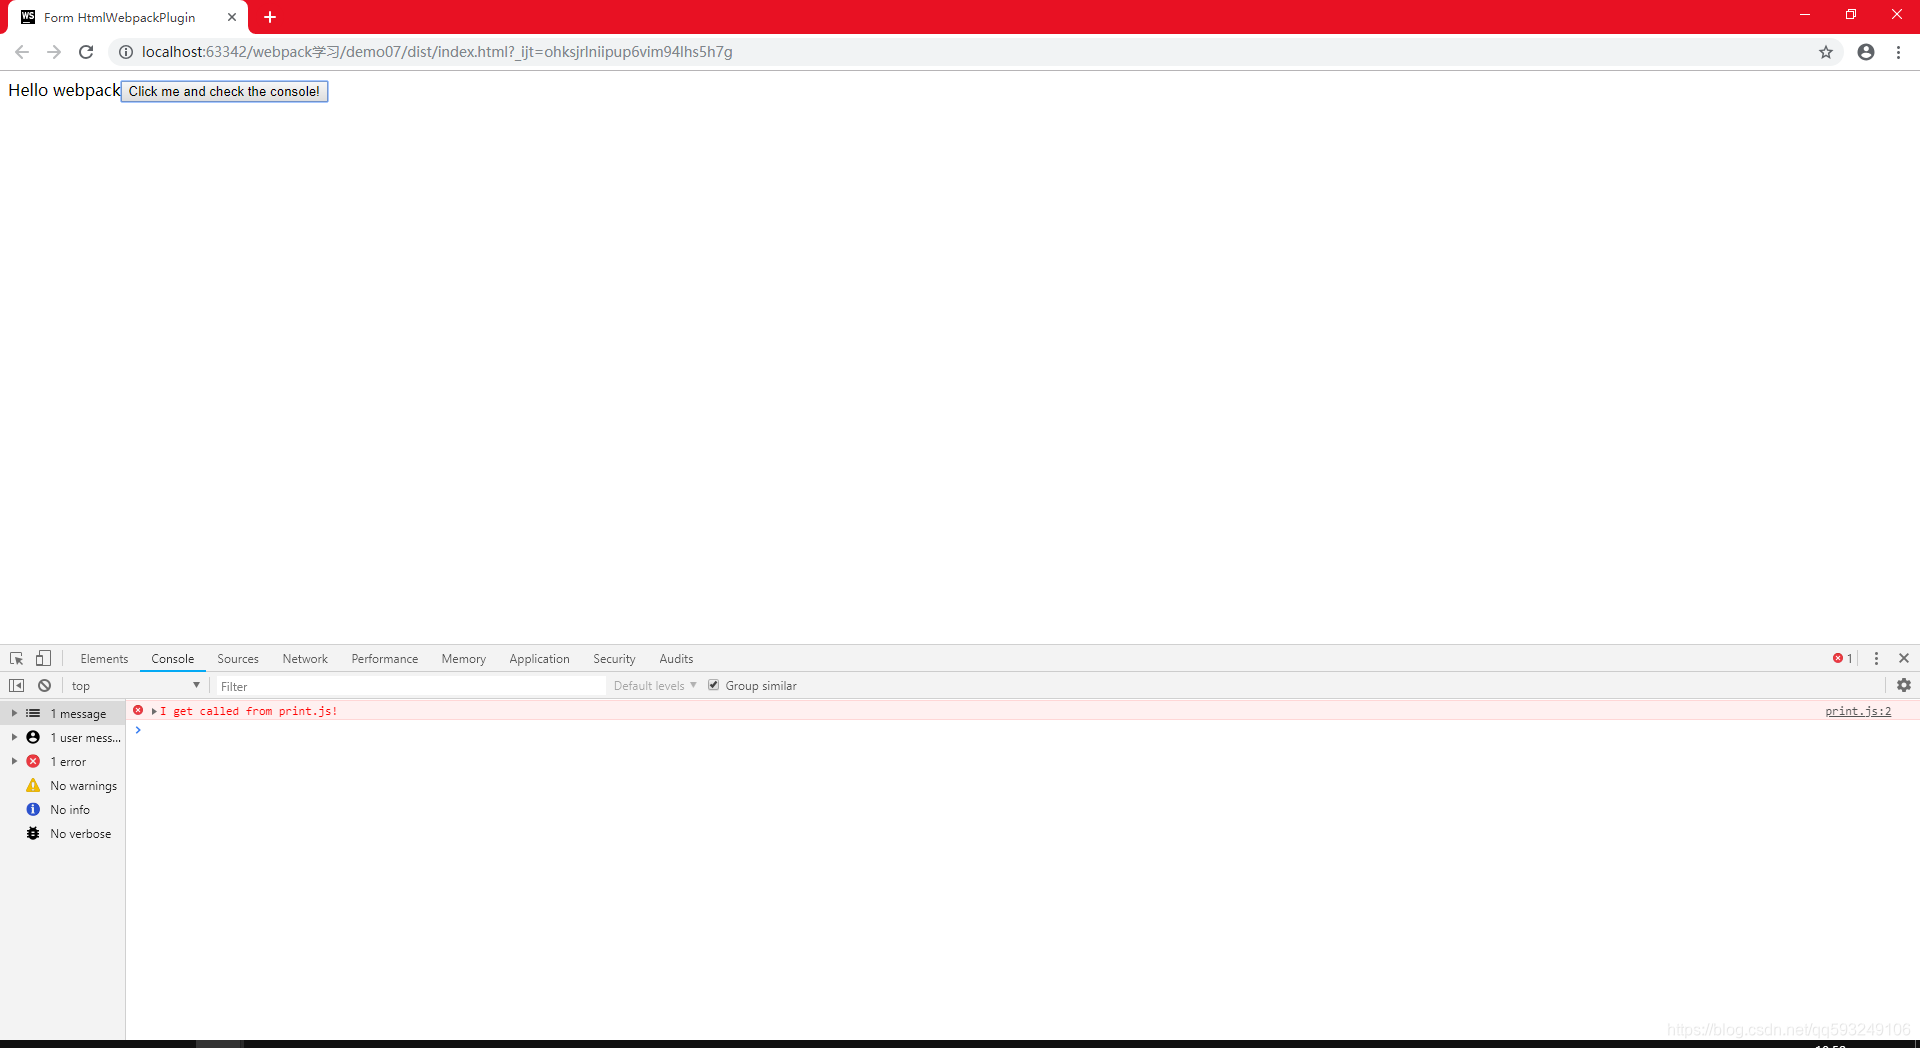
点击按钮, 触发事件产生错误, 可以看到已经准确跟踪到了源文件 print.js, 如果不使用 source map , 他会显示 app.bundle.js