版权声明:本文为博主原创文章,遵循 CC 4.0 BY-SA 版权协议,转载请附上原文出处链接和本声明。
目录
3、实现Callable接口,通过FutureTask包装器来创建Thread线程
4、使用ExecutorService、Callable、Future实现有返回结果的多线程
一、进程和线程的概念
进程:进程是操作系统结构的基础;是一次程序的执行,是系统进行资源分配和调度的一个独立单位。如下图:

可以将一个正在操作系统中运行的exe程序理解成一个“进程”。
线程:线程可以理解成是在进程中独立运行的子任务。
二、java多线程的四种实现方式
其实实现多线程的方式简单来说,就只有两种(1和2),后边的实现方式都是对前两种实现形式的封装。
1和2执行不返回结果,可返回值的任务必须实现Callable接口。
1、继承Thread类
public class Mythread extends Thread {

    @Override
    public void run() {
        System.out.println("运行线程:"+Thread.currentThread().getName());
    }

    public static void main(String[] args) {
        Mythread mythreadA = new Mythread();
        mythreadA.setName("线程一");
        Mythread mythreadB = new Mythread();
        mythreadB.setName("线程二");
        mythreadA.start();
        mythreadB.start();
    }
}
2、实现Runnable接口
run方法为线程执行的任务,继承接口后,需要实例化一个线程对象,去执行run任务。
public class Mythread implements Runnable {

    @Override
    public void run() {
        System.out.println("实现Runnable接口的线程:"+Thread.currentThread().getName());
    }

    public static void main(String[] args) {
        Mythread mythread = new Mythread();
        Thread threadA = new Thread(mythread);
        Thread threadB = new Thread(mythread);
        threadA.start();
        threadB.start();
    }
}
3、实现Callable接口,通过FutureTask包装器来创建Thread线程
public class MyCallable implements Callable {

    @Override
    public Object call() throws Exception {
        String str = "hello world!";
        String newStr = Thread.currentThread().getName()+":"+str;
        System.out.println("打印返回结果——"+newStr);
        return newStr;
    }

    public static void main(String[] args) {
        MyCallable myCallable = new MyCallable();
        // 创建线程A
        FutureTask futureTaskA = new FutureTask(myCallable);
        Thread threadA = new Thread(futureTaskA);
        threadA.start();
        // 创建线程B
        FutureTask futureTaskB = new FutureTask(myCallable);
        Thread threadB = new Thread(futureTaskB);
        threadB.start();
    }
}
执行结果:

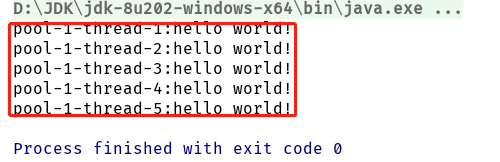
4、使用ExecutorService、Callable、Future实现有返回结果的多线程
public class MyCallable implements Callable {

    @Override
    public Object call() throws Exception {
        String str = "hello world!";
        return Thread.currentThread().getName() + ":" + str;
    }

    public static void main(String[] args) throws ExecutionException, InterruptedException {
        // 创建一个拥有五个线程的线程池
        ExecutorService es = Executors.newFixedThreadPool(5);
        List<Future> futures = new ArrayList<>();
        for (int i = 0; i < 5; i++) {
            // 实现了callable接口的实例
            MyCallable myCallable = new MyCallable();
            // 线程池执行任务
            Future future = es.submit(myCallable);
            // 把执行结果放入list集合
            futures.add(future);
        }
        // 关闭线程池
        es.shutdown();
        // 打印执行结果
        for (Future future : futures) {
            System.out.println(future.get().toString());
        }
    }
}
执行结果: