亲自教你动手制作神经网络。Github源码地址:https://github.com/hzka/PythonNetworkBook
2.1 Python
Python是一种计算机程序设计语言。是一种动态的、面向对象的脚本语言,最初被设计用于编写自动化脚本(shell),随着版本的不断更新和语言新功能的添加,越来越多被用于独立的、大型项目的开发。
2.2交互式Python
安装IPython,参考这个链接:
https://blog.csdn.net/weixin_38244174/article/details/852341952.3优雅的开始使用Python
2.3.1 Notebook
点击New Notebook开始使用Notebook,对于IPython而言,可以设置单元格(Cell)输入输出命令。In[1]为标记你的提问;Out[1]为相应的答案。
2.3.2简单的Python
Ctrl+Enter为运行按钮,左上角的+号、工具提示为Insert Cell Below为增加新的单元格。
# 输出乘积
print 2*3
# 输出Hello World
print ("hello world")
#简单的加法,x和y在这里表示为变量
x=10
print (x)
print (x+5)
y=x+7;
print (y)
# print (z)
2.3.3 自动化工作
# 1.输出0-9范围的数字。
print list(range(10))
# 2.循环代码结构输出循环列表
# 其中for n in 创建了一个循环,将当前的值赋予变量n来保持计数,将0赋值给n,1、2、3逐次赋值。
# pass命令表示循环结束,下一行返回正常缩进
for n in range(10):
    print (n)
    pass
print ("done")
# 3.打印出数字的平方。
for n in range(10):
    print ("The square of",n,"is" ,n * n)
    pass
print ("done")
2.3.4 注释
若一行的开头是哈希符号#,Python将忽略使用该行。
2.3.5 函数
函数接受输入,做一些工作,并弹出输出。
# 1.得到两个数的平均数,输入是两个参数
# def avg(x, y)表示为可重用函数,Python不会让明确这是什么类型的变量,函数定义需要缩进。
# 最后告诉机器返回了什么值。最后使用avg(3,4)进行调用。/ 2.0保证了坚持使用小数部分的数字
# /2的话表示不保留小数部分
def avg(x, y):
    print ("first input is", x)
    print ("second input is", y)
    a = (x + y) / 2.0
    print ("average is",a)
    return a
avg(3,4)
avg(300,400)
2.3.6 数组
# 1.新建3*2的数组,其内容被零填充,并将其打印出来,需要导入numpy的包。
import numpy

a = numpy.zeros([3, 2])
print (a)
# 2.更新某些行某些列上面的值,打印出最终结果
a[0, 0] = 1
a[0, 1] = 2
a[1, 0] = 9
a[1, 1] = 12
print (a)
# 3.打印该二维数组中的某个元素
print (a[0, 1])
v = a[1, 1]
print (v)
# 4.若是数组访问越界会报什么样的错,可以看看
#a[0,2]
2.3.7绘制数组
可视化数组,对数组中的单元格的值转换成某种色彩。可以简单选择颜色标度,将数值转为某种颜色,也可以将超过某一阈值的单元格涂成黑色,其他的涂为白色。
1.%matplotlib inline表示在Notebook上绘制图形,不要在独立之外的窗口上绘制图形。
2.imshow的第一个参数是绘制的数组,interpolation告诉Python帮我们进行缺省设置。

2.3.8 对象
Python也提供了对象,即定义对象一次,但却可以使用多次对象。
# 1.定义一个狗的对象和狗的吠叫动作,我们将狗的动作定义为一个函数。作者认为self能够确保函数赋予给正确的对象
class Dog:
    def bark(self):
        print ("woof!")
        pass

    pass


# 2.创建Sizzles的对象是为一条狗,创建了Dog类的一个实例后调用bark方法,实现狂吠功能。
sizzles = Dog()
mutley = Dog()
sizzles.bark()
mutley.bark()

# 3.如何将数据变量添加到类中,并添加一些方法来观察和改变数据
# 增加了三个新的函数,第一次创建对象时,会自动调用__init__构造函数,status用于打印狗的姓名和温度
# 最后是setTemp设置狗的温度,第一次创建之后,可以多次设置狗的体温
class Dog:
    def __init__(self, petname, temp):
        self.name = petname
        self.temp = temp

    def status(self):
        print ("dog name is:", self.name)
        print ("dog temperature is:", self.temp)
        pass

    def setTemp(self,temp):
        self.temp = temp
        pass

    def bark(self):
        print ("woof!")
        pass
    pass
lassie = Dog("lassie",37)
lassie.status()

lassie.setTemp(40)
lassie.status()
有了这些基础知识,我们就可以使用Python制作神经网络了
2.4使用Python制作神经网络
2.4.1框架代码
勾勒神经网络,至少有三个函数:(1)初始化函数,输入层、隐藏层、输出层节点的数量;(2)训练,学习给定样本,优化权重。(3)查询,给定输入,从输出节点给出答案。建立一个初步的框架。
# neural network definition
class neuralNetwork:

    #initialise the neural network
    def __init__(self):
        pass

    #train the neural network
    def train(self):
        pass

    #query the neural network
    def query(self):
        pass
2.4.2 初始化网络
(1)初始化网络需要设置输入层节点、隐藏层节点和输出层节点的数量。这些定义了神经网络的尺寸和形状。我们将这些对象设置为不固定的。我希望达到的效果是:同一个类既可以创建小的神经网络,也可以创建一个大型的神经网络(只需要传递参数即可)
(2)我们使用所定义的神经网络类,尝试建立每层3个节点,学习率为0.3的神经网络对象。
# neural network definition
class neuralNetwork:

    # initialise the neural network
    def __init__(self, inputnodes, hiddennodes, outputnodes, learningrate):
        # set number of nodes in each input,hidden,output layer
        self.inodes = inputnodes
        self.hnodes = hiddennodes
        self.onodes = outputnodes
        self.lr = learningrate
        pass

    # train the neural network
    def train(self):
        pass

    # query the neural network
    def query(self):
        pass
# number of input ,hidden and output nodes
input_nodes = 3
hidden_nodes = 3
output_nodes = 3

#learning rate is 0.3
learning_rate = 0.3

#create insrance of neural network
n = neuralNetwork(input_nodes,hidden_nodes,output_nodes,learning_rate)
2.4.3权重—网络的核心
网络中最重要的莫过于权重,可以使用其来计算前馈信号、反向传播误差等。输入层和隐藏层之间的链接权重矩阵为Winput_hidden ,隐藏层和输出层之间的链接权重矩阵为Whidden_output。由上一章可知,链接初始权重要小,0~1之间取随机数。使用numpy.random.rand(3, 3)方法可以达到这个目的,减去0.5的话其值域应该是在-0.5~+0.5之间,在构造函数中建立链接权重矩阵。
self.wih = (numpy.random.random(self.hnodes,self.inodes)-0.5)
self.who = (numpy.random.random(self.onodes,self.hnodes)-0.5)
2.4.4 可选项:较复杂的权重
在实际使用过程中,我们希望使用正态概率分布采样权重,平均值为零,标准方差为节点传入链接数目的开方,即1除以根号下链接传入数目:
self.wih = (numpy.random.normal(0.0, pow(self.hnodes, -0.5), (self.hnodes, self.inodes)))
self.who = (numpy.random.noramal(0.0, pow(self.onodes, -0.5), (self.onodes, self.hnodes)))
正态分布中心为0.0,标准方差用pow(self.onodes, -0.5)来表示节点数目的-0.5次方,最后一个数字是numpy数组的形状大小。
2.4.5 查询网络
Query函数接受神经网络的输入,返回网络的输出。我们所要做的是传递来自输入层节点的输入信号,通过隐藏层,在输出层输出。当信号馈送至给定隐藏层节点或输出层节点时,我们使用链接权重调节信号,并使用S激活函数抑制来自这些节点的信号。但由于我们知道:
Xhidden=Winput_hidden*I
所以直接点乘即可。然后再使用激活函数进行抑制。在这里S函数调用了scipy库,神经网络初始化代码内部我们定义了激活函数,lambda为匿名函数,x为参数,S函数为:scipy.special.expi。代码示例如下:
self.activation_funcation = lambda x:scipy.special.expit(x)
# query the neural network
    def query(self, inputs_list):
        inputs = numpy.array(inputs_list, ndmin=2).T
        hidden_inputs = numpy.dot(self.wih,inputs)
        hidden_outputs = self.activation_funcation(hidden_inputs)

        final_inputs = numpy.dot(self.who,hidden_outputs)
        final_ouputs = self.activation_funcation(final_inputs)
        return final_ouputs
2.4.6 迄今为止的代码
训练神经网络需要两个阶段:第一步,计算输出;如同query所做事情;第二步为反向传播误差。告诉如何优化链接权重。
2.4.7 训练网络
训练任务分为两部分:
第一部分,针对给定的训练样本计算输出,这与query函数一样。这一步唯一不同的在与多了一个参数target_lists,我们使用targes = numpy.array(targets_list, ndmin=2).T将其变为numpy数组。
第二部分,将计算得到的输出和所需输出对比,使用差值来指导网络权重的更新。这里也是整个神经网络的核心。
(1)计算误差,将矩阵targets减去矩阵final_outputs相减,output_errors = targes - final_ouputs
(2)得到隐藏层节点反向传播的误差。
hidden_errors = numpy.dot(self.who.T, output_errors)(3)对于输入层和隐藏层之间的权重,我们可以使用hidden_error进行优化。
![]()
self.who += self.lr * numpy.dot((output_errors * final_ouputs * (1 - final_ouputs)), numpy.transpose(hidden_outputs)) self.lr是学习率,numpy.dot实现矩阵点乘,output_errors * final_ouputs * (1 - final_ouputs))表示S函数相关部分和下一层的误差,numpy.transpose(hidden_outputs)为转职输出矩阵。
(4)输入层和隐藏层之间权重的更新。原理相同:
self.wih += self.lr * numpy.dot((hidden_errors * hidden_outputs * (1 - hidden_outputs)),numpy.transpose(inputs))这样就计算结束了。
总结代码如下:
# neural network definition
import numpy
import scipy.special


class neuralNetwork:

    # initialise the neural network
    def __init__(self, inputnodes, hiddennodes, outputnodes, learningrate):
        # set number of nodes in each input,hidden,output layer
        self.inodes = inputnodes
        self.hnodes = hiddennodes
        self.onodes = outputnodes
        self.lr = learningrate
        # link weight matrices,wih and who
        # weights inside the arrays are w_i_j,where link is from node i to node j in the next layer
        # w11 w21
        # w12 w22 etc
        # self.wih = (numpy.random.random(self.hnodes,self.inodes)-0.5)
        # self.who = (numpy.random.random(self.onodes,self.hnodes)-0.5)
        self.wih = (numpy.random.normal(0.0, pow(self.hnodes, -0.5), (self.hnodes, self.inodes)))
        self.who = (numpy.random.normal(0.0, pow(self.onodes, -0.5), (self.onodes, self.hnodes)))
        self.activation_funcation = lambda x: scipy.special.expit(x)
        pass

    # train the neural network
    def train(self, inputs_list, targets_list):
        inputs = numpy.array(inputs_list, ndmin=2).T
        targes = numpy.array(targets_list, ndmin=2).T
        hidden_inputs = numpy.dot(self.wih, inputs)
        hidden_outputs = self.activation_funcation(hidden_inputs)

        final_inputs = numpy.dot(self.who, hidden_outputs)
        final_ouputs = self.activation_funcation(final_inputs)

        output_errors = targes - final_ouputs
        hidden_errors = numpy.dot(self.who.T, output_errors)
        self.who += self.lr * numpy.dot((output_errors * final_ouputs * (1.0 - final_ouputs)),
                                        numpy.transpose(hidden_outputs))
        self.wih += self.lr * numpy.dot((hidden_errors * hidden_outputs * (1.0 - hidden_outputs)),
                                        numpy.transpose(inputs))
        pass

    # query the neural network
    def query(self, inputs_list):
        inputs = numpy.array(inputs_list, ndmin=2).T
        hidden_inputs = numpy.dot(self.wih, inputs)
        hidden_outputs = self.activation_funcation(hidden_inputs)

        final_inputs = numpy.dot(self.who, hidden_outputs)
        final_ouputs = self.activation_funcation(final_inputs)
        return final_ouputs


# number of input ,hidden and output nodes
input_nodes = 3
hidden_nodes = 3
output_nodes = 3

# learning rate is 0.3
learning_rate = 0.3

# create insrance of neural network
n = neuralNetwork(input_nodes, hidden_nodes, output_nodes, learning_rate)
# print(n.query([1.0, 0.5, -1.5]))
n.train([1.0, 0.5, 1.5],[1.0, 0.5, 1.5])
n.train([2.0, 0.6, 1.6],[2.0, 0.6, 1.6])
n.train([1.9, 10.5, 8],[1.9, 10.5, 8])
n.train([20.0, 0.66, 1.98],[20.0, 0.66, 1.98])

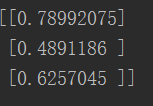
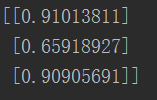
print(n.query([2.0, 0.5, 1.5]))
# numpy.random.rand(3, 3) - 0.5


测试效果还可以,这样一个最简单的神经网络就完成啦!