要写Spring代码,那jar包肯定是少不了的,这里用Maven进行管理,下面是Maven的坐标
<dependencies>
        <dependency>
            <groupId>org.springframework</groupId>
            <artifactId>spring-webmvc</artifactId>
            <version>5.2.0.RELEASE</version>
        </dependency>
    </dependencies>
当坐标写完之后,进行写我们的pojo类,这里是一个Hello类
package com.zhiying.pojo;

public class  Hello{
    private String str;

    public String getStr() {
        return str;
    }

    public void setStr(String str) {
        this.str = str;
    }

    @Override
    public String toString() {
        return "Hello{" +
                "str='" + str + '\'' +
                '}';
    }
}
然后在resource里写一个xml的配置文件,这里命名为Beans.xml
<?xml version="1.0" encoding="UTF-8"?>
<beans xmlns="http://www.springframework.org/schema/beans"
       xmlns:xsi="http://www.w3.org/2001/XMLSchema-instance"
       xsi:schemaLocation="http://www.springframework.org/schema/beans
        https://www.springframework.org/schema/beans/spring-beans.xsd">

    <!--使用Spring创建对象,在Spring中这些都称为Bean-->
    <bean id="hello" class="com.zhiying.pojo.Hello">
        <!--这里是用的value,如果是引用的话是ref-->
        <property name="str" value="Hello Spring"/>
    </bean>

</beans>
然后是测试了
import com.zhiying.pojo.Hello;
import org.springframework.context.ApplicationContext;
import org.springframework.context.support.ClassPathXmlApplicationContext;

public class MyTest {
    public static void main(String[] args) {
        //获取Spring的上下文对象
        ApplicationContext context = new ClassPathXmlApplicationContext("beans.xml");

        //我们的对象都是在Spring中管理的,我们要使用直接到里面取即可
        Hello hello = (Hello) context.getBean("hello");
        System.out.println(hello.toString());
    }
}
测试结果:

这样做我们就不用去改代码了,如果需要改需求,只需要改配置文件即可,所谓的IoC也就是对象由Spring创建、管理和装配
下面来练习一个ref的注入
首先是Dao层
package com.zhiying.dao;

public interface UserDao {
    public void getUser();
}
package com.zhiying.dao;
public class UserDaoImpl implements UserDao {
public void getUser() {
System.out.println("this is a user");
}
}然后是Service层
package com.zhiying.service;

import com.zhiying.dao.UserDao;

public interface UserService {
    public void setUserDao(UserDao userDao);
    public void getUser();
}
package com.zhiying.service;
import com.zhiying.dao.UserDao;
public class UserServiceImpl implements UserService {
UserDao userDao;
public void setUserDao(UserDao userDao) {
this.userDao = userDao;
}
public void getUser() {
userDao.getUser();
}
}然后是Beans.xml配置文件
扫描二维码关注公众号,回复:
8523715 查看本文章

<?xml version="1.0" encoding="UTF-8"?>
<beans xmlns="http://www.springframework.org/schema/beans"
       xmlns:xsi="http://www.w3.org/2001/XMLSchema-instance"
       xsi:schemaLocation="http://www.springframework.org/schema/beans
        https://www.springframework.org/schema/beans/spring-beans.xsd">

    <bean id="userDaoImpl" class="com.zhiying.dao.UserDaoImpl"/>

    <!--这里进行了注入,所以UserServiceImpl需要有set方法-->
    <bean id="userServiceImpl" class="com.zhiying.service.UserServiceImpl">
        <!--应用Spring中创建好的对象-->
        <property name="userDao" ref="userDaoImpl"/>
    </bean>

</beans>
最后是测试
import com.zhiying.service.UserService;
import com.zhiying.service.UserServiceImpl;
import org.springframework.context.ApplicationContext;
import org.springframework.context.support.ClassPathXmlApplicationContext;
public class MyTest {
public static void main(String[] args) {
ApplicationContext context = new ClassPathXmlApplicationContext("beans.xml");
UserService userService = (UserServiceImpl) context.getBean("userServiceImpl");
userService.getUser();
}
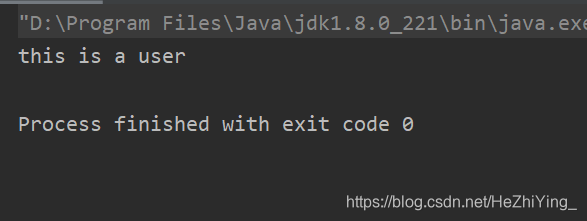
}结果如下: