1.创建springboot 的web项目
2.引入pom配置
添加两个依赖
		<dependency>
            <groupId>org.springframework.boot</groupId>
            <artifactId>spring-boot-starter-web</artifactId>
        </dependency>

        <dependency>
            <groupId>org.springframework.boot</groupId>
            <artifactId>spring-boot-starter-thymeleaf</artifactId>
        </dependency>
3.配置application.yml
server:
  port: 80
spring:
  thymeleaf:
    #是否开启缓存,开发时可以设置false
    cache: false
    #检查模板是否存在,默认true
    check-template: true
    #检查模板位置是否存在,默认true
    check-template-location: true
    #模板文件编码
    encoding: UTF-8
    #模板文件位置
    prefix: classpath:/templates/
    servlet:
      #content-type配置
      content-type: text/html
    #模板文件后缀
    suffix: .html
4.配置bean类
	private Integer id;
    private String name;
    private String author;
5.配置controller
@Controller
public class BookController {
@GetMapping("/books")
public ModelAndView books(){
List<Book> books=new ArrayList<>();
Book b1=new Book();
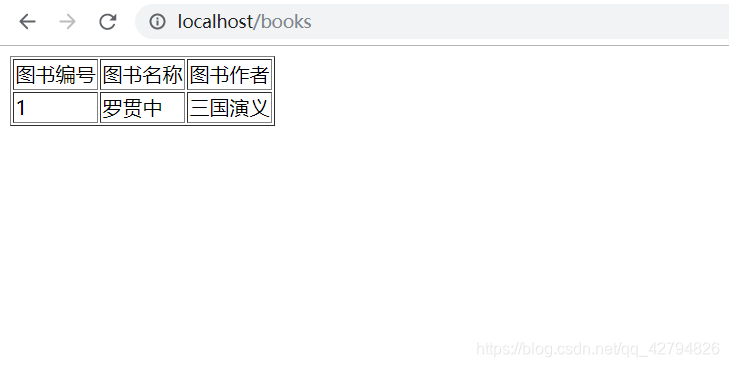
b1.setId(1);
b1.setName("罗贯中");
b1.setAuthor("三国演义");
books.add(b1);
ModelAndView mv=new ModelAndView();
mv.addObject("books",books);
mv.setViewName("books");
return mv;
}
}
6.在templates中写book.html
<!DOCTYPE html>
<html lang="en" xmlns:th="http://www.thymeleaf.org">
<head>
    <meta charset="UTF-8">
    <title>Title</title>
</head>
<body>
    <table border="1">
        <tr>
            <td>图书编号</td>
            <td>图书名称</td>
            <td>图书作者</td>
        </tr>
        <tr th:each="book:${books}">
            <td th:text="${book.id}"></td>
            <td th:text="${book.name}"></td>
            <td th:text="${book.author}"></td>
        </tr>
    </table>
</body>
</html>
7.运行结果