一:方法简介
在 要调用的接口上 加 @FeignClient 注解
二:创建 eureka-feign-client 服务
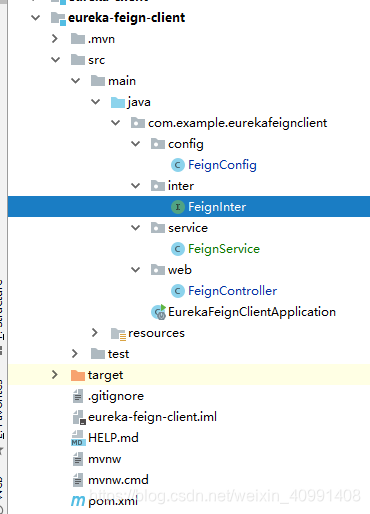
2.1 在主Maven工程中创建一个新的 Module 工程,命名为eureka-feign-client。采用Spring Initializr 的方式的方式创建。
2.2 eureka-feign-client 的 pom.xml 的内容如下:
<?xml version="1.0" encoding="UTF-8"?>
<project xmlns="http://maven.apache.org/POM/4.0.0" xmlns:xsi="http://www.w3.org/2001/XMLSchema-instance"
         xsi:schemaLocation="http://maven.apache.org/POM/4.0.0 https://maven.apache.org/xsd/maven-4.0.0.xsd">
    <modelVersion>4.0.0</modelVersion>
    <parent>
        <groupId>com.springcloud</groupId>
        <artifactId>springcloud-hx</artifactId>
        <version>1.0-SNAPSHOT</version>
        <relativePath/> <!-- lookup parent from repository -->
    </parent>
    <groupId>com.example</groupId>
    <artifactId>eureka-feign-client</artifactId>
    <version>0.0.1-SNAPSHOT</version>
    <name>eureka-feign-client</name>
    <description>Demo project for Spring Boot</description>

    <properties>
        <java.version>1.8</java.version>
    </properties>

    <dependencies>
        <dependency>
            <groupId>org.springframework.cloud</groupId>
            <artifactId>spring-cloud-starter-netflix-eureka-client</artifactId>
        </dependency>
        <dependency>
            <groupId>org.springframework.cloud</groupId>
            <artifactId>spring-cloud-starter-openfeign</artifactId>
        </dependency>
        <dependency>
            <groupId>org.springframework.boot</groupId>
            <artifactId>spring-boot-starter-web</artifactId>
        </dependency>

        <dependency>
            <groupId>org.springframework.boot</groupId>
            <artifactId>spring-boot-starter-test</artifactId>
            <scope>test</scope>
        </dependency>
    </dependencies>

    <build>
        <plugins>
            <plugin>
                <groupId>org.springframework.boot</groupId>
                <artifactId>spring-boot-maven-plugin</artifactId>
            </plugin>
        </plugins>
    </build>

</project>
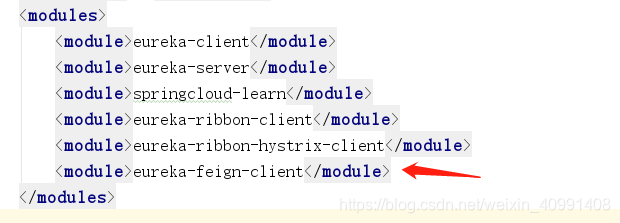
2.3 主Module 的 的 pom.xml 加上:
2.4 eureka-feign-client 的 配置文件 application.yml 的内容如下:
server:
  port: 8766

spring:
  #配置程序名为eureka-feign-client
  application:
    name: eureka-feign-client

eureka:
  client:
    #服务注册地址
    serviceUrl:
      #注意: Eureka Server 的注册地址
      #将服务提供者注册到三个Eureka Server中去
      #defaultZone: http://peer1:8001/eureka/,http://peer2:8002/eureka/,http://peer3:8003/eureka/
      #defaultZone: http://peer1:8001/eureka/
      defaultZone: http://localhost:8761/eureka/
2.5 在启动类上加上 @EnableDiscoveryClient 开启服务注册于发现,加上@EnableFeignClients 开启 Feign Client 功能代码如下:
package com.example.eurekafeignclient;

import org.springframework.boot.SpringApplication;
import org.springframework.boot.autoconfigure.SpringBootApplication;
import org.springframework.cloud.client.discovery.EnableDiscoveryClient;
import org.springframework.cloud.openfeign.EnableFeignClients;

@SpringBootApplication
//开启服务注册于发现
@EnableDiscoveryClient
//开启 Feign Client 功能
@EnableFeignClients
public class EurekaFeignClientApplication {

    public static void main(String[] args) {
        SpringApplication.run(EurekaFeignClientApplication.class, args);
    }

}
2.6 新建一个 interface ,命名FeignInter ,在接口上加 @FeignClient 注解来声明 一个Feign Client,其中 value 为 远程调用其他服务的服务名。
FeignConfig.class 为 Feign Client 的配置类,注入Retryer类的实例,这样在远程调用失败后,feign会进行重试。
代码如下:
package com.example.eurekafeignclient.inter;


import com.example.eurekafeignclient.config.FeignConfig;
import org.springframework.cloud.openfeign.FeignClient;
import org.springframework.web.bind.annotation.GetMapping;
import org.springframework.web.bind.annotation.PathVariable;
import org.springframework.web.bind.annotation.RequestParam;


//在接口上加 @FeignClient 注解来声明 一个Feign Client,其中 value 为 远程调用其他服务的服务名
//FeignConfig.class 为 Feign Client 的配置类,注入Retryer类的实例,这样在远程调用失败后,feign会进行重试
//使用 Spring MVC 的注解来绑定具体该服务提供的 REST 接口

@FeignClient(value = "eureka-client",configuration = FeignConfig.class)
public interface FeignInter {

    //使用 Spring MVC 的注解来绑定具体该服务提供的 REST 接口
    @GetMapping(value = "/HiController/hi/{name}")
    String sayHiFromEurekaClient(@PathVariable(value = "name") String name);
}
2.7 创建 一个 配置类 FeignConfig 代码如下:
package com.example.eurekafeignclient.config;


import feign.Retryer;
import org.springframework.context.annotation.Configuration;

import static java.util.concurrent.TimeUnit.SECONDS;

//注入Retryer类的实例,这样在远程调用失败后,feign会进行重试
@Configuration
public class FeignConfig {


    public Retryer feignRetryer(){
        //Feign 默认的配置在请求失败后,重试次数为0,即不重试。
        //重试间隔 为100毫秒,最大重试时间为1秒,重试次数为5次
        //return new Retryer.Default();
        return new Retryer.Default(100,SECONDS.toMillis(1),5);
    }

}
2.8 创建一个 FeignService类,代码如下:
package com.example.eurekafeignclient.service;

import com.example.eurekafeignclient.inter.FeignInter;
import org.springframework.beans.factory.annotation.Autowired;
import org.springframework.stereotype.Service;

@Service
public class FeignService {

    @Autowired
    private FeignInter feignInter;

    public String helloFeign(String name) {
        return feignInter.sayHiFromEurekaClient(name);
    }
}
2.9 创建一个FeignController 类,代码如下:
package com.example.eurekafeignclient.web;

import com.example.eurekafeignclient.service.FeignService;
import org.springframework.beans.factory.annotation.Autowired;
import org.springframework.web.bind.annotation.GetMapping;
import org.springframework.web.bind.annotation.PathVariable;
import org.springframework.web.bind.annotation.RequestMapping;
import org.springframework.web.bind.annotation.RestController;

@RestController
@RequestMapping("/FeignController")
public class FeignController {

   @Autowired
    private FeignService feignService;

    @GetMapping("/hi/{name}")
    public String helloFeign(@PathVariable("name") String name) {
        StringBuffer sb  = new StringBuffer();
        //模仿 50次用户请求
        for (int i=0;i<50;i++){
            if(i==49){
                sb.append(feignService.helloFeign(name));
            }else {
                sb.append(feignService.helloFeign(name)).append("---");
            }
        }
        return sb.toString();
    }

}
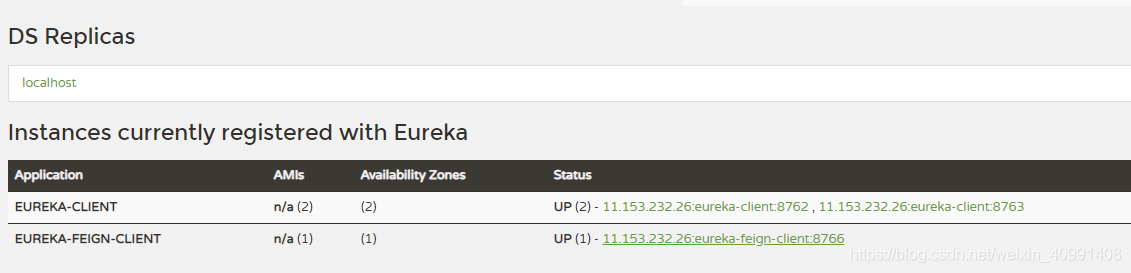
2.10 分别启动 eureka-server , eureka-client-8762, eureka-client-8763 ,eureka-feign-client 服务。
浏览器访问 http://localhost:8761/
截止在浏览器上 输入 :http://localhost:8766/FeignController/hi/java,得到结果如下:

这时可以发现,当访问 http://localhost:8766/FeignController/hi/java 的API接口时,Feign Client 远程调用了 eureka-client 端口为 8762 和 8763 的两个实例 的 “/hi” AP接口。所以 ,Feign Client 有负载均衡的作用,会轮流地请求 eureka-client 的两个实例中的 “/hi” API接口。
查看 feign 起步依赖 spring-cloud-starter-openfeign ,代码如下:
<dependencies>
		<dependency>
			<groupId>org.springframework.cloud</groupId>
			<artifactId>spring-cloud-starter</artifactId>
		</dependency>
		<dependency>
			<groupId>org.springframework.cloud</groupId>
			<artifactId>spring-cloud-openfeign-core</artifactId>
		</dependency>
		<dependency>
			<groupId>org.springframework</groupId>
			<artifactId>spring-web</artifactId>
		</dependency>
		<dependency>
			<groupId>org.springframework.cloud</groupId>
			<artifactId>spring-cloud-commons</artifactId>
		</dependency>
		<dependency>
			<groupId>io.github.openfeign</groupId>
			<artifactId>feign-core</artifactId>
		</dependency>
		<dependency>
			<groupId>io.github.openfeign</groupId>
			<artifactId>feign-slf4j</artifactId>
		</dependency>
		<dependency>
			<groupId>io.github.openfeign</groupId>
			<artifactId>feign-hystrix</artifactId>
		</dependency>
		<dependency>
			<groupId>io.github.openfeign</groupId>
			<artifactId>feign-java8</artifactId>
		</dependency>
		<dependency>
			<groupId>org.springframework.cloud</groupId>
			<artifactId>spring-cloud-starter-netflix-ribbon</artifactId>
			<optional>true</optional>
		</dependency>
		<dependency>
			<groupId>org.springframework.cloud</groupId>
			<artifactId>spring-cloud-starter-netflix-archaius</artifactId>
			<optional>true</optional>
		</dependency>
	</dependencies>
可以看到该起步依赖默认引入了Ribbon 和 Hystrix 的依赖,即负载均衡 和熔断器的依赖
