ipa主从搭建使用方式总结
本次实验的环境准备
| 主机 | ip | dns地址 | 域 | 角色 |
|---|---|---|---|---|
| ipa-master1.test.cn0.wormpex.com | 10.255.206.101 | nameserver 10.253.0.201,nameserver 10.253.0.137 | wormpex.com | freeipa主服务器 |
| ipa-slave1.test.cn0.wormpex.com | 10.255.206.100 | nameserver 10.253.0.201,nameserver 10.253.0.137 | wormpex.com | freeipa复制服务器 |
| localhost | 10.255.206.102 | nameserver 10.253.0.201,nameserver 10.253.0.137 | wormpex.com | 登录测试用的client |
用户信息配置
| 用户 | 密码 |
|---|---|
| admin | Yanghehe.123 |
| Directory Manager | Yanghehe.123 |
ipa-master安装步骤
- 添加dns解析,使用dig测试
[[email protected] ]$ dig ipa-master1.test.cn0.wormpex.com

; <<>> DiG 9.9.4-RedHat-9.9.4-73.el7_6 <<>> ipa-master1.test.cn0.wormpex.com
;; global options: +cmd
;; Got answer:
;; ->>HEADER<<- opcode: QUERY, status: NOERROR, id: 51371
;; flags: qr aa rd ra; QUERY: 1, ANSWER: 1, AUTHORITY: 2, ADDITIONAL: 3

;; OPT PSEUDOSECTION:
; EDNS: version: 0, flags:; udp: 4096
;; QUESTION SECTION:
;ipa-master1.test.cn0.wormpex.com. IN   A

;; ANSWER SECTION:
ipa-master1.test.cn0.wormpex.com. 60 IN A   10.255.206.101

;; AUTHORITY SECTION:
cn0.wormpex.com.    86400   IN  NS  ns1.cn0.wormpex.com.
cn0.wormpex.com.    86400   IN  NS  ns2.cn0.wormpex.com.

;; ADDITIONAL SECTION:
ns1.cn0.wormpex.com.    86400   IN  A   10.19.66.17
ns2.cn0.wormpex.com.    86400   IN  A   10.19.165.32

;; Query time: 0 msec
;; SERVER: 10.253.0.201#53(10.253.0.201)
;; WHEN: Wed Jun 19 11:36:36 CST 2019
;; MSG SIZE  rcvd: 145

[[email protected] ]$dig ipa-slave1.test.cn0.wormpex.com

; <<>> DiG 9.9.4-RedHat-9.9.4-73.el7_6 <<>> ipa-slave1.test.cn0.wormpex.com
;; global options: +cmd
;; Got answer:
;; ->>HEADER<<- opcode: QUERY, status: NOERROR, id: 53975
;; flags: qr aa rd ra; QUERY: 1, ANSWER: 1, AUTHORITY: 2, ADDITIONAL: 3

;; OPT PSEUDOSECTION:
; EDNS: version: 0, flags:; udp: 4096
;; QUESTION SECTION:
;ipa-slave1.test.cn0.wormpex.com. IN    A

;; ANSWER SECTION:
ipa-slave1.test.cn0.wormpex.com. 60 IN  A   10.255.206.100

;; AUTHORITY SECTION:
cn0.wormpex.com.    86400   IN  NS  ns1.cn0.wormpex.com.
cn0.wormpex.com.    86400   IN  NS  ns2.cn0.wormpex.com.

;; ADDITIONAL SECTION:
ns1.cn0.wormpex.com.    86400   IN  A   10.19.66.17
ns2.cn0.wormpex.com.    86400   IN  A   10.19.165.32

;; Query time: 0 msec
;; SERVER: 10.253.0.201#53(10.253.0.201)
;; WHEN: Wed Jun 19 11:59:19 CST 2019
;; MSG SIZE  rcvd: 144
安装随机数软件
[[email protected] ]$ yum install rng-tools
启动随机数软件
[[email protected] ]$ systemctl start rngd
[[email protected] ]$ systemctl enable rngd
[[email protected] ]$ systemctl status rngd安装freeipa软件包
yum install ipa-server
5.配置freeipa
[[email protected] ]$ ipa-server-install
[[email protected] ]$ ipapython.admintool: ERROR    IPv6 stack is enabled in the kernel but there is no interface that has ::1 address assigned. Add ::1 address resolution to 'lo' interface. You might need to enable IPv6 on the interface 'lo' in sysctl.conf.
ipapython.admintool: ERROR    The ipa-server-install command failed. See /var/log/ipaserver-install.log for more information
出现这个问题的解决方法
[[email protected] ]$ sysctl -a | grep "net.ipv6.conf.lo.disable_ipv6 = 1"
net.ipv6.conf.lo.disable_ipv6 = 1
[[email protected] ]$ vim /etc/sysctl.conf
net.ipv6.conf.lo.disable_ipv6 = 1
[[email protected] ]$ sysctl -p- 查看是否配置成功
[[email protected] ]$ ifconfig
    ens192: flags=4163<UP,BROADCAST,RUNNING,MULTICAST>  mtu 1500
            inet 10.255.206.101  netmask 255.255.255.0  broadcast 10.255.206.255
            ether 00:50:56:ab:cb:bb  txqueuelen 1000  (Ethernet)
            RX packets 30070636  bytes 2131037275 (1.9 GiB)
            RX errors 0  dropped 23  overruns 0  frame 0
            TX packets 243564  bytes 27721084 (26.4 MiB)
            TX errors 0  dropped 0 overruns 0  carrier 0  collisions 0

    lo: flags=73<UP,LOOPBACK,RUNNING>  mtu 65536
            inet 127.0.0.1  netmask 255.0.0.0
    出现这里就说明配置成功        inet6 ::1  prefixlen 128  scopeid 0x10<host>
            loop  txqueuelen 1  (Local Loopback)
            RX packets 448  bytes 23856 (23.2 KiB)
            RX errors 0  dropped 0  overruns 0  frame 0
            TX packets 448  bytes 23856 (23.2 KiB)
TX errors 0 dropped 0 overruns 0 carrier 0 collisions 0- 继续配置freeipa
[[email protected] ]$ ipa-server-install

The log file for this installation can be found in /var/log/ipaserver-install.log
==============================================================================
This program will set up the IPA Server.

This includes:
  * Configure a stand-alone CA (dogtag) for certificate management
  * Configure the Network Time Daemon (ntpd)
  * Create and configure an instance of Directory Server
  * Create and configure a Kerberos Key Distribution Center (KDC)
  * Configure Apache (httpd)
  * Configure the KDC to enable PKINIT

To accept the default shown in brackets, press the Enter key.

Do you want to configure integrated DNS (BIND)? [no]: no  # 一般使用自己的dns服务器

Enter the fully qualified domain name of the computer
on which you're setting up server software. Using the form
<hostname>.<domainname>
Example: master.example.com.


Server host name [ipa-master1.test.cn0.wormpex.com]: # 默认配置就成
The domain name has been determined based on the host name.

Please confirm the domain name [test.cn0.wormpex.com]: wormpex.com
# 这里我选择wormpex.com

The kerberos protocol requires a Realm name to be defined.
This is typically the domain name converted to uppercase.

Please provide a realm name [WORMPEX.COM]:
Certain directory server operations require an administrative user.
This user is referred to as the Directory Manager and has full access
to the Directory for system management tasks and will be added to the
instance of directory server created for IPA.
The password must be at least 8 characters long.

# 输入上方配置的密码
Directory Manager password:
Password (confirm):

The IPA server requires an administrative user, named 'admin'.
This user is a regular system account used for IPA server administration.

# 输入上方配置的密码
IPA admin password:
Password (confirm):


The IPA Master Server will be configured with:
Hostname:       ipa-master1.test.cn0.wormpex.com
IP address(es): 10.255.206.101
Domain name:    wormpex.com
Realm name:     WORMPEX.COM

# 确认配置安装
Continue to configure the system with these values? [no]: yes

The following operations may take some minutes to complete.
Please wait until the prompt is returned.
- 查看freeipa是否安装成功
The ipa-client-install command was successful

Please add records in this file to your DNS system: /tmp/ipa.system.records.trywY2.db
==============================================================================
Setup complete

Next steps:
    1. You must make sure these network ports are open:
        TCP Ports:
          * 80, 443: HTTP/HTTPS
          * 389, 636: LDAP/LDAPS
          * 88, 464: kerberos
        UDP Ports:
          * 88, 464: kerberos
          * 123: ntp

    2. You can now obtain a kerberos ticket using the command: 'kinit admin'
       This ticket will allow you to use the IPA tools (e.g., ipa user-add)
       and the web user interface.

Be sure to back up the CA certificates stored in /root/cacert.p12
These files are required to create replicas. The password for these
files is the Directory Manager password- 测试freeipa
浏览器登录
https://ipa-master1.test.cn0.wormpex.com/ipa/ui/#/e/hbacrule/search
- 命令行测试:
# 获取票据
[[email protected] ]$ kinit admin
Password for [email protected]:
# 使用
[[email protected] ]$ ipa user-find admin
--------------
1 user matched
--------------
  User login: admin
  Last name: Administrator
  Home directory: /home/admin
  Login shell: /bin/bash
  Principal alias: [email protected]
  UID: 872600000
  GID: 872600000
  Account disabled: False
----------------------------
Number of entries returned 1
ipa slave安装配置
安装从服务器之前进行版本检查
ipa --version
VERSION: 4.6.4, API_VERSION: 2.230
听说4.2之前的复制服务器的安装方式是不一样的。- 进行看是否能解析域名
[[email protected] ]$ dig ipa-slave1.test.cn0.wormpex.com

; <<>> DiG 9.9.4-RedHat-9.9.4-73.el7_6 <<>> ipa-slave1.test.cn0.wormpex.com
;; global options: +cmd
;; Got answer:
;; ->>HEADER<<- opcode: QUERY, status: NOERROR, id: 3832
;; flags: qr aa rd ra; QUERY: 1, ANSWER: 1, AUTHORITY: 2, ADDITIONAL: 3

;; OPT PSEUDOSECTION:
; EDNS: version: 0, flags:; udp: 4096
;; QUESTION SECTION:
;ipa-slave1.test.cn0.wormpex.com. IN    A

;; ANSWER SECTION:
ipa-slave1.test.cn0.wormpex.com. 60 IN  A   10.255.206.100

;; AUTHORITY SECTION:
cn0.wormpex.com.    86400   IN  NS  ns1.cn0.wormpex.com.
cn0.wormpex.com.    86400   IN  NS  ns2.cn0.wormpex.com.

;; ADDITIONAL SECTION:
ns1.cn0.wormpex.com.    86400   IN  A   10.19.66.17
ns2.cn0.wormpex.com.    86400   IN  A   10.19.165.32

;; Query time: 0 msec
;; SERVER: 10.253.0.201#53(10.253.0.201)
;; WHEN: Wed Jun 19 12:11:01 CST 2019
;; MSG SIZE rcvd: 144- 在ipa复制服务器上安装ipaclient
[[email protected] ]$ ipa-client-install
DNS discovery failed to determine your DNS domain
Provide the domain name of your IPA server (ex: example.com): example.com #输入
Provide your IPA server name (ex: ipa.example.com): ipa.example.com #输入
The failure to use DNS to find your IPA server indicates that your resolv.conf file is not properly configured.
Autodiscovery of servers for failover cannot work with this configuration.
If you proceed with the installation, services will be configured to always access the discovered server for all operations and will not fail over to other servers in case of failure.
Proceed with fixed values and no DNS discovery? [no]: yes #输入
Client hostname: ipa-slave1.test.cn0.wormpex.com
Realm: WORMPEX.COM
DNS Domain: wormpex.com
IPA Server: ipa-master1.test.cn0.wormpex.com
BaseDN: dc=wormpex,dc=com

Continue to configure the system with these values? [no]: yes #输入
Synchronizing time with KDC...
Attempting to sync time using ntpd.  Will timeout after 15 seconds
User authorized to enroll computers: admin #输入
Password for [email protected]: **** #输入密码
...
...
Configuring example.com as NIS domain.
Client configuration complete.- 在ipa复制服务器上安装ipaserver
[[email protected] ]$ ipa-replica-install
Password for [email protected]:   # 输入admin的用户名密码
Run connection check to master
Connection check OK
Configuring NTP daemon (ntpd)
  [1/4]: stopping ntpd
  [2/4]: writing configuration
  [3/4]: configuring ntpd to start on boot
  [4/4]: starting ntpd
Done configuring NTP daemon (ntpd).
Configuring directory server (dirsrv). Estimated time: 30 seconds
  [1/41]: creating directory server instance
  [2/41]: enabling ldapi
  [3/41]: configure autobind for root
..........- 查看服务器主服务器和复制服务器的状态
[[email protected] ]$ ipa-replica-manage list
Directory Manager password:

ipa-master1.test.cn0.wormpex.com: master
ipa-slave1.test.cn0.wormpex.com: master
# 都是master他们之间的数据是会相互同步
ipa的使用方式
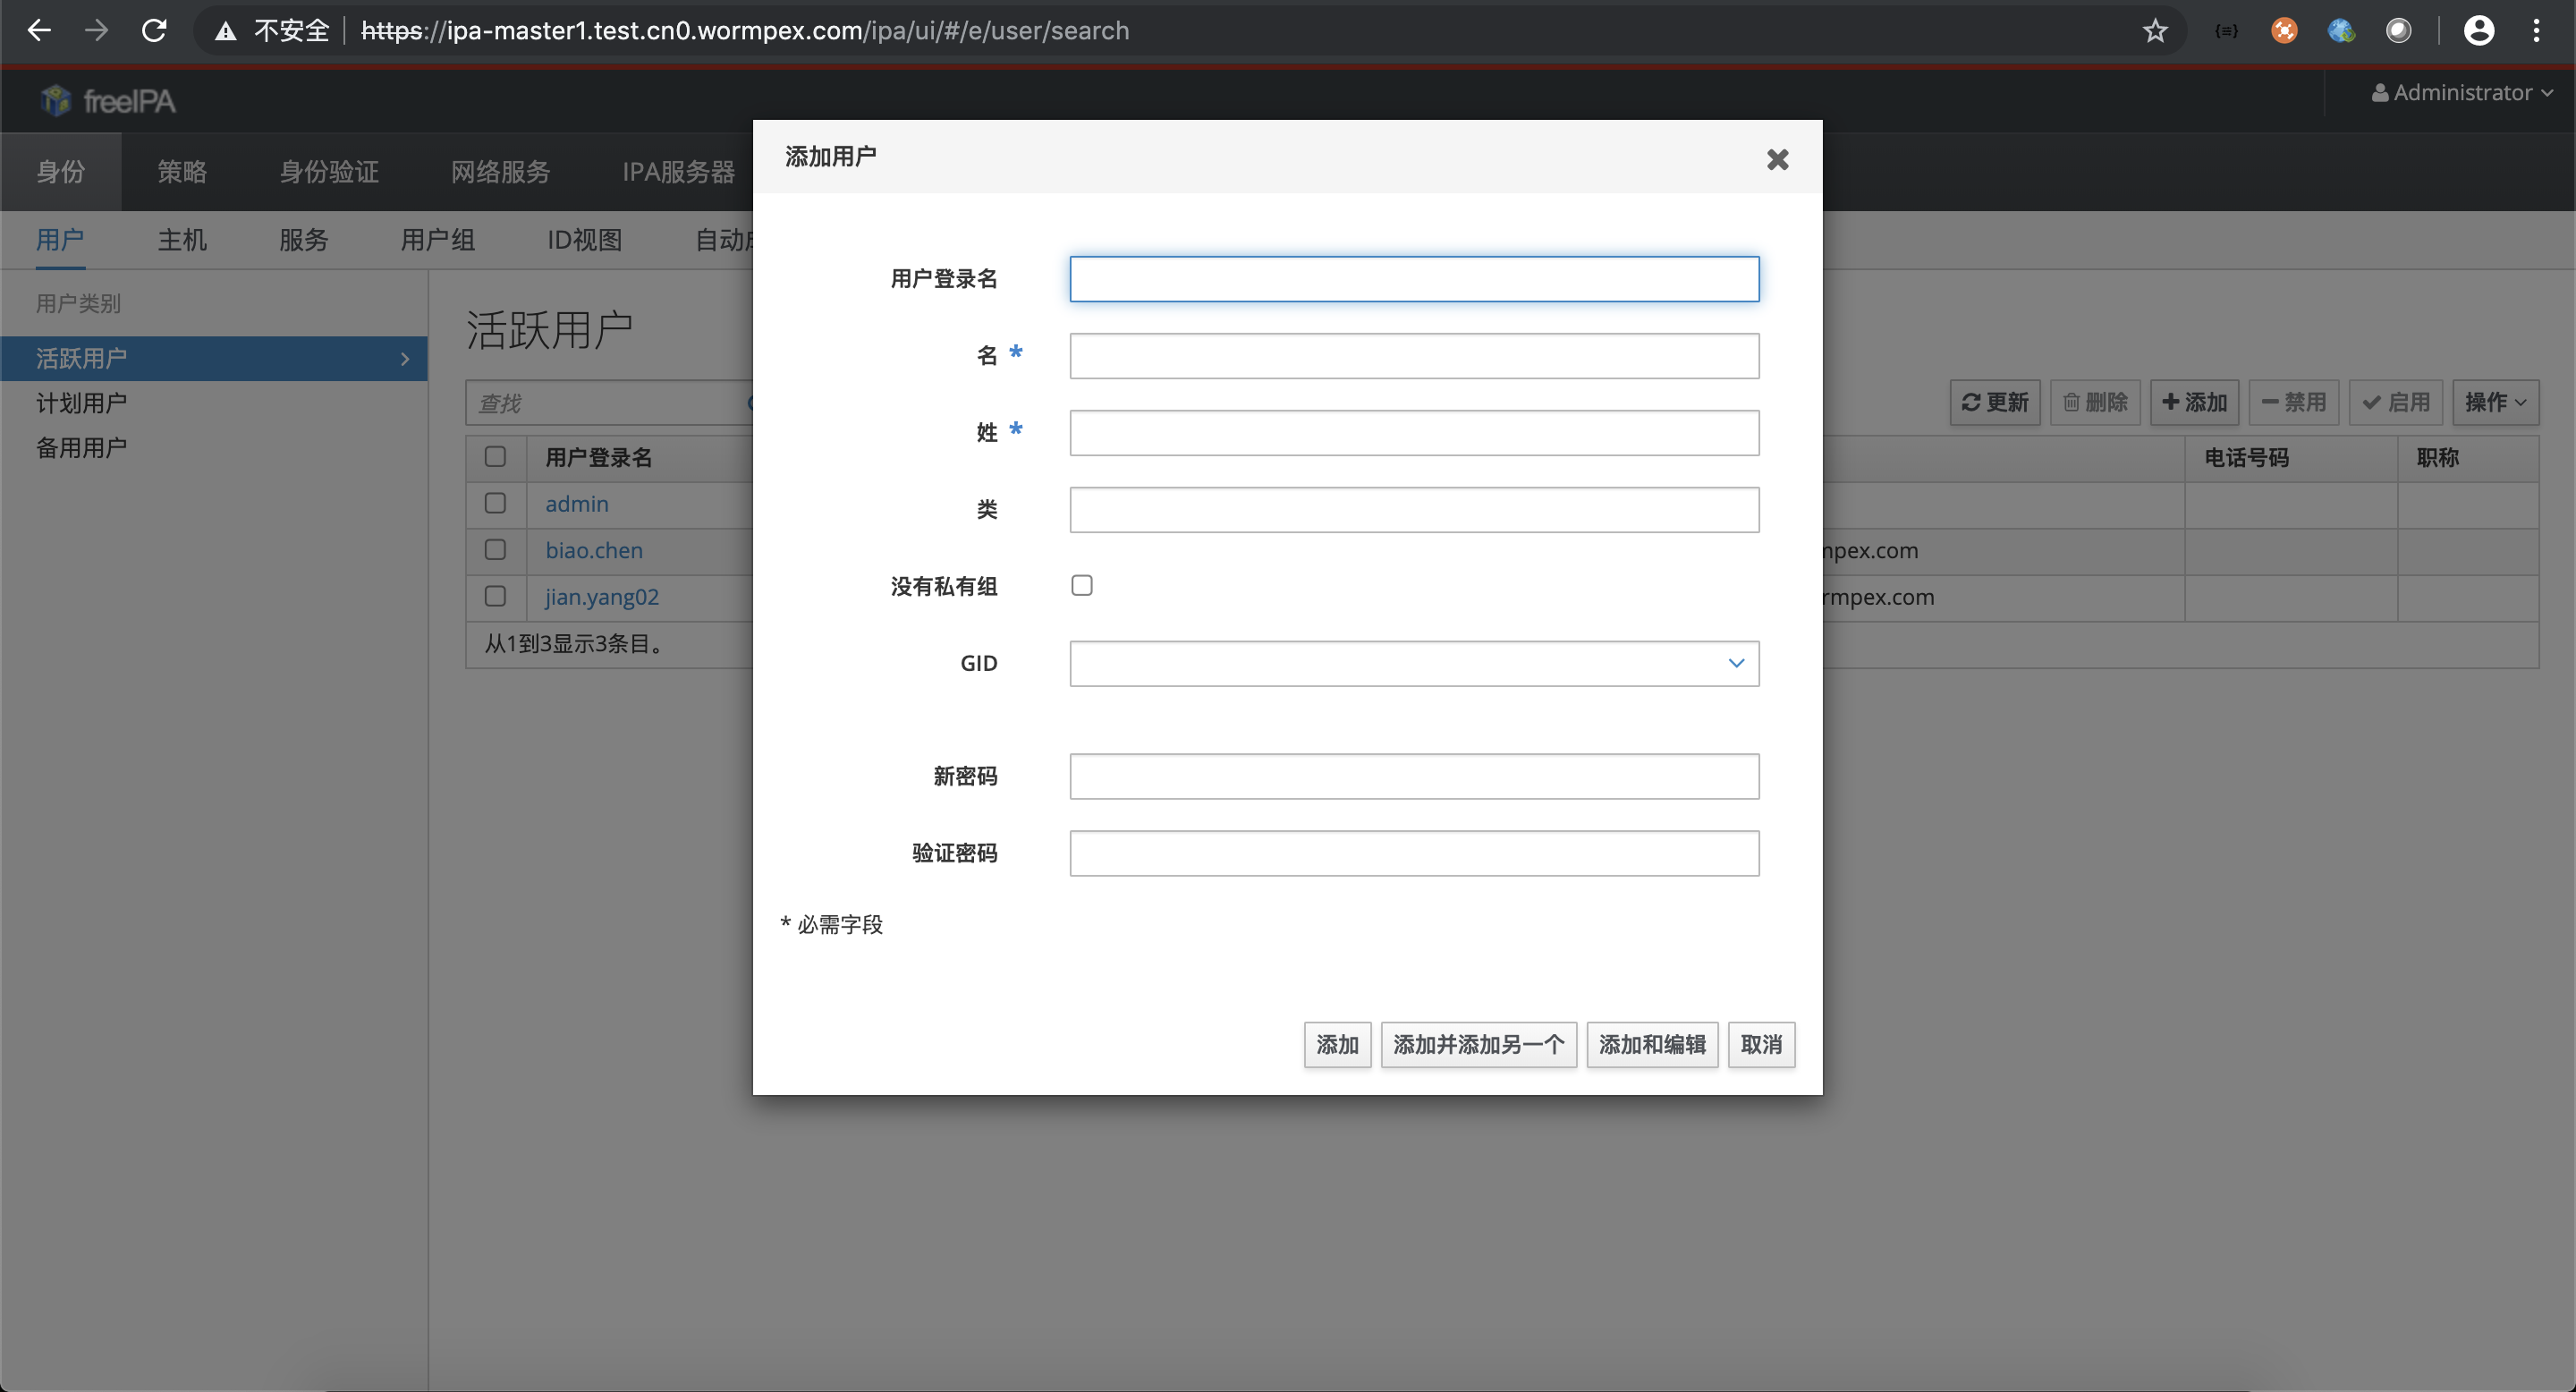
- 新增用户,标*号的都需要写,密码必须要写
配置登录的策略,比如要配置一个超级管理员的用户组
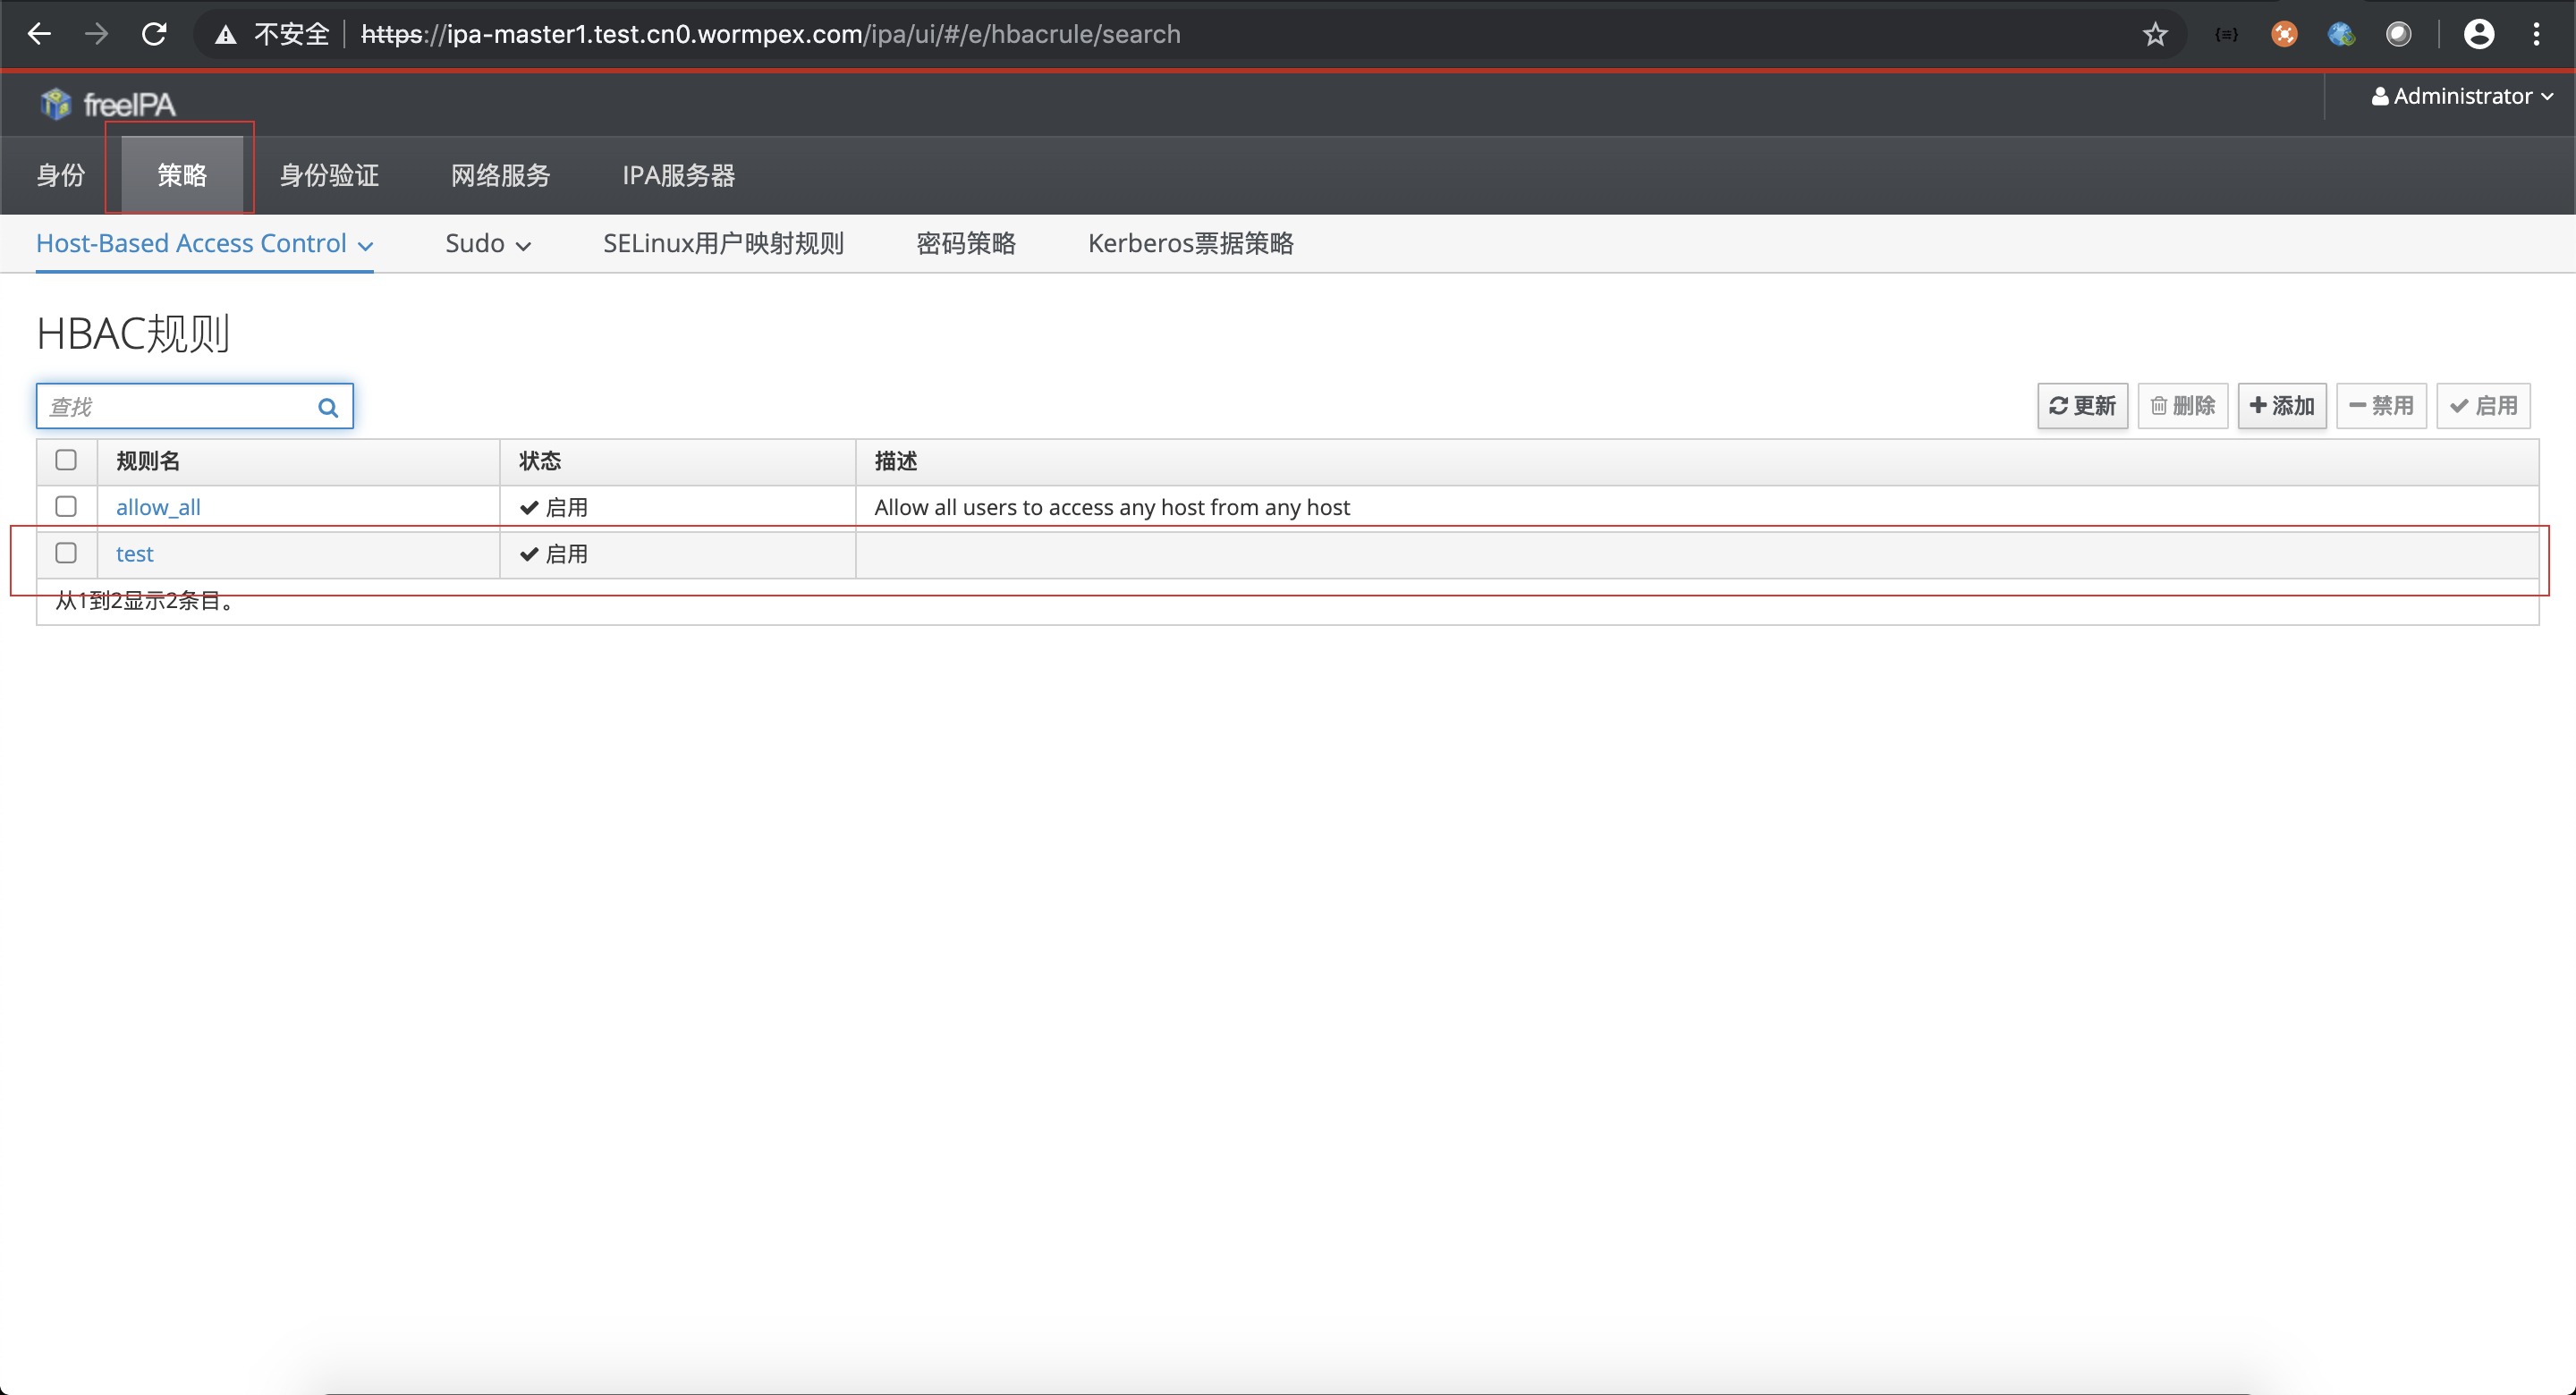
超级管理员组具有所有的权限
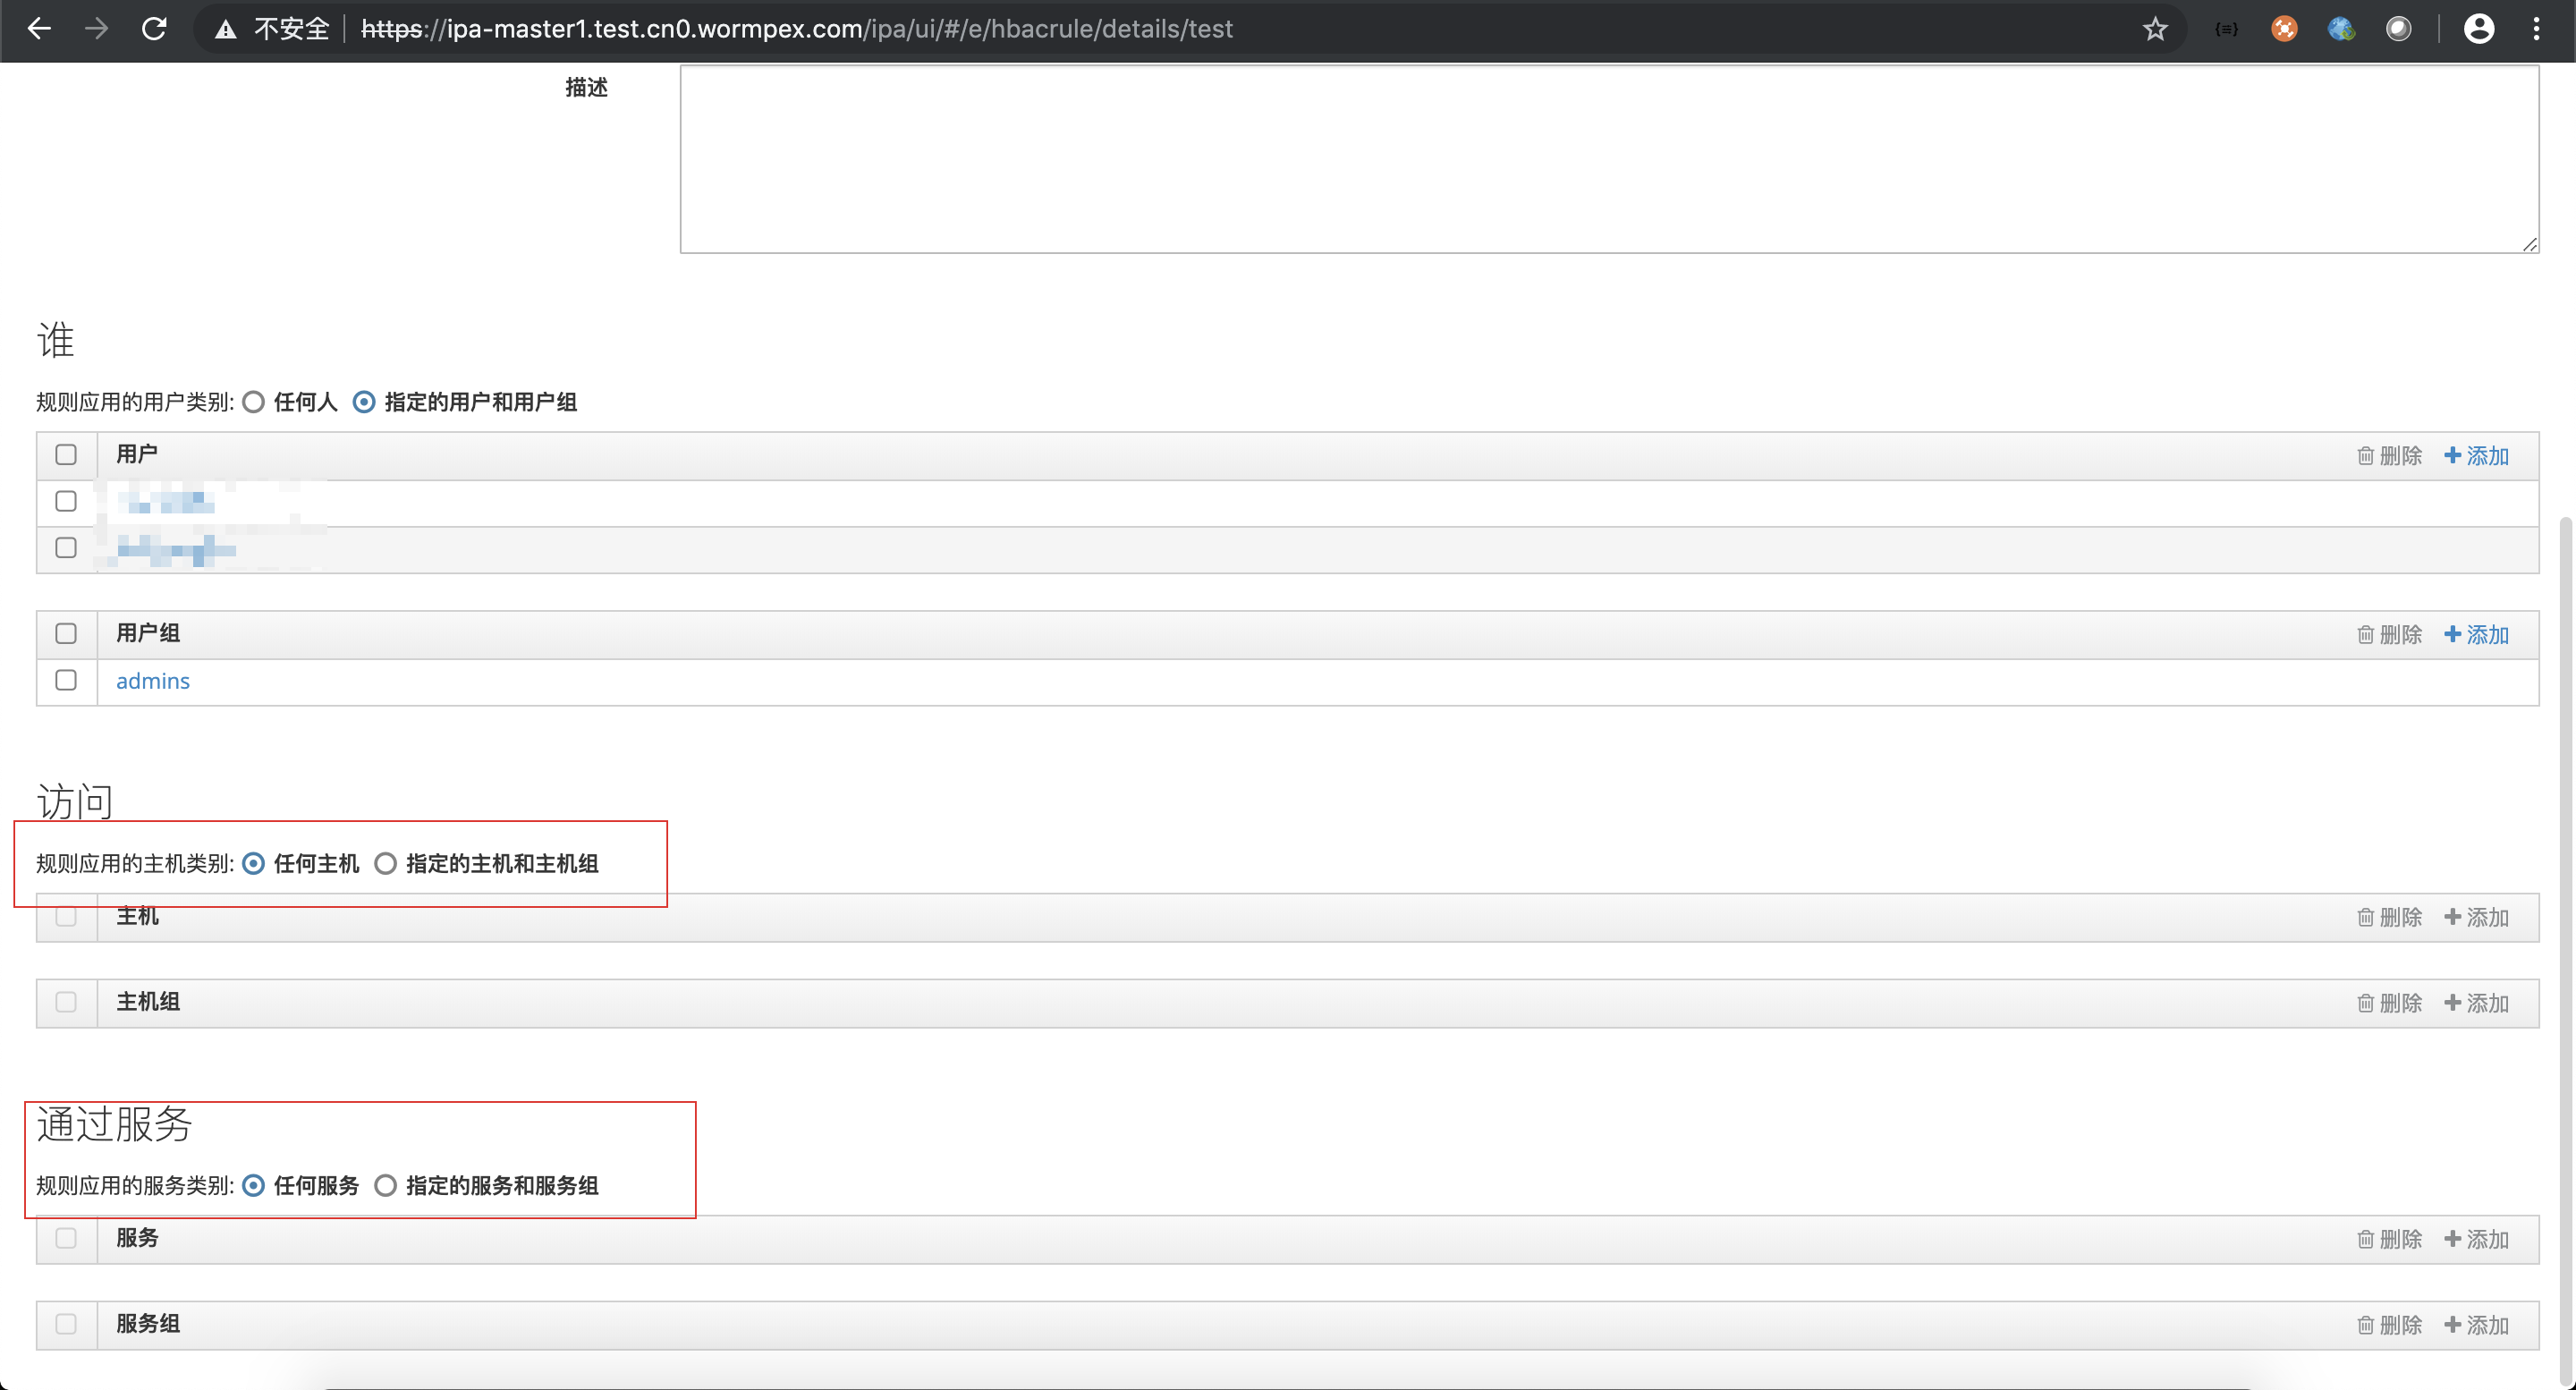
- 我们生产等录都是个人用户登录的,需要将个人用户加入到超级管理员组中admins
- 登录的client需要配置cat /etc/krb5.conf, 通常这个文件复制ipa-server所在服务器的/etc/krb5.conf 文件即可
includedir /etc/krb5.conf.d/
includedir /var/lib/sss/pubconf/krb5.include.d/

[logging]
 default = FILE:/var/log/krb5libs.log
 kdc = FILE:/var/log/krb5kdc.log
 admin_server = FILE:/var/log/kadmind.log

[libdefaults]
 default_realm = WORMPEX.COM
 dns_lookup_realm = false
 dns_lookup_kdc = true
 rdns = false
 ticket_lifetime = 24h
 forwardable = true
 udp_preference_limit = 0
 default_ccache_name = KEYRING:persistent:%{uid}

[realms]
 WORMPEX.COM = {
  kdc = ipa-master1.test.cn0.wormpex.com:88   # 指定需要认证kdc主机
  master_kdc = ipa-master1.test.cn0.wormpex.com:88 # 指定master的kdc
  admin_server = ipa-master1.test.cn0.wormpex.com:749 # 指定admin用户所在的服务器
  default_domain = wormpex.com # 指定域名,
  pkinit_anchors = FILE:/var/lib/ipa-client/pki/kdc-ca-bundle.pem
  pkinit_pool = FILE:/var/lib/ipa-client/pki/ca-bundle.pem
}

[domain_realm]
 .wormpex.com = WORMPEX.COM
 wormpex.com = WORMPEX.COM
 ipa-master1.test.cn0.wormpex.com = WORMPEX.COM

[dbmodules]
  WORMPEX.COM = {
    db_library = ipadb.so
  }

[plugins]
 certauth = {
  module = ipakdb:kdb/ipadb.so
  enable_only = ipakdb
}- 获取票据,
[root@localhost log]# kinit wakaka
Password for [email protected]:- 查看票据
[root@localhost log]# klist
Ticket cache: KEYRING:persistent:0:0
Default principal: [email protected]

Valid starting       Expires              Service principal
06/19/2019 20:00:41 06/20/2019 20:00:37 krbtgt/[email protected]- 登录服务器
[root@localhost log]# ssh [email protected]
Last login: Wed Jun 19 18:51:24 2019 from 10.255.206.132
-sh-4.2$
查看到可以直接登录,但是命令行是这样的-sh-4.2$
这个需要在/etc/bashrc 中添加
[ "$PS1" = "\\s-\\v\\\$ " ] && PS1="\[\e[32m\][\u@\H \w]$\[\e[m\] "我也添加了但是线上的服务器一登录就能出现这样的结果
[[email protected] ~]$
我部署的测试服务器需要登录之后输入
-sh-4.2$ bash
[[email protected] ~]$
原因是什么还需要研究
- 超级管理员的权限需要进行的配置
cat /etc/sudoers.d/02-ops
%admins  ALL=(ALL)       NOPASSWD: ALL
需要在这个目录下加入这个配置,原因是:切到root权限需要使用su -或者其他切root的方式,但是执行这些命令需要有root sudo 的权限