上一篇文件我们通过一个实例进行了spring boot入门,学会了简单的入门案例
接下来我们来了解一下怎么实现Spring Boot 集成 Thymeleaf。
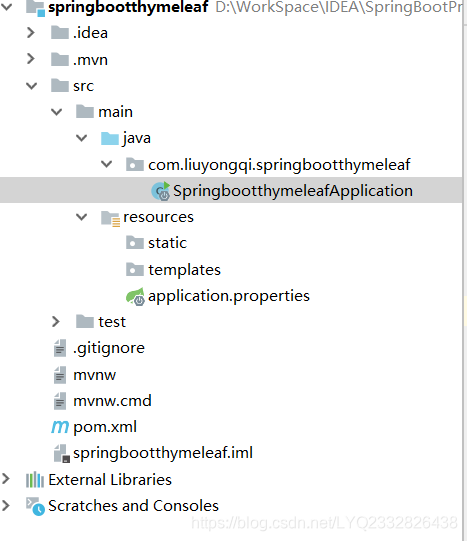
1.创建springboot项目
和之前的spring boot入门案例的创建过程只有下面一点点的不同,不会的请参考我的第一篇spring boot文章!
2.添加Maven依赖
<dependency>

    <groupId>org.springframework.boot</groupId>

    <artifactId>spring-boot-starter-thymeleaf</artifactId>

</dependency>
3. 改造html代码
原来的login.html
<!DOCTYPE html>
<html lang="en">
<head>
    <meta charset="UTF-8">
    <title>Title</title>
</head>
<body>
<div>
    <form action="/login" method="post">
        <h2 >请 登 录</h2>
        <input type="text"  placeholder="账号" name="username"/>
        <input type="password"  placeholder="密码" name="password"/>
        <button type="submit">登录</button>
    </form>
</div>

</body>
</html>
现在的login.html
<!DOCTYPE html>

  <html lang="en" xmlns:th="http://www.thymeleaf.org">

  <head>

    <meta charset="UTF-8">

    <title>Title</title>

  </head>

  <body>

  <div>

    <form th:action="@{/login}" method="post">

        <h2 >请 登 录</h2>

        <input type="text"  placeholder="账号" name="username"/>

        <input type="password"  placeholder="密码" name="password"/>

        <button type="submit">登录</button>

    </form>

  </div>


  </body>

  </html>
1.2.1 xmlns:th命名空间
使用Thymeleaf引擎需要在html标签添加Thymeleaf模板引擎的命名空间:xmlns:th=”http://www.thymeleaf.org”,这样的话才可以在其他标签里面使用th:*这样的语法.这是下面语法的前提。
1.2.2 th:href=”@{…}”的使用
引用的绝对路径也可以用模板改造,“@{}”为引用静态资源文件,如:
<link rel="stylesheet" href="/SpringBootBase/css/bootstrap.min.css"/>

<link rel="stylesheet" href="/SpringBootBase/css/customer/login.css"/>
可以用thymeleaf模板改写为@{}的形式表示

<link rel="stylesheet" th:href="@{css/bootstrap.min.css}"/>

<link rel="stylesheet" th:href="@{css/customer/login.css}"/>
会引入/static目录下的/css/下的文件;
1.2.3 th:action=”@{…}”的使用
表单POST的action url也可以用@{}表示:如
<form class="form-signin" action="./login" method="post">

    ...

</form>
现在
<form class="form-signin" th:action="@{/login}" method="post">

    ...

</form>
测试一下
创建controller
package com.liuyongqi.springbootthymeleaf.conrtoller;


  import org.springframework.stereotype.Controller;

  import org.springframework.web.bind.annotation.RequestMapping;

  import org.springframework.web.bind.annotation.RequestMethod;


  /**

 * @ClassName: LoginController

 * @Description: TODO

 * @Author: Administrator

 * @CreateDate: 2018/11/7 21:02

 * @UpdateUser: Administrator

 * @UpdateDate: 2018/11/7 21:02

 * @UpdateRemark: 修改内容

 * @Version: 1.0

 */

  @Controller

  public class LoginController {

    @RequestMapping(value = "/",method = RequestMethod.GET)

    public String home(){

        System.out.println("home");

        return "login";

    }

}
运行一下,结果正常

1.2.4 th:object=”${…}”与th:field=”*{…}”的使用
...用于获取变量值,对于javaBean的话使用变量名.属性名,如...用于获取变量值,对于javaBean的话使用变量名.属性名,如{user.name}
举个例子,如若需要将后台的值回显到前台,那应该怎么做,此时th:object=”${…}”与th:field=”*{…}”就派上用场了。
<form th:action="@{/login}" method="post" th:object="${users}" >

    <h2 >请 登 录</h2>

    <input type="text"  placeholder="账号" name="username" th:field="*{username}"/>

    <input type="password"  placeholder="密码" name="password" th:field="*{password}"/>

    <button type="submit">登录</button>

</form>在表单代码中增加th:object属性,将name属性换成th:field属性,其中th:object定义表单数据提交对象user,用th:field定义表单数据属性,用*{}锁定上级定义的对象,{}内填写对象属性,提交表单时自动将属性值注入到对象中。
@RequestMapping(value = "/setValue",method = RequestMethod.GET)

  public String setValue(Model model, Users users){

    model.addAttribute("users",users);

    return "login";

}

  @RequestMapping(value = "/login",method = RequestMethod.POST)

  public String login(Model model, Users users){

    System.out.println("login");

    System.out.println("POJO: " + users.getClass().getName() +

            ", hash code: " + users.hashCode() + ", " + users.toString());

    model.addAttribute("users",users);

    return "success";

}
我们来运行一下,输入http://localhost:8080/springbootthymeleaf/setValue?username=admin&password=888888得到如下界面:

输入用户名admins及密码123456,点击登录,得到如下结果


最后建议在application.properties配置关闭thymeleaf缓存,因为Spring Boot使用thymeleaf时默认是有缓存的,即你把一个页面代码改了不会刷新页面的效果,你必须重新运行spring-boot的main()方法才能看到页面更改的效果。
spring.thymeleaf.cache: false
今天就写到这里了,谢谢大家支持!
如果大家想浏览我的下一篇文章,请留言
版权声明:此文章属于原创,不准随意转载:https://blog.csdn.net/LYQ2332826438