版权声明:本文为博主原创文章,遵循 CC 4.0 BY-SA 版权协议,转载请附上原文出处链接和本声明。
实验参考资料:
https://www.arduino.cn/thread-82298-1-1.html#425316_2.3-%E7%83%A7%E5%BD%95esp8266
https://www.arduino.cn/thread-82353-1-1.html
实验原理:ESP8266可编程
第一步:安装软件开发环境
1、安装Arduino IDE
官网:https://www.arduino.cc/en/Main/Software
Arduino中文社区链接地址:https://www.arduino.cn/thread-5838-1-1.html
2、配置Arduino Core For ESP8266
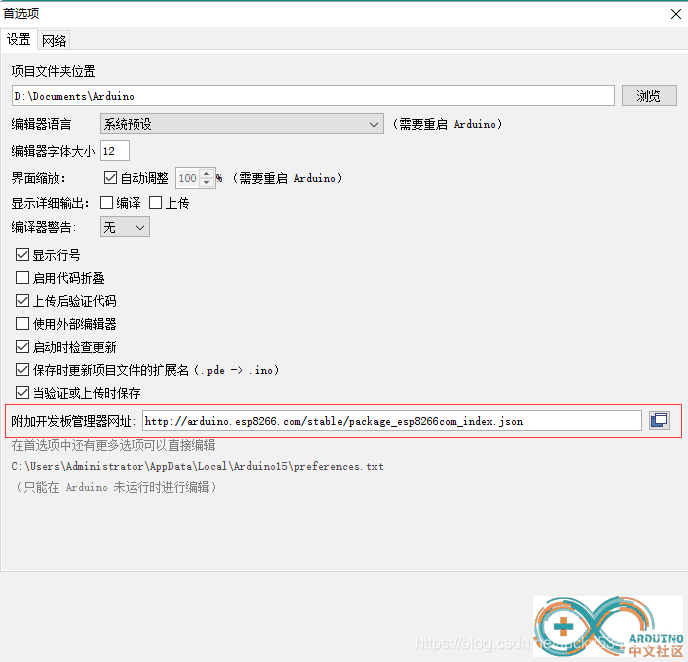
1)、打开Arduino IDE->菜单项文件->首选项,然后会看到附加开发版管理器网址,填入http://arduino.esp8266.com/stable/package_esp8266com_index.json,重启IDE;
2)、重启IDE之后->菜单项工具->开发板->点击开发板管理器->滚动找到ESP8266平台;
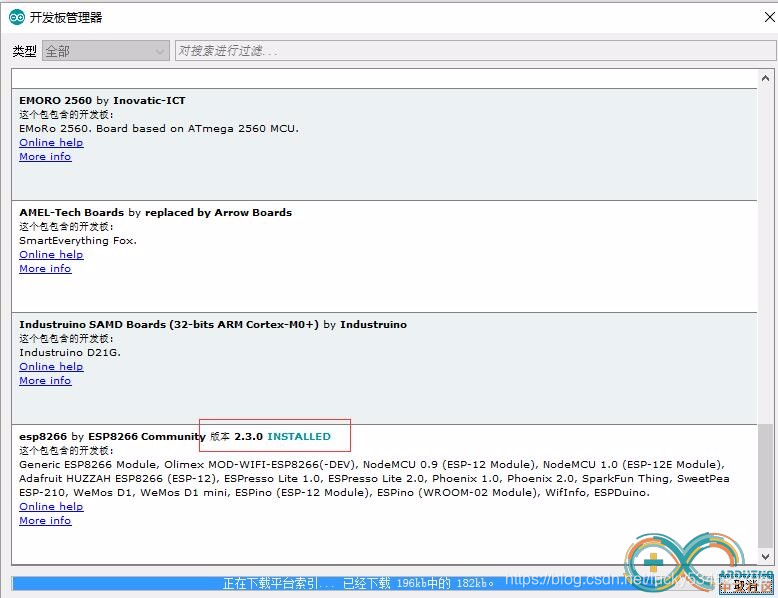
从下拉选项中选择你想下载的版本,点击安装,需要等待一段时间安装完毕。
第二步:硬件连线
ESP8266模块 + USB转TTL线
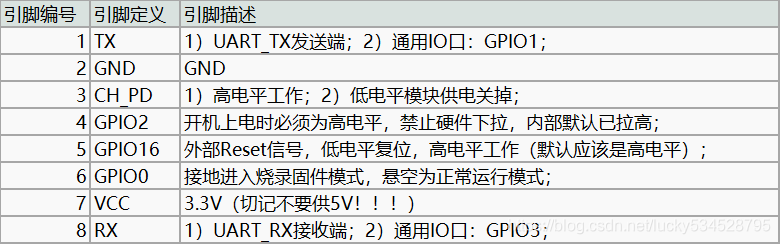
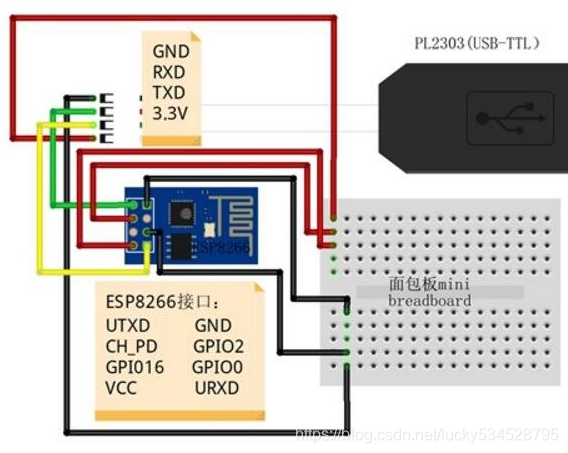
烧录固件时需要将GPIO0口接地
正常工作时需要将GPIO0口悬空
第三步、 烧录配置
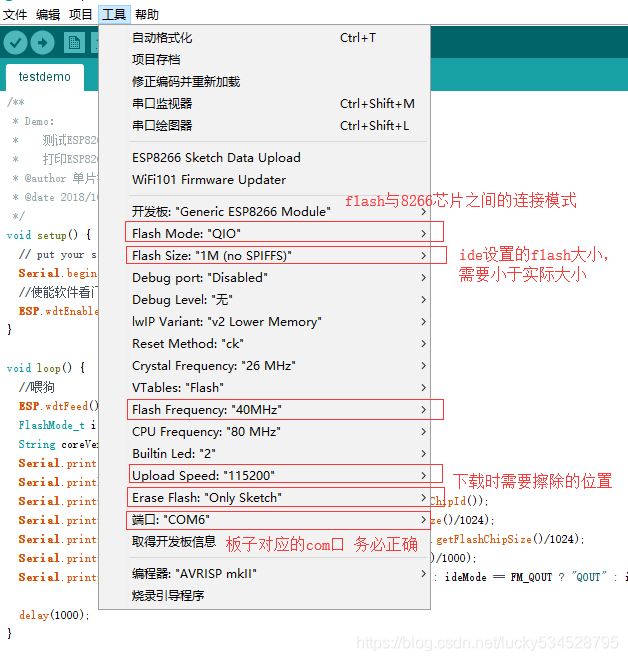
笔者的开发板是ESP202测试板,核心芯片是ESP8266-12F,Flash大小是4MB,Flash芯片是W25Q32,适用下图配置:
第四步、烧录固件
#include <ESP8266WiFi.h>
const char* ssid = "wifi名"; //change to your own ssid
const char* password = "wifi密码";//change to your own password
const char* serverIP = "要连接的服务器的ip";
int serverPort = 端口号;
WiFiClient client;
bool bConnected = false;
String cloud_comdata = "";
String comdata = "";
void setup() {
Serial.begin(115200);
delay(10);
while (WiFi.status() != WL_CONNECTED) {
delay(500);
}
}
void loop() {
delay(1);
if (bConnected == false)
{
if (!client.connect(serverIP, serverPort))
{
delay(500);
return;
}
bConnected = true;
}
else if (client.available())
{
while (client.available())
{
cloud_comdata += char(client.read());
delay(2);
}
if (cloud_comdata.length() > 0)
{
Serial.print(cloud_comdata);//发送云端来的数据
cloud_comdata = "";
}
client.flush();
Serial.flush();
delay(10);
}
if (Serial.available()){
while (Serial.available())
{
comdata += char(Serial.read());
delay(2);
}
if (comdata.length() > 0)
{
client.print(comdata);//发送数据给云端
comdata = "";
}
client.flush();
Serial.flush();
delay(10);
}
}